Showing posts with label Leni Original. Show all posts

Friday, February 21, 2014

Leni's Bread Recipe - Baking in Bulk

Is there any smell better than that of freshly baked bread? Not in my book (although fresh ground coffee is a close second!) 

This is a recipe I developed over the years when we were only eating home-baked bread. There was so much garbage in all of the store brands that I gave up trying to find one that didn't make my kids crazy. 

I ended up investing in a Bosch mixer after burning up numerous stand mixers, and all these years later, I can still say it's the best appliance investment ever. As I started to have more limitations from fibromyalgia and arthritis, I needed to have a reliable machine that could do the heavy kneading for me. This recipe makes 8 loaves of wheat bread, and doesn't even begin to bog down the motor. Makes this mamma one happy camper!

Now that the kids are grown, I rarely have a reason to make 8 loaves of bread at a time, but when I do, it looks something like this...


This time around, I divided it up into 2 loaves of bread, 3 dozen cinnamon rolls, 2 dozen dinner rolls and 2 pizza crusts.

Leni's Notes:
~Scale the recipe back if you don't have a heavy duty mixer.
~If you scale it back to 2 loaves, you can put this in a bread machine on the dough setting, and then remove from machine and bake in two bread pans in your oven.
~A gallon ziploc will hold 2 loaves of dough and it will keep in the fridge for up to a week. You might have to check it for the first couple of hours to make sure it's not continuing to rise, and breaking out of the bag!
~Dough is good for bread, rolls, cinnamon rolls, pizza, calzones, bread braids (sweet or savory) and bread sticks.
~You can replace up to 1/4 of the flour with another grain like whole wheat or oats. I used to get this great 7 grain mix that I used, made for a great texture.
~The wheat gluten is optional, but really does add a nice touch to the bread, better texture and flavor.
~I make this bread mostly from memory, so I apologize in advance if the instructions are incomplete. If anything seems to be missing from the instructions, leave a comment and I will fix it up until it makes sense! ;)

Ingredients:
5 Cups water or milk, warmed (about 80 degrees)
3/4 Cup sugar
3/4 Cup oil or softened butter
1 tsp salt
16 Cups white flour, more as needed
1/4 C wheat gluten, optional

3 T. dry yeast

Instructions:
~Fit attachment for dough making onto your mixer.
~Layer ingredients in the mixing bowl in the order listed, starting with water or milk, ending with yeast.
~Put top on the bowl and pulse the ingredients to start to gently incorporate them without making flour fly everywhere.
~Once combined, set the machine on the setting that kneads well without bogging down. (For my Bosch, that's the "2" setting.)
~Knead for 8 minutes, then let rest until doubled in size.
Note: The Bosch mixer is very efficient, and does not require a second rising. If you are using a different mixer, or working by hand, let your dough rise a second time.
~Pulse again to knock down the dough, then remove from bowl and divide up for use.
~Shape into loaves (or whatever else you are making) and let rise until doubled in size.
~Bake at 350 for 20 min, then remove from pan and place on wire racks to cool completely before packaging.

Blessings from my family bakery to yours,
Leni


Saturday, January 25, 2014

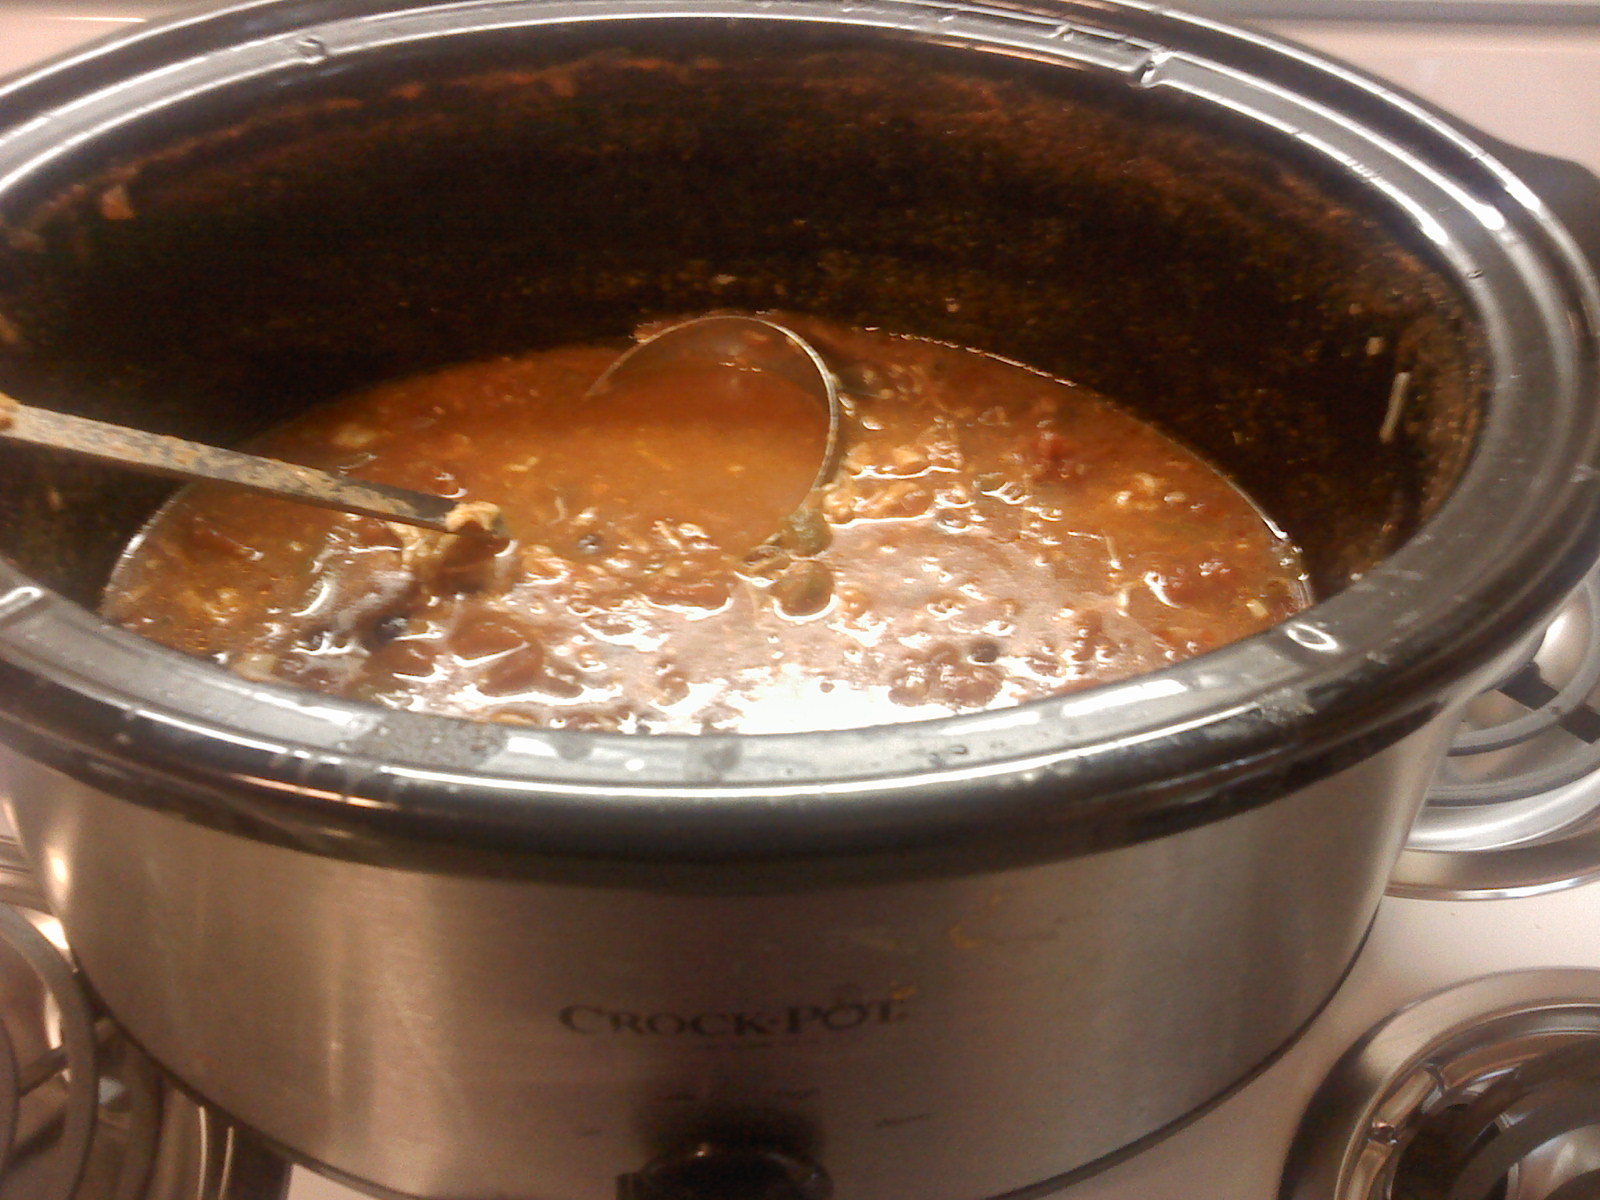
The Long-Awaited Chili Recipe


Yes, indeed, the long-awaited recipe. Not that you've been waiting for it, but I sure have! Over the years, I have tried so many recipes I've lost count of them all. But none of them were just right. They were ok, the family said they enjoyed it, but it just wasn't "it."

Let's face it, if you ask 100 people for their chili recipe, you'll get 100 different recipes. I tried to mimic my favorites, but they were always off on the consistency or taste. I also have to take dietary needs into account. Do you know how hard it is to make chili with no seeds? 

I started a little research project. I polled a group of long-standing online friends, friends I work with on the social committee, favorite cooks, the spice seller guy (who shall from now on be referred to affectionately as "Old Spice", but I'm getting ahead of myself) and anyone else who would listen. I wanted to know if they had a specific recipe, a secret ingredient, something that made their chili stand out in a crowd. Everyone had a different answer, and none of them went together. When I told Old Spice that my chili needed some serious help, he asked, "Well, what kind of chili do you make?" And that's when I realized I missed the most important question. "How do you define chili?" 

After talking with Old Spice for a couple of minutes, we refined my definition, and he recommended a spice blend. I was a little leery, because I'm not fond of mixes and I really hate a recipe that reads, "Open a can of soup, add it to a box of XYZ mix and bake for 7 hours." However, this blend is just right, and he adds NO fillers, no MSG, no nasties. Just pure spices. So I had narrowed down my search.

I took all of the suggestions, and played with recipes until I got the taste I wanted, but the texture was still wrong. My husband likes a good brothy chili, and I just could not find a way to get that without crushed tomatoes, which are full of seeds. But I found a way, and it turned out exactly like we wanted. My husband hid the leftovers so he could have them himself. That's a good sign. 


Leni's Chili with sour cream and slices of sharp cheddar, because I was to tired to shred it.

Leni's Notes:
~The spice blend I'm using is Cool Chili Seasoning from Stuart's Spices in Rochester, NY. It's got a tiny bit of kick, but I can tell you I don't enjoy hot food, and this is not spicy. It is a blend of ground chili peppers, cumin, garlic, oregano and salt. If you don't have the pleasure of living locally, you can order from them, just click on the Contact Us button. Or, mix up your own blend!
~Adjust the meat and bean ratio to your own liking. We like a good amount of protein in ours.
~Turn up the heat accordingly, or leave spices on the table for folks to adjust the taste themselves.
~This can certainly be done on the stove, but it is nice to throw in the crock pot and forget about.
~The amount of masa listed will thicken it slightly, but still leave a very soupy texture. Adjust amount to your liking.
~Serve with some rolls or corn bread.

Ingredients:
32 oz Vegetable Juice (like V8)
2 lbs. ground beef
2 cloves garlic, minced
1 can black beans, drained and rinsed
1 can pinto beans, drained and rinsed
1 small onion, diced
6 large mushrooms, diced
1/4 C Cool Chili Seasoning
2 Tbls masa (corn flour)
salt and pepper

Instructions:
~Brown the ground beef with the minced garlic, then drain.
~Add everything except masa, salt and pepper to the crock.
~Let cook on low 5-6 hours or high for 3-4 hours.
~Half an hour before serving, taste the broth and add salt and pepper to your liking.
~Sprinkle masa over the chili, and stir in.
~Cover and let cook until you are ready to eat.

Blessings to you from my kitchen in the frozen tundra of Western New York,
Leni

Thursday, October 03, 2013

Crock Pot Apple Crisp

Ahhh, more apples! I'm not sure what I love most about fall, the cooler weather, the return to school routines, or the fresh produce. Specifically the apples. Growing up, my family didn't really garden or put up a lot of food. Mom was (and is) an awesome cook, we just didn't cook ahead much. Except for applesauce. She and dad and I would peel and core them, and mom would cook them down. I still adore the smell of cooking apples. Takes me right back. 

Then I got married, and I have to tell you, my mother-in-law makes the best apple pie ever. She makes one for my birthday every year, and then for my mom's birthday, too. More happy memories. These days, I like making applesauce the easy way, with the Victorio strainer. Even though it speeds up the process, it's still a family event. Lots of fun. And always, that great smell of cooking apples.

Today's recipe is one that's easy to throw together quickly. I call it Crock Pot Apple Crisp, or Oatmeal for People Who Hate the Texture of Oatmeal. Some of us cannot stand that slimy texture of cooked oatmeal. (I would be the only one in my house who feels that way.)

This serves up nicely as a dessert or a breakfast. 


Leni's Notes:
~This one is all about personal tastes. Make it as sweet as you like. More fluid will give you a more traditional oatmeal texture, less will give you more of an apple crisp.I'm going to list it like I made it this time, but I play with the measurements each time I make it.
~This recipe will usually give us dessert for 4 (with a scoop of ice cream) and breakfast for 3 the next morning (with a little more fluid added, and rewarmed.)
~About the Oats. I hate it when I'm making a recipe and need one kind of oats, but only have the other. For this recipe, you can use either. If you use whole oats, give it the longer cooking time, and some extra fluid. If you use quick oats, it will cook faster and you can cut back on the fluid that's added at the very end.
~The amount of sugar you use will depend on how sweet you like your oatmeal and how sweet your apples are. Even if you always use the same type of apple, the sweetness changes with how ripe they are, so adjust accordingly.


Ingredients
4 Quart Crock Pot
3 large Cortland apples, peeled, cored and sliced thick
Approximately 2 Cups Whole or cut oats  
Approximately 1 C Raw Sugar
Approximately 1 tsp Cinnamon
1 stick of butter
Approximately 1 C water or apple cider

Instructions
~Grease the inside of the crock.
~Place the slices from one apple into the bottom of the crock.
~Cover with about 1/2 C of oats. 
Seriously, I throw this in by the handful, so I don't measure. It should not completely bury the apples.
~Sprinkle on raw sugar, 1/4 C or less. 
This is where your personal taste really comes in. You can always add more at the end.
~Add a light dusting of cinnamon, 1/4 tsp, give or take.
~Slice 1/3 of a stick of butter into pats, and place on top of the layer.
~Repeat this process for two more layers.
~Add water or cider.
Again, this is to personal taste. For a drier product, add about 1/2 C. For a traditional oatmeal, add about 1 C. You can add more at the end if you like it soupier.
~Cover, cook on high for 3-4 hours, or low for 5-6.
~For Crisp: Do not stir. When done cooking, remove lid and let cool for 30 mintues before serving.
~For oatmeal, stir towards the end to break up the apples. Serve immediately.

Blessings from my apple-scented home to yours,
Leni

Thursday, July 18, 2013

Playing in the Kitchen - Raspberry Lime Tea

So I finished making the syrup for the Italian Soda last night, and had all of the pulp left over from the berries and limes. On a whim, I decided to see if I could get a second use out of them. As a rule I don't like anything in my tea. I prefer my tea Irish style. Put the sugar in the cake and the milk in the baby's bottle and leave the tea plain! However, my son enjoys different flavors of tea, so I thought I'd give it a shot. It looked and smelled good, but looks can be deceiving! So I poured it over some ice and discovered something amazing...I actually liked it!


I get so tired of water, but the amount of sugar in juice and soda gets really overwhelming when you're just trying to stay hydrated.

So here's what I did.

~Place all of the pulp into a wide-mouthed 1 quart canning jar.
~Add 1 family sized decaf tea bag (or 4 regular sized tea bags.)
~Fill to the top with almost boiling water.
~Give the pulp a gentle stir so the hot water gets through it all.
~Let steep up to 30 minutes, depending on how strong you like it.
~Remove bags and let cool completely, then strain through a fine mesh strainer.
~Serve over ice.

This tastes plenty sweet to me, but I don't like sweetened tea, so adjust to your taste.

If you decide to give it a try, let me know how it goes.

Wednesday, July 03, 2013

The Summer of Ganache

I think this is quickly becoming the Summer of Ganache.

Such a simple, elegant way to add a beautiful richness to a dessert. And so easy to screw up. ;)

Today I was winging it. Through an odd set of circumstances, I ended up not having all of the ingredients I needed to make what I wanted. I was topping a Banana Cream cake.

~This mixture was much thinner than I expected, if the pan didn't have sides, I could not have poured it on until it set up some. Oops.
~I wasn't crazy with how the white chocolate melted. Some of it really didn't want to melt, and I it looked grainy. But I had a lot of other factors, so I'll reserve judgment. But I might use Ghiradelli next time.
~I was out of vanilla (how did that happen?) and the unsweetened chocolate really needed flavor. I've never used rum in it before, but I thought the flavor would work.

So, here's what I did...it tasted good, but we'll see how it sets up.

In a glass bowl:
4 oz. unsweetened baking chocolate, chopped
8 oz. white baking chocolate, chopped

In a sauce pan:
2 oz. Rum
1/4 C raw sugar
1 C heavy cream

~Heat cream over medium heat, stirring regularly to keep from scorching.
~When it begins to boil, remove from heat, and pour over chocolate.
~Stir the mixture continuously, until the chocolate is completely melted and smooth.
~Pour over cake or into a container for later use. (Like an after work snack.)

I'll report back how this turned out. *fingers crossed*

Monday, June 24, 2013

Cheesecake with Chocolate-Orange Ganache

A couple of weeks ago, we celebrated my son-in-law's birthday. He and I share a love for cooking/baking and overall good food. Really good. So given his love for cheesecake, I decided to step it up a notch and not only make the best cheesecake ever, but to try out a new recipe for ganache.

As you can see from the picture, my cheesecake got so tall, I didn't have a lot of room for ganache. I didn't use a spring form pan, so I couldn't take it out and let it run down the sides. Therefore, I had a lot of ganache left over, which was a good problem to have!


This is not an every day cheesecake. (Is there such a thing as and every day cheesecake? There should be.) I'm just saying, you might look at this recipe and start to calculate the calories. STOP! Just enjoy the cheesecake. I promise, it's worth every calorie.

The cheesecake is a modification of an old Amish recipe, the ganache is my own version. I do hope you enjoy it!

Leni's Notes:

~I had a chocolate-orange ganache in mind, so I went looking for ways to accomplish this. In the end, I decided on some premium chocolate with orange peel in it. (Linked below.) The orange peel had a wonderfully crispy crunch to it that went perfectly with the creaminess of the cake.

~I bake mine in a silicone pan, which makes it deeper, so if you use a wider pan, reduce the baking time. It will need at least one hour.

~Save any leftovers of ganache for a quick chocolate pick-me-up or stir into hot milk for cocoa. ;o)

Ingredients:
Crust
12 graham crackers
1/2 C butter, melted

Cheesecake
5 (8 oz) pkg cream cheese, room temp
1 3/4 C sugar
3 T flour
1/2 t. vanilla
7 eggs, unbeaten, room temp
1/2 C heavy whipping cream, room temp

Chocolate-Orange Ganache
8 oz. semisweet baking chocolate, chopped
2 (3.2 oz) Chocolove Orange Peel in Dark Chocolate, chopped
1 C heavy whipping cream

Instructions:
Preheat oven to 250. (Not a typo, 250)

~Pulse graham crackers in a food processor until completely reduced to crumbs.
~Drizzle melted butter in, continue to pulse.
~Press mixture into silicone cake pan (on top of a cookie sheet, so you can move it around.)
~Place in fridge until ready to fill.
~In mixer, combine cream cheese, sugar, flour and vanilla.
You want this to be well combined and smooth, but do not overbeat!!
~Beat in eggs, one at a time.
~Stir in cream.
~Bake in 250 oven for 2 hours, then turn off heat and leave pan in oven for one hour.
~Cool at room temperature.
~Place chopped chocolate in a bowl.
~Heat cream until just about boiling, stirring so it does not scorch.
~Remove from heat, pour over chocolate, and stir until chocolate is completely melted.
~Allow to cool a bit before pouring over cheesecake.
~Pour slowly and allow for puddling of the ganache.
You might not use it all, so don't flood your dish!
~Chill cake before serving.

Blessings from my busy home to yours,
Leni

Sunday, April 21, 2013

Cherry Rhubarb Crisp

This weekend I made my husband happy and made some dessert. Time for baking has been scarce lately, so it was fun to have a free afternoon to play around in the kitchen and make a new recipe. Rhubarb is always a hit around here, and I was thrilled to find one more bag in the back of the freezer from our trip to the Public Market. 


Leni's Notes:
~Feel free to use other fruits, but adjust your sugar accordingly. This recipe has a lot because of the rhubarb.
~Wonderful with a scoop of vanilla ice cream or a dollop of whipped cream.
~We like a lot of 'crisp' in ours. If you don't, cut the crisp ingredients in half, and put it all on top.

Ingredients:
1 1/2 C raw sugar
7 Tablespoons cornstarch
2 (14 oz) cans tart cherries, juice reserved
5 C chopped rhubarb
2 C quick cut oats
2 C brown sugar
1 C flour
1 tsp cinnamon
1/2 C butter

Instructions:
~Preheat oven to 375.
~In dutch oven, mix sugar and corn starch.
~Pour in cherry juice and whisk thoroughly. 
~Heat over medium-high heat, whisking continuously until mixture comes to a gentle boil.
~Remove from heat, stir in fruit, set aside.
~In a medium bowl, stir together oats, brown sugar, flour and cinnamon.
~Cut butter in with a pastry blender or two butter knives until mixture is crumbly.
~Grease 13x9 pan,and place half of fruit mixture in pan.
~Evenly sprinkle half of the oat mixture over the top.
~Repeat layers.
~Bake, uncovered, for one hour.
~Let cool for a couple of minutes, and serve with your favorite ice cream.

Blessings from my toasty kitchen to yours,
Leni

Monday, April 08, 2013

Parmesan Cream Casserole

Lately, my life seems to be nothing but racing from one obligation to the next. The dinner table is a good measure of how busy I am, as cooking tends to take a back seat when I get over-scheduled. Recently I was looking for something quick I could make after work when I was determined NOT to put another frozen pizza or tray of chicken strips in the oven.

I decided to pull out an old favorite. We used to use this sauce back in the day when my kids just could not tolerate tomatoes. We used it on everything. Pizza, pasta, veggies, you name it! It is really quick and easy to make, and chances are you have all the ingredients in your kitchen on any given day.

The picture doesn't do it justice. You'd need smell-o-vision for that. It's so intoxicating! All that creamy, cheesy goodness...yum.


Leni's Notes:
~Use whatever type of milk and cream cheese you like. You can go low fat or full fat without changing the consistency.
~I used peas this time, but usually use spinach. Use your favorite veggie, but make sure to time it's addition to the boiling water so that it has enough time to cook thoroughly.
~The sauce is really good for a white pizza. My adults kids still talk about how much they loved that pizza.
~Spirals and bow ties are great for this.
~This is a throw-in dish. Whatever sounds good, go for it.

Ingredients:
1 lb favorite whole wheat pasta
1/2 lb frozen peas
1 1/2 C milk
1 C shredded Parmesan cheese
2 - 4 cloves of minced garlic
2 Tablespoon dry oregano
8 oz. cream cheese
4 Tablespoons butter
2 C chunked up leftover chicken or turkey

Instructions:
~Boil pasta in a dutch oven.
~When pasta is almost done, throw in the peas.
~When pasta and peas are done, drain them in a colander and set aside while you make the sauce.
~Place milk, cheese, garlic, oregano, cream cheese and butter in the dutch oven.
~Turn to medium heat and stir until the cream cheese is completely melted and the mixture starts to thicken.
~Remove from heat and stir in pasta/peas and chunked meat.

Blessings from my hectic kitchen to yours,
Leni


Monday, March 25, 2013

Tiramisu, Take Two!

Back in December, I posted about my first attempt at a Tiramisu Inspired Dessert.  It was a hit with my husband and the rest of our friends and family, but I knew even then that I would make some changes when I made it again.

This version uses different ingredient options, and was a bit more expensive to make, but I think it was worth it. I also overcame my Baptist Girl Problems. ;o) I don't think anyone is getting drunk on two tablespoons of rum in a 17x10 pan of tiramisu.

I wouldn't say this version is better or worse, just different. Still have changes I'd make for next time. Dipping the lady fingers is too much moisture, even for how fast I dip them. I'm thinking maybe brush the coffee mixture on, or spritz it on with a spray bottle. I don't know, that's an experiment for another time.

The pan got gobbled, and my hubby was pleased. That was kind of the point, so we call it a success. There's some cooking involved with this version, but don't let that scare you off.


Leni's Notes:
~I like to make this as a two-step process. Getting the individual ingredients ready and then cooled, then come back and assemble later.
~If you don't want to use the rum, try adding some extract. Rum, vanilla, maybe hazelnut?
~I think this would freeze really well for a later date. Nice for a dinner party or holiday.

Ingredients:
2-4 Tablespoons of rum
2 Tablespoons of raw sugar
4 servings of Decaf Espresso or strongly brewed coffee, cooled (you'll have a bunch left over)
6 egg yolks
3/4 C raw sugar
2/3 C milk
2 (8oz) packages marscapone cheese, room temperature
2 Cups Heavy Whipping Cream
1/4 Cup powdered sugar
2 tsp vanilla extract
3 packages of Lady Fingers. (you may have up to half a package of leftovers)
Cocoa Powder

Instructions:
~Place rum and 2 Tablespoons of raw sugar in the bottom of the coffee pot.
~Brew coffee into the pot as you normally would.
~Pour coffee into a shallow dish (for dipping later) and let it sit out, uncovered to cool.
~Place egg yolks and 3/4 C raw sugar in a pot, whisk until completely blended.
~Whisk in milk, bring mixture to a boil over medium high heat, stirring so that it doesn't scorch.
~When mixture boils, turn down to medium-low, and boil for one minute.
~Remove from heat, place plastic wrap directly on surface of custard and let cool.
~Set marscapone out to warm up.
~Place whipping cream, powdered sugar and vanilla into a bowl.
~Beat with electric mixer until stiff peaks form. (Do not overbeat or you will have sweet butter! )

Take a break and go do something else for a while. Like take your daughter to college and run a couple of errands.

~Use the electric mixer to beat together the custard and the marscapone cheese.

~Quickly dip each lady finger in the coffee mixture and lay in pan until the bottom is covered in a single layer of fingers. Dip these VERY quickly, as they saturate instantly. If you're not fast, not only will your product be soggy, but they'll fall apart before you get them to the pan.
~Layer half of the custard mixture over the lady fingers.
~Layer half of the whipped cream over the custard.
~Repeat layers of fingers, custard and cream.
~Dust the top with cocoa powder by placing some in a mesh strainer and tapping the side with a spoon.
~Cover with saran wrap, and refrigerate for at least two hours to let the flavors blend and the tiramisu set up.
~This will cut into squares beautifully.
~Serve with coffee.

Blessings from my experimental kitchen to yours,
Leni

Monday, March 11, 2013

Freezer Cooking - Lasagna

My youngest daughter is on Spring Break, so I don't have to drive her to the college this week! I decided to take this opportunity to restock my freezer meals as we are completely out.

There is just nothing like being able to pull a healthy, home-cooked meal from your freezer, pop it in the oven and walk away. I'd like to think this would let me relax for a couple of minutes, but really, it frees me up to go work on something else. I'll take what I can get, though. My schedule is maxed out right now, so any break I can get is worth it.

In case I haven't mentioned it before, I have become a huge fan of disposable steamer trays. These half trays are just the right size for when the whole family is visiting, or when it's our smaller group (with a couple of lunch servings left over.) The foil lids let them stack beautifully in the freezer. When dinner's over, throw them out. ;o) I get mine in bulk at Sam's Club.


Leni's Notes:
~Adjust the recipe to include your family's favorite ingredients.
~Cooking has to be flexible with this one, as there are a lot of determining factors. Was it completely thawed before baking? Partially frozen? Did you have other things in the oven? When did you uncover it? Always check with a thermometer or by poking a metal butter knife in the middle and feeling the temp on the end of the knife. (Very scientific, don't you know!)
~Always put a cookie sheet under these pans. Not only will this save your oven should there be any boil-over, but these pans can be very flexible, and you do not want hot cheese and sauce spilling down your legs. Safety first!
~I know you can buy no-boil lasagna noodles. I personally don't like the result. It leaves all that starch in the finished product and everything tastes gummy. Not a fan.
~When I cook the lasagna noodles, I only partially cook them. (about 3/4 of the amount of time instructed.) When they come out of the water, I rinse them and then layer them between sheets of aluminum foil until I'm ready to use them. This works really well!
~I'm using some convenience items here, but I have found that if you do small things like buy block cheese and shred it yourself, you can make lasagna pretty economically. Everything costs time or money, so it depends on what you have available to spend!
~I am not a fan of chunks in my sauce, so I tend to buy smooth marinara. Feel free to buy your favorite sauce, or to throw in some crushed tomatoes with your marinara.

Ingredients:
2 packages whole wheat lasagna noodles, cooked, layered on foil
3 lbs browned ground beef (give or take) cooked with onions, salt and pepper
6 Italian sausages, cooked, cooled and chopped (optional)
1 (3 lb) container ricotta cheese
3 cups shredded mozzarella cheese
3 eggs
1 cup parmesan cheese
1 Tablespoon each: oregano, basil, parsley
2 ( 24 oz) jars of your favorite marinara
1 (24 oz) jar of water
1 (20 oz) can of tomato puree
2 cloves of garlic
Extra mozzarella for topping


Instructions:
~Combine beef and sausage in one bowl.
~Combine ricotta, mozzarella, eggs, parmesan, oregano, basil and parsley in another bowl.
~Combine marinara, water, tomato puree and garlic in a third bowl.
~Prepare three 13x9 pans with cooking spray or a little olive oil and a pastry brush.
~Start with a thin layer of sauce.
~Follow with layers of: noodles (3 will fit perfectly,) cheese, sauce, noodles, meat, sauce.
~Repeat until all ingredients have been used up.
~Top with extra mozzarella.
~Top each pan with it's lid, seal tightly.
~Label with item name and cooking instructions (including thawing times.)
~Stack neatly in the freezer. (Don't let them tip at all until they are solid frozen or you will have a MESS!)

~When ready to cook, my suggestion is to thaw completely first, then bake at 375 for 1 to 1 1/2 hours.
~I usually bake for one hour with the lid on, then take it off, check for doneness and decide if it needs more actual cooking time, or just a little time to brown the top a smidge.
~Remove from oven when done, and let it cool for 15-20 min. This gives the fluids time to settle a bit before serving.

Blessings from my busy kitchen to yours,
Leni


Monday, March 04, 2013

Crock Pot Best Beef Stew

Be honest. Nothing beats a good beef stew. Especially when it's cooking all day while you're at work, and you come home to that wonderful aroma. It just speaks comfort. Add in some fresh-baked rolls or dumplings and you've got a combo that can't be beat.

The first time I made the stew for a crowd, it was for a VBS closing dinner. Everyone thought I was nuts, making hot beef stew for 150 people in the heat of August. But when you're doing a old-style cowboy themed program, how can you not serve up chuck wagon stew? There were skeptics who said kids wouldn't eat something so grown up. I'm here to tell you, those who came late for dinner were left out, because adults and kids alike chowed down that stew like they hadn't eaten in a week. You just can't beat good home cooking!

Here's the great thing about stew. You make it early, and then you leave it alone. You have to let it cook long and low to get the meat tender and the flavors blended. So when you have a big group to feed, or you just don't want to be fussing in the kitchen while you have company, this is a terrific choice. Start it in the morning and leave it alone until you're ready to serve.

This stew has morphed over the years as I've changed my methods trying to find the easiest way to get the best taste. I *think* have found my final version. Gone are the days of browning the meat and deglazing the pan, which defeated the purpose of the crock pot, which was to make everything easy! Also, no taking time to thicken the gravy at the end, everything is done up front.

Leni's Notes
~This recipe translates well when multiplied for a large roaster pan. However, potatoes do not freeze well, so only make enough to eat up in a couple of days.
~This recipe can be adjusted for budget. If you have less money to work with, cut way back on the meat and load it up with more veggies. Just be careful with carrots (too many makes it sweet) and celery (too many, and all you'll taste is celery.)
~Feel free to buy a roast and cut it up, or even to use browned ground beef if that's what you've got. Because of my work schedule, I don't have time to mess with cutting up meat, so I spring for well-trimmed stew beef.
~A loaf of Italian bread or fresh rolls is a terrific accompaniment for this. Dumplings are even better, but not for a crowd. Save those for the intimate family dinners.
~If you're really in a hurry, and don't have time to make a roux in the morning, just put the ingredients in with the broth, and make the roux later. I like to do it ahead of time, because when I get home, I'm too tired to care. ;o)
~This recipe fits well in an 8 quart crock pot, with enough room to not boil over. Beef stew is the only thing I make that consistently boils over! What a mess. Leave an inch of space in the top of the crock to avoid this.


Ingredients
1 1/2 sticks of salted butter
1 1/2 cups white flour
2 quarts beef broth (Pacific Organic)
1/4 cup dry chopped onions
1 T dry basil
1 T dry oregano
2 tsp garlic powder
2-4 tsp sea salt, according to preference
1 1/2 tsp black pepper
1-2 lbs well trimmed stew beef
4-6 white potatoes, cleaned and cubed
4 carrots, chopped
2 celery stalks, chopped

Instructions
~In dutch oven, melt butter, then whisk in flour, allowing it to cook a little as you mix.
~Slowly add in broth, whisking until all is smooth. (Immersion blender is great for this step.)
~Allow to cook and thicken a bit, stirring to keep from scorching.
~When roux has reached desired thickness, pour into the crock pot.
~Place all remaining ingredients in crock pot and stir.
~Cook on low for 5-6 hours.
~Stir well before serving.
~Enjoy with fresh bread and butter.

Blessings from my cozy home to yours,
Leni

Tuesday, February 12, 2013

The Gang's All Here Sweet & Savory Pork Tenderloin


As you may have deduced, I enjoy cooking for friends and family. ;o) I'm always playing with recipes, tweaking and experimenting. While I love doing that, I also like to keep a nice supply of go-to meals. The type the everyone loves, and for the most part never go wrong when I make them. Today's recipe might look familiar, as it was inspired by ChanceLee Chicken.

I was looking for something I could make for a large group without losing quality in the cooking. I decided to make it with pork tenderloin. That turned out to be a terrific choice! I love the way my house smells when I make this stuff. 

I made some changes to the recipe, nothing too major. I like making this dish for company because the sweetness makes it a huge hit with the kids, and the spicy makes it have a nice taste for the grown ups, also. The kiddos at dinner (aged 7 and under) were pleased and asking for seconds, so that makes me a happy camper. Pretty sure my 16 year old faked illness to come home early from an overnight so she could have some too. ;o)


Leni's Notes
~This recipe is intended to feed a large group (we got 14 servings,) so scale down accordingly. 
~Also pictured above, stir fried french green beans and egg noodles with butter and parsley. Also good with cous cous and carrots.
~Every time you warm it up, the sauce gets a little thicker and the sweet gets a little more intense, so you might want to add some water to thin it and maybe some more salt or soy sauce if you have leftovers.
~Generally when I list soy sauce, I mean Bragg's Liquid Aminos. This time we used Coconut Aminos. The taste was good, but it had half the sodium, so the finished product needed salt. (Coconut Aminos are crazy expensive, but if you have an allergy to soy, a nice alternative.)
~Replace the pepper with cayenne for an extra spice kick.

Ingredients
4 pork tenderloins
1 1/2 cups brown sugar
1 1/3 cup red wine vinegar
1/2 cup ginger ale
2 Tbls. lemon juice
6 Tbls. minced garlic
4 Tbls. soy sauce
2 tsp. white pepper 
1/4-1/2 cup corn starch

Instructions
~Preheat oven to 375 degrees.
~Sear tenderloins in a cast iron pan with olive oil.
~Place tenderloins in a greased 13 x 9 pan.
~ Mix the rest of the ingredients in a bowl and pour over tenderloin.
~Place in oven, uncovered, for 45-60 minutes, until a meat thermometer says they are done.
~Remove from pan, slice into tenderloin coins, and place in a dish or on a platter, and pour sauce over the top.
~Serve with your favorite side dishes.

Blessings from my kitchen to yours,
Leni

Monday, February 04, 2013

Peppermint Ice Cream Cake

Ice Cream cake? In February? In Upstate NY? No, I haven't lost my mind, it was a special request from my daughter.


Yes indeed, this weekend we celebrated my baby girl's sixteenth birthday! 


Isn't she beautiful? More importantly, she's got a beautiful spirit.  My baby is growing up. *sniff, sniff*  To mark the special occasion, I made her a cake I first made over 20 years ago for her big sister's first birthday. Come to think of it, that might have been the last time I made it!

We had planned a day of shopping with the Thrift Store Teen Queen, but the snowy weather kept us from leaving town.  So instead, we stayed home and ate ice cream cake, of course. ;o)

Leni's Notes:
~While my family loved the way I made the peppermint layer, I think if I make it again, I will cut down on the amount of peppermint patties. Only because it makes it kind of chewy when it's frozen. I seemed to be the only one who noticed.
~This will fit into 2 13x9 pans or one larger pan.

Ingredients:
2 containers chocolate sandwich cookies (Oreo type)
1 half gallon chocolate or vanilla ice cream
1 regular sized bag of York Peppermint Patties
1/2 - 1 Cup cream
2 T coconut oil (You could use shortening if you need to)
4 C whipped cream

Instructions:
~Crush cookies in a plastic bag, and place into the bottom of the pan, reserving a cup of crumbs.
~Slice or scoop ice cream and put on top of the cookies.
~Let the ice cream melt over the cookies while you make the chocolate sauce. (Not completely to liquid, just til it's soft enough to push down over the crust.)
~In a double boiler, place the candies and oil, and turn on the burner to medium. (I break the candies up a bit.)
~As they start to melt, add in the cream, and stir occasionally.
~When the sauce is smooth, dump the hot water out of the double boiler and set the sauce aside to cool a bit.
~While the ice cream is melting, press it down over the cookies.
~Drizzle peppermint sauce over the ice cream, reserving about half a cup.
~Cover with whipped cream.
~Lightly drizzle with remaining sauce, then sprinkle cookie crumbs over the top.
~Cover with plastic wrap, and place on an even surface in the freezer.

~When ready to serve, remove from the freezer half an hour before cutting.

Blessings from my kitchen to yours,
Leni

Monday, January 14, 2013

Ginger Pumpkin Trifle

This recipe came about in an attempt to combine as many of my husbands favorites as possible into one dessert. Pudding, whipped cream, pumpkin, cake...how can you go wrong? 

Well, you could realize half way through that you don't have any vanilla. Or you could totally underestimate the length of time the project will take. But never fear, I persevered, and my man was thrilled with the result. Mission accomplished!

On a side note, Steve, being the wise man he is, does what he can to encourage me to keep cooking. For this recipe I got to use my new immersion blender on the whipped cream. I love that tool! 


Leni's Notes:
~I took a short cut when I realized how much I had to do. I used a box mix for gingerbread instead of making my own. Any gingerbread will do, but you want enough to fill a 13x9 pan.
~The pudding is made purposely runny so that it will soak into the cake. If you want it firmer, use less pumpkin or more thickener.
~Feel free to cut the pudding recipe in half. I made extra because I knew that my family would make good use of the the extras. ;o)
~Regular whipped cream would work in this, but we ended up loving the version I made. It lended a nice flavor to the over all dish.

Layers:

Ingredients: Gingerbread
This is where I cheat. I recommend Krusteaz if you're not going to make it from scratch.

Instructions: Gingerbread
~Bake the cake, then cut into small squares, and spread out on a bigger pan to cool.
~Do not cover, you want it to kind of dry out.

Ingredients: Pumpkin Pudding
1 C raw sugar
2/3 C flour
6 Cup whole milk
4 eggs, beaten
1 (29 oz) can solid pack pumpkin (about 3 1/2 cups)
1 Tbls vanilla extract
1 tsp cinnamon

Instructions: Pumpkin Pudding
~Mix sugar and flour in large pot with a whisk.
~Pour in milk slowly, whisking until combined.
~Heat over medium high heat, stirring constantly.
If it starts to scorch or stick, reduce heat. Don't walk away, you'll ruin the whole batch!
~When mixture starts to thicken and get bubbly, remove from heat.

~In a medium bowl, place beaten eggs. Slowly add in 2 cups of hot milk mixture, stirring continuously.
~Add pumpkin, and mix until thoroughly combined.
~Add egg mixture back into the pot with milk mixture and put back over medium heat.
~Continue to stir until mixture is just starting to boil.
~Remove from heat, add in vanilla and cinnamon.
~Put in bowl, and place saran wrap directly on surface.
~Place in fridge and let cool completely.

Ingredients: Whipped Cream
2 Cups Heavy Whipping Cream
1/4 C powdered sugar
3 tsp pure maple extract

Instructions: Whipped Cream
If you have an immersion blender, now is your chance to use it! 
~Combine ingredients in a cold dish.
~Blend with hand mixer until cream holds a stiff peak.

Instructions: Layering
~Once the cake and pudding are completely cool, start the layering process.
~Cake, Pudding, Whipped Cream.
~Repeat.
~Top with cake crumbs.
~Cover and refrigerate.

Depending on the size of the bowl you use, you should have a little cake leftover and about half of the pudding. Enjoy as you see fit! ;o)

Blessings from my kitchen to yours,
Leni

Sunday, January 06, 2013

Sausage Stuffed Mushrooms

New Year's Eve has come and gone, and somehow I never managed to get here to post my recipe. My apologies. Had the family home all week with no work (for them, anyways) or school and we tried to just enjoy. 

So, this was my first attempt at Stuffed Mushrooms. I think it could use some tweaking, but my family said to leave it alone. Hmmm. I shall post it as it was prepared. ;o)


Leni's Notes:
~These were great to make ahead and then refrigerate just before the baking step. Nice for a party, so you can get the work done a day or so ahead of time.
~This version did not have a lot of extra fluid (which I happen to think it could have used, but I digress.) They weren't sloppy to eat. Again, good for a party.
~I used mild sausage, feel free to kick it up with hot sausage.
~Ingredients I would consider adding next time: reconstituted dry onion, 1/2 tsp garlic powder, 6 minced mushroom stems.

Ingredients:
4 links of Italian sausage, cooked and refrigerated until completely cooled.
32 oz package of baby bella mushrooms (I used Wegmans Food You Feel Good About)
10 oz (give or take) chopped spinach, thawed and drained
1 Cup panko bread crumbs
1/2 - 3/4 Cup shredded parmesan
1-2 Tablespoons lemon juice
Salt & Pepper to taste

Instructions:
~Place cooled sausage in food processor and mince until it has an even crumbly texture.
~Pour into a larger bowl, and add spinach, panko, parmesan, lemon juice, salt and pepper.
~Thoroughly mix ingredients.
~Wipe off mushrooms, and remove stems.  (save the stems to add to another recipe.;o)
~Grease baking dish.
~Place a mushroom cap in the palm of your hand, and pack the filling in until it resembles a golfball.


~Bake at 450 degrees for 20-25 minutes, until browned.

Leftovers warm up well. ;o)

Blessings from my kitchen to yours, and Happy New Year!
Leni


Monday, December 17, 2012

Tiramisu Inspired Dessert


Let me tell you a story about my attempt at Tiramisu.  

I wanted to do something special for my hubby for our 21st anniversary. As it would happen, my dearest friend in the world was also coming into town, and bringing her Prince Charming with her. So now the celebration morphed into an Anniversary/Woohoo-Karen-got-the-job/Happy-Birthday-to-Matt type of thing. This calls for something big! Something I've never done before. Something everyone loves. Tiramisu. 

Have you ever looked at recipes for this lovely dessert? If you look at one, you might be doing ok. If you look at more than one, you can be sure that none of the recipes will agree with each other and your head will start to swim with all of the ingredients and instructions that each person insists you MUST DO to be authentic! Eggs, no eggs. Raw eggs, or cooked eggs? Rum, Amaretto, Marsala? No alcohol at all! Lady Fingers? No, pound cake! Marscapone or cream cheese? Both? Only use Espresso! Just use coffee!

I gave up on authentic before I even began. In fact, I gave up on recipes. I decided to ditch it all and just wing it, making my own recipe. I hesitate to call this Tiramisu, because I'm sure purists would stone me or something. It might be well deserved. So we're going with Tiramisu-inspired.

I nervously gathered my ingredients and immediately ran into problems. Not just any problems, Baptist Girl problems. (BGP) The original recipe called for alcohol of some sort. I am not strictly opposed to alcohol, and actually like to use it for cooking. I happen to have an inherited bottle of amaretto, and was excited that I could use it for this. My BGP was not a conflict over using alcohol, it was a struggle over opening it. I couldn't get the top off! It's been a couple of years since I baked anything with it, but I'm reasonably sure I didn't have this kind of trouble before. I called my daughter to help me. The first thing she said was, "WHAT are you doing with that bottle, missy?!" She's a funny girl. Alas, even my muscle-bound teenager couldn't get the top off, so I dismissed that idea and moved on. So much for Plan A.

Rum extract! Not ideal, but it would help the flavoring. Do you think we could find even a drop of rum extract?? I know for a fact that I have at least 2 bottles floating around somewhere. But it was definitely not on the shelf full of extracts where it belonged. Good-bye to Plan B.

Plan C involved a total reworking of the recipe I had in mind, but I think it worked. I would not serve it to someone who was an expert on Tiramisu, as it would likely be a huge disappointment to them. But I don't think anyone will spit it out in disgust. (There were moments I thought that might be a possibility...)

So, below you will see the recipe for my final attempt. Should you try it, I'd love your feedback. Especially if you have tasted the real deal. I'd like to know how close I got. ;o)


Leni's Notes
~This made a 13x9 pan, there was enough filling that I probably could have made another smaller dish, but I just layered up extra filling. 
~Other than making coffee, there's no cooking involved in my version.
~I feel like this would freeze really well. I might save a piece and try it, it would make a terrific dish to make ahead for the holidays, and then just pull out to thaw the day of.
~Don't yell at me for doing it wrong. Remember, Tiramisu Inspired.
~Budget played a roll in my choice of ingredients. If you've got money to spend and want to go for marscapone instead of cream cheese, go for it! 
~Having now served the tiramisu, I can say that next time I would definitely use at least half marscapone, if not all.
~This one took a bit more time than I usually spend on a recipe. I think it would go faster with experience, but for a no-bake recipe, it took me a while. Probably all the decision making I was doing along the way.
~This plates beautifully! I served it with coffee. A lovely night was had by all.

Ingredients
2 Cups of Decaf Espresso or strongly brewed coffee, cooled
2 Tablespoons of raw sugar
3 packages of Lady Fingers. (Each package had about 40 small lady fingers)
4 (8 oz) blocks of cream cheese, softened
3/4 Cup raw sugar
2 Cups Heavy Whipping Cream 
2 tsp vanilla extract
Cocoa Powder

Instructions
~Brew the coffee, and mix in the 2 T of sugar. 
~Place in the fridge to cool.
~Cream together cream cheese and sugar until smooth
~Whip the heavy cream and vanilla extract until you have soft peaks, but not runny.
~Fold the cream mixture into the cream cheese mixture.
~Separate the lady fingers.
~Dip the lady fingers into the coffee and place in pan.
IMPORTANT NOTE! This is a very quick process, 2 seconds or less. Any more than that will have them falling apart in your hand.
~Put a layer of dipped lady fingers in the pan, making sure you've covered in all with the fingers laying flat.
~Gently spread half of the cream mixture over the lady fingers.
~Layer a dusting of cocoa powder over the cream mixture.
~Repeat layers.
~Cover tightly with plastic or foil and place in fridge for a minimum of 2 hours.

If all goes well, you should be able to cut a square of this dessert to plate for your guests.

Blessings from my kitchen to yours,
Leni

Tuesday, October 16, 2012

Chicken Salsa Soup

Cold weather is upon us! Fall is here, but that air has a decidedly Winter bite to it. I was inspired by some soup recipes I found on Pinterest this week, and decided to stock up my freezer with some lunches for my husband. As you can see from the half-empty crock, I had to work fast on getting it into the freezer, because everyone was eating it!

I started out following someone else's recipe, but by the time I finished, it in no way resembled the original, so I'm giving it it's own name. The soup doesn't actually call for salsa, but it gets kind of a salsa vibe since you're using a lot of the same ingredients.


Leni Notes:
~This recipe filled an 8 qt. crock pot, we got 12 good-sized servings out of this.
~A nice crusty bread or grilled garlic bread would be a nice accompaniment. 

Ingredients:
6 Cups water
4 raw chicken breasts
2 (30 oz) can diced tomatoes
1 (30 oz) can black beans
1 Cup tomato paste
1 (4 oz) can diced jalapeños 
1 green bell pepper, diced
1 large onion, diced
6 tsp Chicken Better than Bouillon base or 6 chicken bouillon cubes
4 tsp chopped garlic (equivalent of 8 cloves) 
4 tsp cumin
4 tsp chili powder
1/2 tsp cayenne powder
8 oz. Pepper Jack cheese, shredded

~Place all ingredients in crock, except for the cheese.
~Cook on low for 8 hours.
~Pull chicken out, and place on plate. 
~The chicken will shred very easily, shred and place back into crock.
~Sprinkle cheese over the top and mix in.


Monday, October 01, 2012

Pumpkin Chocolate Trifle

This is a recipe that does not fit into my plan of quick and easy, but it was worth the extra effort.

Seth turned 18 this past week. He wanted something pumpkiny, creamy and chocolately. Noelle piped up and said, "You should make a trifle!" So trifle it was. We are big trifle fans around here. It started years ago when friends from Ireland taught us how to make it. In those days, we were using cake and jello and fruit. Since then, we've expanded into many different flavors.

My favorite was the one  I made for my father-in-law many years ago. He loves lime, so I decided to make him a lime bundt cake for his birthday. I don't make those often, and soon remembered why. I can never get the things to come out of the pan without breaking! Sure enough, it broke, and I was left with lime bundt chunks. Appetizing.

So I did the only reasonable thing, and decided to turn it into a trifle! (I'm sure this is how trifle was born. Fixing cooking screw-ups.) I whipped up some vanilla pudding and whipped cream, and made a big bowl of trifle, with about an hour to spare before everyone arrived for the birthday dinner. As I was placing it in the fridge, breathing a sigh of relief, I knocked a can of biscuits into the top of it! Grrr! Took it out, patched it up again, and told my kids, "If anyone asks, this was the plan all along! And nothing fell into it!"

For today's recipe, I didn't have quite so many adventures, but it was a two-day process. I was creating this one from scratch, and getting all of the elements the way I wanted took a while. The results were just what I had hoped for, and everyone gave it a thumbs up. If I make it again, I would try it with a milk chocolate ganache, just to see if we like that flavor better.

The birthday boy was pleased with it, so I'm happy! (Said birthday boy just walked in and asked me if I'd make it again for Christmas. ;o)


Leni's Notes:
~If you don't have a trifle bowl, any clear dish will do. I've even used a large punch bowl when I was making trifle for a crowd. Part of the fun is seeing the layers.
~Most of my trifles are not so elaborate, and really do lend themselves to a quick throw-together. 
~Really is best to make this a two day process so you can let your cake cubes dry out a bit. Then they absorb the flavors better.
~I made the whole thing from scratch. You can shorten up the process a LOT with pudding mix, cake mix and jarred syrup. I don't guarantee it will be as good, but you can do it. ;o)

Simple Ingredient List:
Pumpkin Cake
Vanilla Pudding
Chocolate Ganache

Detailed Ingredient and Instruction List:
Cake
3 C flour
1 C whole wheat flour
2 C raw sugar
2 Tablespoons baking powder
2 tsp cinnamon
1/2 tsp each of salt, baking soda and fresh ground nutmeg
2 C pumpkin puree
1 C milk
4 eggs
2/3 C coconut or vegetable oil

Sift dry ingredients together in a large bowl.
Add wet ingredients, combine, then mix on high for a couple of minutes. 

Pour batter into a greased 13 x 9 pan. (or larger, but cook for less time if it's a larger pan.)
Bake for 1 hour at 350, test to be sure it's baked through. 
Set aside to cool.
When cool, cut into squares and spread out on a cookie sheet to dry out a bit. 
(You'll have extras, so feel free to let the kids snack a bit!)

While cake is baking, you can get started on the pudding.

Pudding
1 C raw sugar
2/3 C flour
6 C whole milk
4 beaten eggs
2 Tablespoons butter
1 Tablespoon vanilla extract

Whisk together sugar and flour in a large pan.
Slowly whisk in milk until well combined, no lumps of flour left.
Turn pan on to medium, and stir until mixture begins to bubble and thicken.
I must admit, I am ridiculously impatient at this point, and always end up bumping up the heat to move things along. Unless you are right there watching every minute, DON'T DO IT! You will scorch your pudding and have a mess to clean up.
Remove the pudding from the heat, and ladle a cup or so into the beaten eggs, mixing continuously to temper the eggs. 
If you add the eggs directly to the mixture, you'll be sifting scrambled eggs out of your runny pudding. DON'T DO IT!
Take the egg/pudding mixture, and incorporate back into the pudding pan.
Place back on medium heat, and stir constantly just until it begins to bubble.
Turn the heat down a bit and cook for a couple minutes more, but do not let it boil. 
What happens if I let it boil? See note above about scrambled eggs.
Remove from heat, add butter and extract. 
When everything is melted in and stirred together, place saran wrap directly on the surface of the hot pudding and let cool without stirring. 
Refrigerate until ready to use.

Ganache (Make when you are ready to assemble the trifle)
13 oz. Semi-sweet chocolate (Spring for baker's chocolate and resist the urge to buy chocolate chips)
1 1/2 C heavy whipping cream (again, no substitutes)

Place the cream in a pan with a good heavy bottom. 
Turn burner on to low, stir occasionally. 
Chop up the chocolate and place in a glass bowl. (I feel that glass holds the heat better. Use what you have, but if you have glass, that's what I prefer.)
When cream is hot, pour over the chocolate and stir until everything is melted and evenly mixed. 

Trifle Assembly
This is where you can get artsy, or you can just throw the whole thing together and not worry about being fancy. Once it's on the plate, it's not too pretty anyways! ;o) I like to layer the sides so that you see all the ingredients in a beautiful pattern.

I did three layers, each starting with cake, then pudding, then ganache. You will end with ganache, and you can spread it right up to the rim of the dish, which seals it and eliminates the need for saran wrap, unless you're traveling with it. 

If you want to decorate the top for an occasion, it's best to wait until you get where you're going so it doesn't get smooshed. 

Blessings from my kitchen to yours,
Leni

Monday, September 24, 2012

Mini Pumpkin Cheesecakes for a Crowd

Finally, I get to share some wedding recipes with you!

I made a lot of these. 200 pumpkin cheesecakes...I was swimming in cheesecakes! lol

This was what we put on our cupcake tower for the wedding. They really were not terribly hard to make, and once you get the process going, it goes quickly. These would be great for Thanksgiving or Christmas, also. They freeze wonderfully, and my older kids have discovered they like them straight out of the freezer like a pudding pop. (Remember those?)

Because I was making so many of them, I bought 3 oz paper cups to bake them in. These are the type that stand straight up, and don't spread out when you fill them. I had to order online to find them, but they were worth it.

I played with this recipe for a while before I found just the right dimensions. I hope you enjoy!

Fresh out of the oven.

On the cupcake tower at the wedding.
Leni's Notes:
~Baking times will vary, but lean toward undercooked rather than over cooked. If they over cook, they get really dried out.
~Remember that when it comes to cheesecake, less is more with the mixing. You want to just combine your ingredients, without incorporating a bunch of air into it. Over beating will also give you a tough texture.
~These can be dressed up with whipped cream and a sprinkle of cinnamon or a drizzle of caramel sauce.
~They freeze well, but if they get thawed and refrozen, the cookies will go to mush.
~You can make these gluten free by leaving out the gingersnap, however without it, you will not get a nice level surface. Without the cookie, they tend to sink in a bit.

Mini Pumpkin Cheesecakes for a Crowd
This recipe makes 3 dozen servings.

4 (8 oz.) packages of cream cheese, softened (Full or low fat, don NOT use fat free)
1 1/2 cups sugar
4 eggs
32 Gingersnap cookies (one box is usually enough)
32 paper baking cups
1 cup pumpkin puree (not pumpkin pie filling)
1 tsp cinnamon
1/4 tsp freshly ground nutmeg

Beat cream cheese and sugar together.
Add eggs one at a time, beat just until smooth.
Add pumpkin and spices, beat just until combined.
Line cupcake pan with liners. Place a gingersnap flat side down in each liner.
Fill with cream cheese mixture, leaving about a centimeter clearance at the top.
Bake at 375 degrees for 15-20 minutes.
Allow cheesecakes to cool and store in the fridge or freezer.
To serve: Remove from freezer, but keep chilled until ready to serve.

Tuesday, August 14, 2012

Crockpot Enchilada Casserole

First, an apology for the delay with this week's post. I fear as the wedding gets closer there may be more instances of this happening. 24 days to go!

Now I know that the picture below might cause confusion. I admit, I am recycling my photos! Today I'm sharing the recipe for the casserole that uses the sauce I posted last week

Who doesn't love an enchilada? Who loves taking the time to roll each enchilada? Always looking for a way to speed the process, we developed this crock pot casserole. It's cheap, it's filling, and if you've got a household full of teenagers, they will leave the table satisfied and not be back in 10 minutes claiming hunger again.

When we go camping (in a cabin, I do not do tents any more!) I make these either in the crock or in individual servings in foil cake pans. They can be popped in an oven or over coals to cook. I make them ahead and freeze, just thaw before cooking. 


Leni's Notes:
~Very versatile, feel free to change up the ingredients. Pick and choose from the lists below. Go wild and throw in whatever floats your boat!
~This can be done in the oven also, it's very much a "cook until done" recipe. When the cheese is melty and starting to brown, it's done.
~This is a terrific meal to keep in the freezer for those occasions when you want to send a meal to a friend who is laid up or for those nights when you just didn't have time to pull dinner together.

Ingredients
(for an 8 qt crock pot)

1/2 recipe of enchilada sauce (link above)
1 package whole wheat tortillas
1 large can fat free refried beans
2# browned ground beef
Shredded cheddar
Sour Cream and Salsa for serving

Instructions

~Grease your cooking container of choice
~Spoon some sauce into the bottom of the container
~Combine the refried beans with some enchilada sauce to make it easier to spread
~Combine the meat with some enchilada sauce to make it easier to spread
~Layers:
Tortilla
Meat mixture
Cheese
Tortilla
Bean Mixture
Cheese
~Repeat until your cooking container is full, ending with tortillas
~Top with a good healthy dose of sauce, so it runs down in and saturates the casserole.
~Sprinkle some cheese on top, cook until done. (It can handle high for 4-5 hours, if it's going to be on longer than that, cook on low.)

Serve with sour cream and salsa.

It's not pretty to look at on the plate. My kids say that just scares off the people who don't know any better, leaving more for them. ;o)

Alternate Ingredients
Whole canned beans (black, pinto, navy...)
Rice (makes a great filler for stretching a budget!)
Grilled chicken (or leave the meat out altogether)

From my home to yours, enjoy!