Saturday, August 25, 2012

Don't Worry, We're Not Starving

*I* might not have time to cook, but the bride and groom found time. My house smells wonderful tonight, as they spent all evening making these wonderful whole wheat blueberry cinnamon rolls for tomorrow's church picnic. SO good!


Tuesday, August 21, 2012

What is Leni Cooking This Week?

Nothing! Probably not actually nothing, but it feels that way. I did put some Salisbury steaks in the crock pot yesterday, but I was completely unimpressed by it, so it doesn't count. ;o)

I am probably calling on my back up to bring home a roasted chicken tonight. My days are filled with wedding plans and wedding projects. Lists and phone calls and emails. Shots of adrenaline as I remember a fine detail that was missed. Panic as I realize a self-imposed deadline has passed. And yet, we're still having fun. ;o)

It might have been much easier to hire someone to do all of this for us, but it has been a precious time of working with my daughter and our sweet friends who are helping us. Great memories being built here!

I will resume posting recipes about mid-September. Meanwhile, you get to hear about wedding food and wedding plans and anything else wedding related that I find the time to bore you with! ;o)

Tuesday, August 14, 2012

Crockpot Enchilada Casserole

First, an apology for the delay with this week's post. I fear as the wedding gets closer there may be more instances of this happening. 24 days to go!

Now I know that the picture below might cause confusion. I admit, I am recycling my photos! Today I'm sharing the recipe for the casserole that uses the sauce I posted last week. 

Who doesn't love an enchilada? Who loves taking the time to roll each enchilada? Always looking for a way to speed the process, we developed this crock pot casserole. It's cheap, it's filling, and if you've got a household full of teenagers, they will leave the table satisfied and not be back in 10 minutes claiming hunger again.

When we go camping (in a cabin, I do not do tents any more!) I make these either in the crock or in individual servings in foil cake pans. They can be popped in an oven or over coals to cook. I make them ahead and freeze, just thaw before cooking. 


Leni's Notes:
~Very versatile, feel free to change up the ingredients. Pick and choose from the lists below. Go wild and throw in whatever floats your boat!
~This can be done in the oven also, it's very much a "cook until done" recipe. When the cheese is melty and starting to brown, it's done.
~This is a terrific meal to keep in the freezer for those occasions when you want to send a meal to a friend who is laid up or for those nights when you just didn't have time to pull dinner together.

Ingredients
(for an 8 qt crock pot)

1/2 recipe of enchilada sauce (link above)
1 package whole wheat tortillas
1 large can fat free refried beans
2# browned ground beef
Shredded cheddar
Sour Cream and Salsa for serving

Instructions

~Grease your cooking container of choice
~Spoon some sauce into the bottom of the container
~Combine the refried beans with some enchilada sauce to make it easier to spread
~Combine the meat with some enchilada sauce to make it easier to spread
~Layers:
Tortilla
Meat mixture
Cheese
Tortilla
Bean Mixture
Cheese
~Repeat until your cooking container is full, ending with tortillas
~Top with a good healthy dose of sauce, so it runs down in and saturates the casserole.
~Sprinkle some cheese on top, cook until done. (It can handle high for 4-5 hours, if it's going to be on longer than that, cook on low.)

Serve with sour cream and salsa.

It's not pretty to look at on the plate. My kids say that just scares off the people who don't know any better, leaving more for them. ;o)

Alternate Ingredients
Whole canned beans (black, pinto, navy...)
Rice (makes a great filler for stretching a budget!)
Grilled chicken (or leave the meat out altogether)

From my home to yours, enjoy!


Wednesday, August 08, 2012

Wish Me Luck!

Today I am doing a test-run of the mini cheesecakes I am making for the wedding. Trying a couple of variations, and seeing how they hold up to being frozen and thawed.

I shall report back with my results, no matter how bad they are! Meanwhile, the whole family is looking forward to eating the evidence when they get home. ;o)

If you have any tried and true mini-cheesecake recipes, do share!

Monday, August 06, 2012

Enchilada Sauce

The inspiration for today's recipe comes from my favorite California resident, Jeanette. She shared her recipe for enchilada sauce after I complained about how much it cost to buy it in those little cans. Her recipe tasted so much better than the store bought! 

Jeanette is a homeschooling friend from across the country. After years of sharing parenting advice and recipes with me, I finally got to meet her when hubby's company sent us to CA for a week. I can't tell you what a treat it was to meet some of her family and go explore Santa Monica Pier and the Promenade with them. Definitely the highlight of my trip. Now I can't call her an imaginary friend any more. ;o)

Pictured below is the finished product of our Crock Pot Enchiladas. I'll be posting that recipe next.
I made minor changes to Jeanette's recipe suit our family's tastes and to make it into a bulk recipe. Notes below. 


Leni's Notes:
~When we make enchiladas, they go fast, so we always make a huge batch. Hence, this sauce recipe is a quadruple batch.
~The resulting sauce will freeze well in casseroles, but I wasn't crazy about the texture if we just froze the sauce.
~This works great with gluten free flour and regular flour, so adjust to fit your needs.
~As written, this will give a mild heat to your dish. If you like things spicier, add in more chili powder at the end to reach your desired taste.
~Makes 12 cups

Ingredients:
1/2 C oil
1/2 C flour (white, rice, GF blend - they all work)
1/2 C chili powder
32 oz tomato puree
8 C water
1/2 C dry, minced onions
4 tsp salt
2 tsp cumin 
1 tsp garlic powder


Instructions:
Heat oil in dutch oven. When oil is hot, add in flour and chili powder, whisking to combine.
Continue to heat mixture, whisking regularly, for about one minute.
Add the rest of the ingredients, bring to a boil and simmer for 10 min., stirring occasionally.
You can start making enchiladas at this point or cool and store in the fridge until ready to use.

Enchilada Casserole recipe to come next week!

Monday, July 30, 2012

Spicy Citrus Grilled Corn

Let me start by apologizing for the dark picture. By the time I realized how much we loved this new recipe, there was one ear of corn left and I had to get a pic quickly before it got devoured!

So I'm in Sam's with my daughter and her fiancé a week or so ago, and while we're looking at other items, I can hear the dialog on the televisions in the next section over. Now I cannot see the tv, so I have no idea who the chef was, or any specifics. But the recipe he mentioned sounded worth trying.

I tried to find the recipe, but found TONS of recipes for it. None of them agreed on the seasonings. All of them involved leaving the corn husks on (because apparently, that's how you grill corn.) Well my dad always did it that way too, but I hate messing with charred corn husks. So, in true Leni fashion, I threw out the rule book and decide to try it my own way. This was a collaboration between me, my husband and so-close-to-the-wedding-we're-almost-giddy-son-in-law. They did the cooking, I gave direction and advice. We make a pretty amazing team, let me tell you!

Suffice it to say, I don't think we'll ever eat regular corn again. We're already preparing for cold weather, trying to figure out how we could make a similar dish in the oven with frozen corn.


Leni's Notes:
~We used Extra Hot Indian Chili Powder. It's hot. So if you use regular chili powder, you won't get the same kick, but that might be a good thing. ;o)
~Extra lime juice will cut down the heat of the chili, so keep some on the table for folks to adjust the spiciness of their corn.
~Don't shy away from that charred look on the corn. It gave it some amazing flavor.
~This has a little kick, but is not overwhelming. Young children might not like it. (Though mine would have liked it at a young age.)
~Might I suggest putting out some wet washcloths on the table? This is a messy one, which is a sign of a good food in our house.

Recipe:
12 ears of corn

3/4 C salted butter
3 tsp. chili powder (see note above,) adjust to personal taste
1 Tbsp lime juice, plus extra for the table


Instructions:
~Peel all of the corn, place in a large enough stock pot to allow you to cover it with water.
~Cover with water and turn on high. The idea is to get it good and steamy, not necessarily boiling. I suggest turning it on and then going out to get the grill ready, we cooked the sausage while the corn heated up.
~In a small pan, melt butter and mix in the chili powder and lime juice.
~When the corn is good and hot and soaked, (maybe 20-30 min) pull out with tongs and place on grill over low flame.
~Immediately start basting the corn with the butter mixture. Turn, baste, wait, repeat.
~When it starts to get charred, you're about done. The amount of time it takes will depend entirely on how hot your flame is. ;o)
~Let cool slightly before serving, it improves the flavor.

Enjoy!

Tuesday, July 24, 2012

Party Cupcakes

Aren't these pretty?? The pinterest title for these caught my eye, because who wouldn't want to try  insanely moist and decadent chocolate cupcakes? As it happened, I was planning a bridal shower for my daughter who is a bit of a fan of chocolate, and I was going for kind of a retro black & white look for decorations. 

I found the flower cups at Walmart. I love how they turned out, but I will say that if you are looking for a pure white decoration, these yellowed in the oven. If they had been for a wedding, I would not have been pleased. (Now if I could find them in bright yellow, they'd make adorable Brown-Eyed Susans! But I digress.)

You'll want to serve a big glass of milk or water with these, as they are really rich. These got an enthusiastic thumbs-up from all the women at the shower and later from the hubby and kids at home.

Leni's Notes:
~I doubled the recipe, and then put one standard size ice cream scoop of batter in each one. This netted us 5 dozen cupcakes.
~If you made a standard cream filling, these would totally be a Hostess cupcake knock off. Seriously.
~There was black raspberry dip on the table, I am assured it was a perfect compliment to the cupcakes. ;o)
~I made two substitutions on the frosting, and one instructional change.
1. I detest corn syrup. I used agave instead, worked great.
2. For reasons I cannot fathom, our little local grocery does not carry cream. I had half & half at home. It worked.
3. I ended up melting down the frosting for the leftover cupcakes, and I poured it over the top like ganache. It made for a beautiful glossy finish, and it let it melt down into the paper liner.
~Because I made so many (seriously, there were cupcakes everywhere!) they lasted a couple of days. I noticed that they started to dry out pretty quickly, like by the end of day two. Melting the frosting over the top helped to seal them up and keep them moist.
~The batter will be very runny. PLEASE do not adjust it! You didn't mess up the proportions.
~Next time I make these, I will add some instant coffee granules to the boiling water before I add it into the batter.

I found the post on Pinterest, which led me to this page. Enjoy!

Instructions:
Insanely Moist and Decadent Chocolate Cupcakes

from Modern Day Baker by Nick Malgieri

makes 18 cupcakes
2 cups sugar
1 1/2 cups all purpose flour
3/4 tsp baking soda
1/2 tsp salt
4 oz unsweetened chocolate, cut into 1/4-inch pieces
1 cup boiling water
8 tbsp (1 stick) unsalted butter, melted
2 large eggs
1 1/2 tsp vanilla extract
1/2 cup sour cream

Set a rack in the middle of the oven and preheat to 350F. Line a muffin tin with paper cupcake liners.

For the cupcake batter, stir the sugar, flour, baking soda and salt together in a mixing bowl. Set aside.

Put the cut up chocolate in a large mixing bowl and pour the boiling water over it. Let stand for 2 minutes, then whisk until smooth. Whisk in the butter, then the eggs, one at a time, whisking after each addition until smooth. Whisk in the vanilla and sour cream.

Whisk in the flour and sugar mixture in 3 separate additions, whisking until smooth after each.

Divide the batter equally among the cavities in the pans, spooning it in. Bake the cupcakes until they are well risen and feel firm when pressed in the center with a fingertip, about 20 minutes.

Cool in the pans on racks for 5 minutes, then transfer the cupcakes to racks and cool completely before frosting. If making the frosting below, start it while the cupcakes are cooling since it also needs time to cool.


chocolate fudge icing
1 cup heavy whipping cream
1/4 cup light corn syrup
12 oz bittersweet or semisweet chocolate, melted
6 tbsp unsalted butter, very soft
1 tsp vanilla extract

Combine the cream and corn syrup in a small saucepan and whisk well to mix. Place over low heat until simmering and pour into a bowl to cool to lukewarm, about 110F.

Add the cooled cream mixture to the melted chocolate and whisk until smooth. Distribute the butter in small pieces all over the top of the chocolate mixture, then whisk it in smoothly. Whisk in the vanilla. Cool the icing until it is firm enough to spread. (I chilled mine in the fridge for 20 minutes and then stirred it and let it sit on the counter until firm.)

Use a small offset spatula or knife to spread some of the icing on each cupcake.

Sunday, July 22, 2012

Bridal Shower Time

My oldest baby is getting married! The bridesmaids and I hosted a bridal shower for her this weekend, so I thought I'd share what we served and how we decorated.

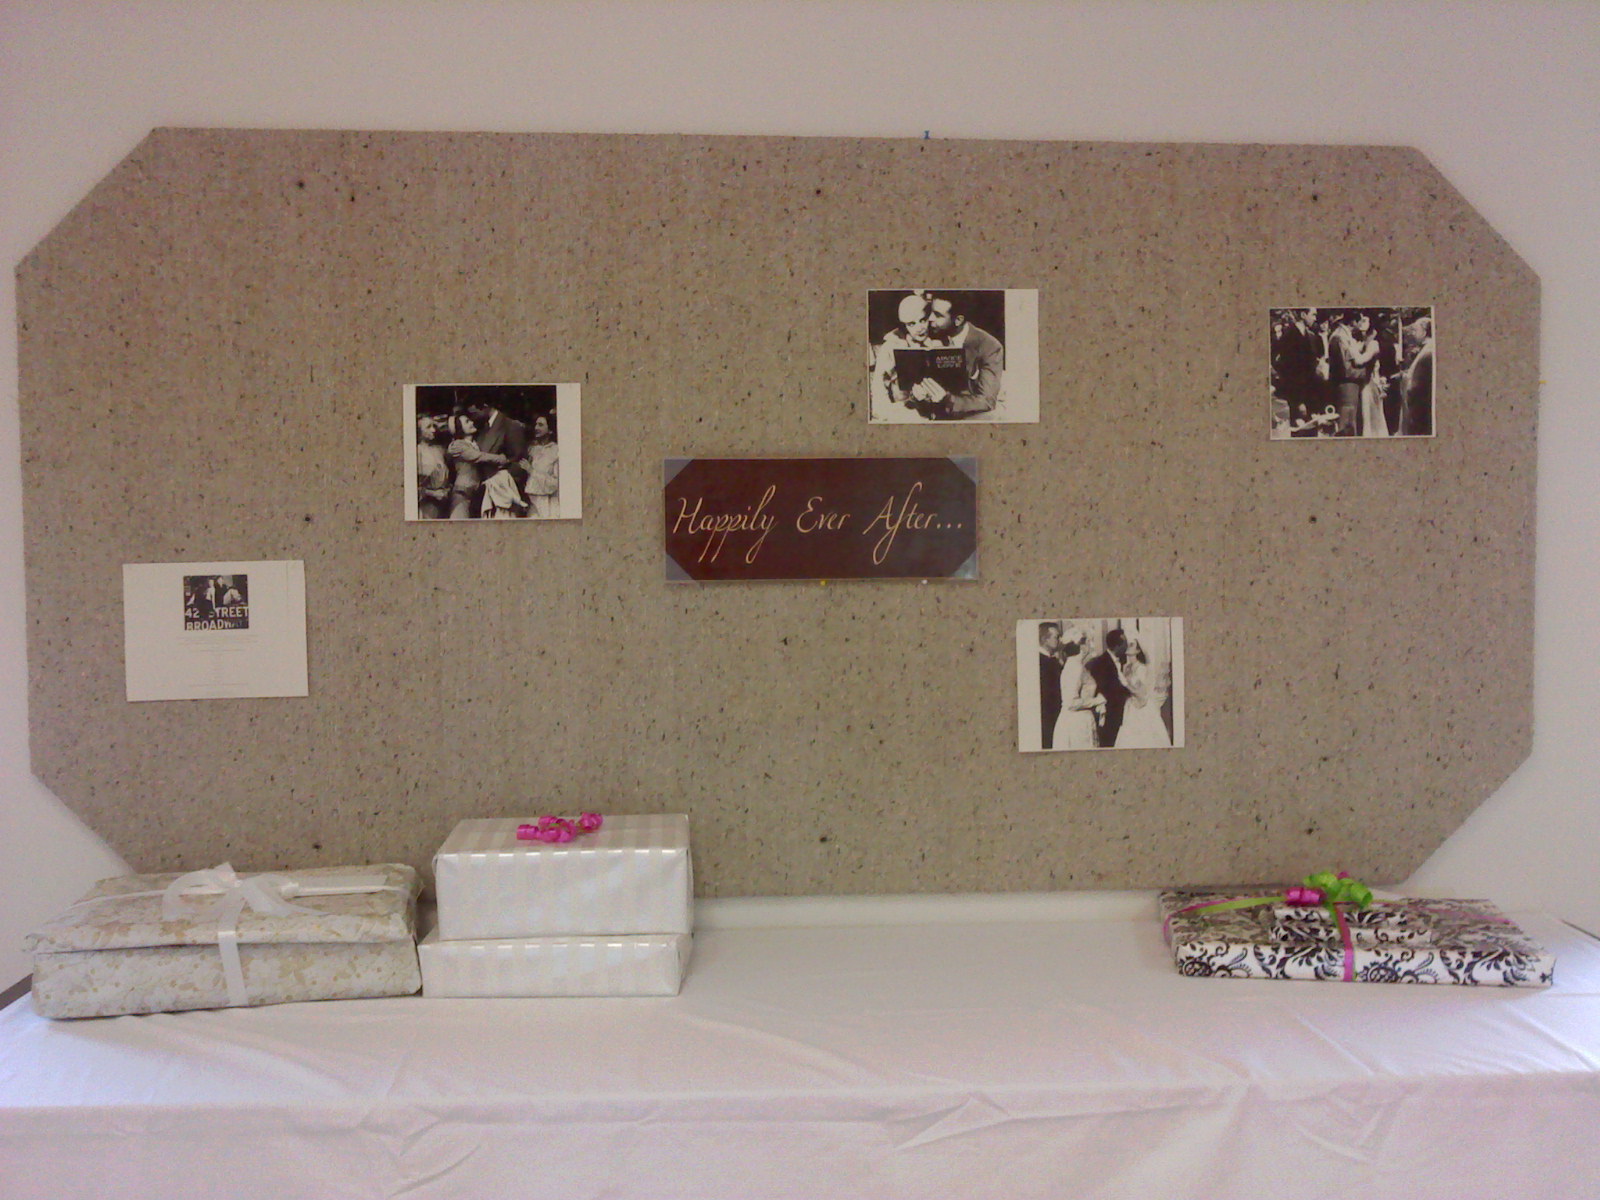
Since the bride and groom are big fans of the movies, we put together a movie theme. I was able to find a great book called Kisses that was full of photos and quotes from black and white movies. We used those for decorations and place mats. I was thrilled that the first thing guests did was walk around the table trying to identify all of the actors and movies! ;o)

I set up an Amazon wish list on my account with a large selection of movies that they love but do not own. (Cary Grant, anyone?) 

Here are some pictures, and the menu is down below.

The wall behind the gift table was covered with photos from movies and a "Happily Ever After" plaque.


Place settings included a unique black and white movie photo and a mini packet of microwave popcorn.
The popcorn buckets were full of movie candy and dvd movies that we used as prizes for games.


The bridal party at the food table. Bride Moriah on the right, Maid of Honor Noelle on the left and Bridesmaid Julie in the middle. The other Julie wasn't able to attend, due to being in another state. ;o)

We tried to keep the menu simple but yummy.

Meatballs with barbeque sauce
Maple Dip with Honey Wheat Pretzels
Pumpkin Dip with Ginger Snaps
Black Raspberry Dip with Chocolate Pretzels
Veggie Pizza Appetizers (Recipe to come)
Insanely Moist and Decadent Chocolate Cupcakes (Recipe to come)
Pina Colada Punch (Recipe to come)
Iced Water Bottles

We did a quiz that consisted of movie quotes, requiring players to name the movie, and for bonus points, the movie couple. 

We also did the toilet paper bridal gown game. That was great fun. ;o)


Saturday, July 21, 2012

Crockpot Spinach Artichoke Dip

I have a special weekend edition for you! We hosted a bridal shower today, and this was one of the new recipes I tried. It was a huge hit. My daughter Noelle insisted that I send it to our family recipe email account immediately. ;o) One guest said that it was comparable to Applebee's version. Good news, since that was the bride's favorite!


Leni's Notes:
~I mixed this up and refrigerated it a couple of days ahead of time. Being that it was completely chilled, I didn't think it would warm through in 2 hours, so I popped it in the microwave for a couple of minutes first. (Yeah, I used a microwave...lol.)
~This was just enough to fit into our itty bitty 1 quart crock.
~Quartered artichoke hearts are found in the canned vegetable isle. I thought I'd save you the trouble, since I sure couldn't find them!
~We served these with Tostitos Scoops.
~We had a 16 oz container of spinach, and I ended up just throwing it all in. Didn't seem over spinach-y to any of us.

You can find the original recipe at Get Crocked. Looking forward to trying more of her recipes.

  • 2 - 8 oz. packages of cream cheese, (softened)
  • 3/4 c. half and half
  • 1 tsp. onion, finely chopped
  • 1 clove garlic, minced
  • 1/2 c. Parmesan cheese, grated
  • 10 oz. bag frozen cut spinach, thawed and well drained
  • 13 oz. can quartered artichoke hearts, rinsed, drained and chopped
  • 2/3 c. Monterey Jack cheese, shredded
1. Combine the cream cheese and half and half in a bowl until well blended. 2. Add the remaining ingredients and stir well.
3. Pour the mixture into the crock pot.
4. Cover. Cook for 2 hours or until thoroughly melted.

Monday, July 16, 2012

Quality Ingredients

Then there are the days that Leni does not cook. It's going to be in the 90's the next couple of days, and I'm recovering from heat exhaustion, so cooking is not a huge priority for me today! Thankfully, I have some meals stored up in the freezer and my family shall not starve. ;o)

I've been pondering for a couple of weeks the topic of Quality Ingredients. The conclusion that I've come to is that this means different things to different people. Certainly it has meant different things to me during various stages of my life. There are a lot of factors to take in. The amount of money available to spend, what is accessible in your area, culture (both where you live now and how you were raised,) and what you are trying to accomplish.


At this stage of life, my philosophy is to buy the best I can afford, because I want the best quality taste and the healthiest finished product I can manage. That doesn't always mean I can buy the best of the best, I still have a house full of teenagers to feed, and I could go broke just on food! But I can make simple changes like coconut oil instead of shortening, butter in place of margarine, fresh lemonade rather than soda. 

There have been times where due to my health, my major challenge was just to put a meal on the table. Any meal. Anything at all. During those times, I kind of wished I held stock in the Tyson Chicken company, because we were certainly doing our part to support their business! Not what I would picture as health food, but I felt like I made the best choice I could given the circumstances.

In the early years of our marriage, money was the driving factor. Let's face it, there are times when it really doesn't matter what we eat as long as our bodies register it as food!

When we were in Bible College, we had a teacher who had been a lumberjack in Maine in his early years. Mr. Lanpher never stopped being a lumberjack! He was the sweetest man. He used to work for local farmers, and one of the things they let him do was glean the fields. (Are you familiar with that term? They let him go through and gather what the machines had missed, and he could just take the food.) He supplied the students on campus with fruits and vegetables as long as he had them to give. He would stop by my house daily and pound on the wall next to the door so I'd hear him. By the time I got to the door, he was always gone, but there would be a bag full of produce. Money was tight in those days, but we ate like kings. We couldn't really afford meat, but we had a huge pot full of steamed potatoes, carrots and onions every night, with a side of cucumbers and tomatoes. He always kept us supplied with apples, also. Another teacher brought me bags and bags of rhubarb. I'd say we ate pretty well for starving college students!

So when a young cook asks me for tips, I always tell them to buy the best they can afford, and to shop around. You never know where you're going to find that treasure! Living in Western New York, we are blessed with weekly farmer's markets in local towns and the Public Market in Rochester. The last time we were at the public market, we found a company selling spices. I was thrilled to discover that he grinds all of his own spices! No fillers or MSG added. I found Lemon Pepper without food dye in it! "If you want something custom, just call my shop, I'll whip it up for you." The prices were great, the product was top quality. I sure wasn't going to find that at Walmart!

Same thing goes for meat. Honestly, I'd rather have one ounce of good quality meat than a pound of injected meat or additive filled goo. 

My children were raised on a diet free of preservatives, dyes, additives, etc. We did this to handle their ADHD symptoms. Hard? Yes. Beyond hard. But worth it. When they got older and were able to start trying some of the stuff they'd been missing out on for years, they all had the same reaction. "You can taste the chemicals in this. That's all you can taste!"  True enough. ;o)

"Real food tastes real good!"  

Monday, July 09, 2012

Pork Tenderloin with Pan Sauce

I have got to share a recipe with you that I found on Pinterest. The recipe is for Pork Tenderloin with Pan Sauce. We make pork tenderloin all the time, it's somewhat of a convenience food for us. I'm always looking for ways to (literally) spice it up so it's not just humdrum pork again. Nothing humdrum about this! Amazingly, I already had all the ingredients in my house, which I always love in a recipe.

We buy our tenderloin in a vacuum packaged two-pound size. Perfect, because it leaves leftovers for the sandwiches mentioned below. ;o)

Leni's Notes:

~Double the pan sauce, everyone wanted extra of that.
~Do not fall to the temptation to replace the red wine vinegar with apple cider vinegar. (The second time I made it, I didn't have quiet enough red wine vinegar. You could really taste the difference.)
~Suggested side dishes: baked potatoes, egg noodles.
~Veggie: cooked carrots with butter and parsley.
~For a lovely leftover sandwich:
  Butter a roll, and grill the bread.
  Remove the bread and add 3-4 slices of leftover tenderloin. Turn now and then, til warm and browned.
  Place meat on bread, and in same pan, place about a tablespoon of leftover pan gravy. Stir til warm.
  Pour gravy over meat, enjoy.

Recipe:

I linked it above, please do go an peruse the site and see what else Chef Mommy has to offer. I made no changes to the recipe, but the text is here just in case you can't get to that site at some point in the future.

1⁄2 cups olive oil
1⁄3 cup soy sauce
1⁄4 cup red wine vinegar
Juice of 1 lemon
1-2 tbsp Worcestershire sauce
1-2 tbsp fresh parsley, finely chopped
2 tsp dry mustard
Freshly cracked black pepper, to taste
4 cloves garlic, peeled and minced
1 1-lb. pork tenderloin (silver skin removed)

Directions:
Combine all marinade ingredients and reserve 2-3 Tbsp. Place the pork tenderloin and marinade in a Ziplock bag and let marinate for at least 3-4 hours.
 Preheat oven to 350 degrees. In a hot skillet over medium-high heat, sear each side of tenderloin for 2-3 minutes. Place in the oven and cook uncovered for 30-40 minutes or until the meat has reached 160 degrees. Let rest for at least 5 minutes before slicing.

Pan Sauce:
Pan scrapings from pork tenderloin
1/2 cup of chicken broth
2-3 tbsp of pork marinade (thoroughly mixed)
1-2 tsp butter

Meanwhile, place the skillet back on the stove over medium heat. Add the chicken broth and scrape up all the browned pieces from the bottom of the pan. Add the marinade and let it boil down for 2-3 minutes. Add the butter and remove from heat stirring until butter has melted. Pour over the pork tenderloin.

Monday, July 02, 2012

Cayenne Buttermilk Ranch Dressing

Running late, but here I am! I was inspired and cooking today after a week out of the kitchen. I have a bunch of new recipes to share, but I guess I'd better follow through on my promise of Dinosaur Bar-B-Que's Cayenne Buttermilk Ranch Dressing.

This is the dressing they use on the Fried Green Tomatoes, and the House Greens. Turns out they also use it on a couple of sandwiches that I desperately need to go back and try. For research, of course. I'm doing it all for you! (I thought my husband supported my culinary efforts, but he just shook his head 'no' when I mentioned that the Dinosaur would still be open if we left right now...)

So I headed off to the public market last week, got a bunch of spices and came home to create this treat. I started off by making the basic Creole Seasoning, which has since been used on a bunch of different items!


Leni's Notes:
~ Excellent for dipping. I used it in many places that I might have used bleu cheese dressing in the past.
~ If you have a lot of 'dippers' in your family, double up the recipe.
~ If you want it to have a little more zest, you can add in more creole seasoning til it suits your taste.

Recipe, straight out of the Dinosaur Bar-BQue Cookbook:

1 1/4 C mayonnaise
1 C buttermilk
1 Tbsp. red wine vinegar
2 tsp. minced garlic
1/4 C finely chopped chives
1 Tbsp. lemon pepper
1/4 C freshly grated Parmigiano-Reggiano Cheese
1 tsp kosher salt
Freshly ground black pepper
1 tsp. Creole Seasoning

Whisk all the ingredients together in a bowl.
Pour into a container with a tight lid, and store in fridge til needed.

(Makes 2 1/2 Cups)


Wednesday, June 27, 2012

Where's the Beef?!

I am sure that is the cry of my husband and children in recent days. They are coming home to a lot of what we call "at home fast food." Basically, I bought it in a grocery store, but that doesn't mean there's anything particularly healthy or inviting about it.

We've hit one of those seasons, which should be over rather quickly, but in the mean time must be endured. It's the end of the year, and for a homeschool family, that means a lot of things. For this homeschool family, we had a whole lot of time-sensitive things fall into this week.

School Stuff:
~Final Report and Evaluations needed to be written and sent in with test results.
~Letter of Intent and Lesson Plans written and turned in for next year.
(I do it all at once so I'm done for the summer.)
~Noelle's transcripts updated
~Finish planning Seth's graduation party
~Finish prep/host Seth's graduation party

Non-School Stuff
~Moriah's wedding invitations finished, weighed, stamped and mailed
~Shower invitations and registry lists made, addressed, mailed
~Extra work hours since boss is out of town
~Summer Reading program kick off
~Kids are out of school so the library has been inundated with people
(Yes, this is a good thing, but it puts me on overload!)
~Friends visiting from CA (highlight of the week!)
~Orthodontist and Chiropractic appointments
~Baby shower at church

All that to say that sometimes, no matter how badly you might want to feed your family a gourmet organic dinner, they're getting corn dogs!

More importantly, it's ok. No one is going to die from one week of less-than-stellar meals. But you might die from stress if you try to keep up a schedule like I have this week and try to put a four-course meal on the table. Sometimes you just have to let it go and move on. Make the best choices you can, and call it good.

God willing, I'll be back next week with something wholesome and yummy!

Monday, June 25, 2012

Dinosaur Bar-B-Que Creole Seasoning

This weekend, I spent time with some of my favorite people having a meal at one of my favorite places. If you are not so blessed as to live in Western New York, I have possible good news for you. Dinosaur Bar-B-Que is expanding in leaps and bounds, and now has locations all over NY, as well as in NJ and CT. 

For the rest of you, there's always the cookbook, which is what I'm going to be sharing a little bit of. After having some Fried Green Tomatoes and Ribs, I had to come home and make some of the house dressing they use for a bunch of their items. It's a Cayenne Buttermilk Ranch, and it's simply wonderful. But more on that later, because before you can make the ranch, you're going to need some Creole Seasoning, so that's our focus today. 


I highly recommend that you buy the cookbook, and to convince you, I'll share a couple of recipes.

Leni's Notes:
~This seasoning is great for a meat rub also.
~Make a big batch and store it in a sealed container.
~Nice for adding a little kick to any recipe that you just want to liven up a bit!
~I am fairly certain this is the secret ingredient to the broccoli casserole we had at the restaurant a couple of times lately. ;o)

Dinosaur Bar-B-Que Creole Seasoning

1/2 C paprika
1/2 C granulated garlic
1/4 C granulated onion

1/4 C dried oregano
1/4 C dried thyme
3 Tbsp black pepper
2 Tbsp sugar
2 tsp white pepper
2 tsp cayenne pepper
2 tsp ground cumin


Mix it all up, store in sealed container. Makes 2 1/2 Cups.

Monday, June 18, 2012

Father's Day Ribs

I hope you all had a wonderful time yesterday, celebrating the fathers in your life. My own dad passed away seven years ago, and while still miss him like crazy, we had some great moments recounting happy memories of him.

Yesterday was all about my wonderful husband, and so we made a favorite meal for Steve. Orange Chipotle Ribs with corn on the cob and baked potatoes, ice cream for dessert. Really, it's the ideal dinner for Father's Day as I'm fairly certain that my hubby's blood is made of equal parts bbq sauce and ice cream. Technically, I can't call these chipotle ribs, because I don't use chipotle chili powder. I can't find the stuff!

Due to circumstances beyond my control, pie week had to be postponed for a bit. Scandalous, really. We first made the decision to put it off due to some medical restrictions on my part. But then I looked at the upcoming weather for the week and reflected on God's goodness in leading us to that choice. Who wants to bake pies when it's in the 90's? I don't want to do anything when it's that hot, much less cook. (Which reminds me that they are going to want to eat tonight...ugh.)

This is a great recipe that also happens to be gluten free. If you're looking for more great gluten free crock pot meals, check out A Year of Slow Cooking, where this recipe is adapted from.


Leni's Notes:

 ~I used my 18 qt Nesco roaster for this dish--2 full slabs of ribs fit perfectly on the bottom, although I have cooked more and let them overlap.
~I put a rack on top of the ribs, to hold the foil-wrapped baked potatoes.
~Great side dishes include baked potatoes or salt potatoes, corn on the cob, macaroni salad...let your imagination run wild!


The original Orange Chipotle Rib recipe can be found here. Here's the Leni-ized version of this recipe:


Ingredients:

6 pounds ribs (we like pork)
1 cup tomato puree
1/2 cup orange marmalade (preferably without corn syrup)
1/2 cup apple cider vinegar
1/4 cup Bragg's Liquid Aminos
1/4 cup raw sugar
1 tsp Indian hot chili powder (if you use regular chili powder, you'll want 4 tsp.)
1/2 tsp cumin
1/2 tsp ground ginger
4 tsp crushed garlic in olive oil or water

Directions:

Place thawed meat in greased cooker. (Frozen can be used, but you will need to adjust cook time.)

Combine all sauce ingredients, and pour evenly over the ribs. I like to flip the ribs around in there a bit to make sure they are covered well.

Cover and cook 250 for 7-8 hours, to have them falling-off-the-bone done. Sometimes we cook them for 5-6 hours, and then throw them on the grill to caramelize the sugar a bit.

Saturday, June 16, 2012

Confession Time

I had a nice visit with a group of ladies from our church last night. We were at a cooking demonstration,  and my daughter asked a question about how much the demonstrator cooked from scratch. She mentioned that she makes all of her own spaghetti sauce. I casually commented that spaghetti sauce was something I had never managed to master. My friend sitting next to me gasped and looked at me in wide-eyed disbelief. "What? You don't make your own sauce? You?!"  Who knew that I would be the cause of such disillusionment? ;o) 


Yes, it's true. While I'm sure there are many, many things I do not know about cooking, there are two things I know for certain that I am not good at. Spaghetti sauce and beef broth.  


I have never made a beef broth that was in any way palatable. I have followed every recipe, researched the modern wisdom of every Food Network Chef that's out there...I just can't pull it off. Lucky for me, Rachael Ray has done it for me, and after she's gone to all that trouble, it would just be rude to leave it sitting on the shelf!


To be fair, I have managed to make a spaghetti sauce that the family assured me was great, but I didn't think it was spectacular. And for as much work as I had to put into it, it needed to be spectacular for me to want to do it again! I see spaghetti sauce as my back up plan on any given day. When my day suddenly goes out of control and there is no time to cook, I can always open a jar of sauce, boil a pot of water for pasta and take some browned meat or meatballs out of the freezer to make a hearty meal that requires virtually no work. It's my cheater meal. 


So now that my cat's out of the bag, what's your deep dark secret? What stumps you in the kitchen? Is it something you wish you could master, or like me, are you totally fine with never learning how to make it? Leave a comment, let me know I'm not the only one!


Here's hoping that my buddy can get past the shock and still love me. Maybe I'll cook her something to restore her faith in me. 


I would like to thank Classico spaghetti sauce for helping me through my toughest mom days. ;o)

Monday, June 11, 2012

Marinated Pasta Salad

Today in Western New York, it's decided to be summer again. 90 degrees and humid, which means no one will have much of an appetite, and when they do get hungry, they won't want anything hot. This calls for a pasta salad. 

There are so many different recipes for pasta salad, most of which contain mayonnaise. I'm not a big fan of mayo, so I prefer a salad that is marinated in a nice vinaigrette. My current favorite is Brianna's French Vinaigrette. Good stuff, no nasties! (Local friends, you can find it at Wegmans.)

Over the years I have changed up my salad recipe to make it a bit more wholesome, so I can say from experience that this salad tastes good with the cheaper ingredients and the more expensive healthy ingredients. Do whatever works for your pocketbook! When I'm cooking for a large crowd, I tone down the price without sacrificing good taste.


Leni's Notes:
~Nice side dish for grilled meats.
~Holds up well for parties and picnics.
~When you are done mixing, let it sit for a couple of hours in the fridge and then test it again to see if it needs more dressing.
~This makes a nice light lunch, also.

Ingredients:
2 lbs whole wheat pasta of choice (Rotini for us this time)
1 large head of fresh broccoli, cut into small  spears
1 lb block cheese, cut into cubes (Colby-Jack is our favorite)
1 quart grape tomatoes, cut in half
1 (6 oz) package turkey pepperoni, sliced into quarters
1 bottle vinaigrette dressing
1/4 C grated parmesan cheese
Optional: Sliced black olives, chopped raw bell pepper, shredded raw onion

Directions:
~Boil pasta according to directions. During the last minute of cooking, throw the broccoli in. Drain and rinse, and set aside to dry out a bit.
~When pasta is well drained, add in everything except dressing and parmesan.
~Mix well, and add about half the bottle of dressing, making sure to coat all of the pasta well. The dressing amount will vary according to taste, but it's better to go light at first.
~Add parmesan, cover and refrigerate.
~Before serving, taste to gauge the need for more dressing.

Be blessed!
Leni

Friday, June 08, 2012

Birthday Pie

Today's creation was Moriah's birthday pie for her fiancĂ©.  Strawberry Rhubarb looks good, doesn't it?
It is worth noting that she only made one, and we didn't get any of it. :o(  That is not what her momma taught her. I always make enough for an army!


Pie Week Cometh!

You read that right, Pie Week. It's a beautiful thing.

A number of years ago, Father's Day was approaching, and I had no money to speak of for a gift. My hubby wasn't demanding a gift or anything, but he's a great dad and I really wanted to do something to mark the occasion. Well, my man loves pie. An idea was born! And so we had our first annual Pie Week. Every day for one week, he got a different pie. He loved it, the kids loved it. Their friends loved it!

When we started Pie Week, I was a stay-at-home mom. It was not a tremendously big deal to make a pie every day (even though I HATE making pie crust!) One year, I even made two every day. One sweet, one savory. But then the job came along, and my kids started branching out and doing silly things like getting jobs and going to college. Having social lives. Suddenly, it got complicated to make a pie every day! I switched over to pre-made pie crusts, and that helped. Then hubby asked if we could pretty please space out the pies so he didn't go into a sugar-induced coma. Yep, I can make that happen too! So Pie Week has morphed a little bit over the years, but essentially it's still the same: 7 Pies in honor of Father's Day.

I'd love to tell you what is on the agenda for this year, but the Father In Question stalks my blog. I've got some surprises up my sleeve that I don't want him to know about yet! Suffice it to say, you're going to see a lot of pies in the coming weeks. I'm even going to attempt my own crusts again.

There will even be some bonus items, because my soon-to-be son-in-law has a birthday today! Of course, it might be another week before we can all get together to celebrate his birthday, but we shall do it in style when the time comes.

Welcome to the celebration zone!

Monday, June 04, 2012

Pioneer Woman's Iced Coffee

Ahhh, it's that time of year again. That's what I keep telling myself. Despite the high of 65 degrees today, and the black storm clouds that look suspiciously like snow clouds. But the calendar says it's June 4th, and so I am moving forward with my favorite summer treat. Pioneer Woman's Iced Coffee concentrate. 

This stuff is soooo good. Moriah and I are big fans of coffee in general, but especially iced coffee in the summer. With this recipe, all of the guess work is taken out of the coffee/ice ratio, and finally, I can have what I can't seem to get in any restaurant. Decaf iced coffee! Is that too much to ask? I love the coffee, but my heart does not love the caffeine. So I can have my decaf, Mo can have her flavored coffee, our wallets can keep their cash, everyone is happy.

You'll notice over there on the right that I have Pioneer Woman's site linked. I first came across Ree when someone told me about her blogging her story of meeting her husband and making the transition from city girl to ranch girl. I'm a sucker for a good love story, so I checked back every week to get the next installment, and while I was waiting, started exploring other parts of her blog. 

I have to say, as much as I love food and cooking, what really draws me is the personality of the writer. I can get a recipe anywhere, but I love to come across a writer that is just real, you know? I try to be myself in my writing, and hope that it's enough for whoever is reading. I've had my fill of trying to be all things to all people. It doesn't work and stresses you out. When I read Ree's writing, she just seemed genuine. All that to say, I came to her food as a secondary thing. 

Boy, am I glad I found her food! I have been incredibly pleased with all of her recipes that I've tried. One of them even made the cut for my daughter's wedding. ;o)  

Also, for someone who is trying to learn how to cook, Ree's format of photography is terrific! I love that after each step, she shows what it should look like at that point. Great idea for Kids in the Kitchen.

You'll be seeing more here from her in the future, but I'm trying to pace myself, lest I look like a stalker. 

I'm going to link Ree's recipe for Iced Coffee, because it's perfect. The only thing I changed a bit was the gear I used, which is pictured below.


Leni's Notes:
~ I went and bought a brand new dish pan that we only use for coffee.
~ When I first made this, there wasn't a single piece of cheesecloth to be found in four counties. So I bought some new kitchen wash cloths, and we use those for straining the grounds. They get packed up with the dish pan, so they are never used on anything else.
~ We found a nice container that fits in our fridge, Walmart had a ton to choose from.
~ Something you don't hear me say often...don't change anything! Follow her directions exactly!

Click here for Pioneer Woman's Perfect Iced Coffee ingredients and instructions. I'm listing the ingredients here just in case disaster strikes and the recipe disappears!  But if you don't go to her site, you'll miss out on her beautiful presentation.

Ingredients
1 pound Ground Coffee (good, Rich Roast)
8 quarts Cold Water

For Serving:
Half-and-half (healthy Splash Per Serving)
Sweetened Condensed Milk (2-3 Tablespoons Per Serving)
Note: Can Use Skim Milk, 2% Milk, Whole Milk, Sugar, Artificial Sweeteners, Syrups...adapt To Your Liking!

(Adapted from Imbibe Magazine)

In a large container, mix ground coffee with water. Cover and allow to sit at room temperature eight hours or overnight.

Line a fine mesh strainer with cheesecloth and set over a pitcher or other container. Pour coffee/water mixture through the strainer, allowing all liquid to run through. Discard grounds.

Place coffee liquid in the fridge and allow to cool. Use as needed.

To make iced coffee, pack a glass full of ice cubes. Fill glass 2/3 full with coffee liquid. Add healthy splash of half-and-half. Add 2-3 tablespoons sweetened condensed milk (can use plain sugar instead) and stir to combine. Taste and adjust half-and-half and/or sweetened condensed milk as needed.