Showing posts with label Bulk Cooking. Show all posts

Friday, February 21, 2014

Leni's Bread Recipe - Baking in Bulk

Is there any smell better than that of freshly baked bread? Not in my book (although fresh ground coffee is a close second!) 

This is a recipe I developed over the years when we were only eating home-baked bread. There was so much garbage in all of the store brands that I gave up trying to find one that didn't make my kids crazy. 

I ended up investing in a Bosch mixer after burning up numerous stand mixers, and all these years later, I can still say it's the best appliance investment ever. As I started to have more limitations from fibromyalgia and arthritis, I needed to have a reliable machine that could do the heavy kneading for me. This recipe makes 8 loaves of wheat bread, and doesn't even begin to bog down the motor. Makes this mamma one happy camper!

Now that the kids are grown, I rarely have a reason to make 8 loaves of bread at a time, but when I do, it looks something like this...


This time around, I divided it up into 2 loaves of bread, 3 dozen cinnamon rolls, 2 dozen dinner rolls and 2 pizza crusts.

Leni's Notes:
~Scale the recipe back if you don't have a heavy duty mixer.
~If you scale it back to 2 loaves, you can put this in a bread machine on the dough setting, and then remove from machine and bake in two bread pans in your oven.
~A gallon ziploc will hold 2 loaves of dough and it will keep in the fridge for up to a week. You might have to check it for the first couple of hours to make sure it's not continuing to rise, and breaking out of the bag!
~Dough is good for bread, rolls, cinnamon rolls, pizza, calzones, bread braids (sweet or savory) and bread sticks.
~You can replace up to 1/4 of the flour with another grain like whole wheat or oats. I used to get this great 7 grain mix that I used, made for a great texture.
~The wheat gluten is optional, but really does add a nice touch to the bread, better texture and flavor.
~I make this bread mostly from memory, so I apologize in advance if the instructions are incomplete. If anything seems to be missing from the instructions, leave a comment and I will fix it up until it makes sense! ;)

Ingredients:
5 Cups water or milk, warmed (about 80 degrees)
3/4 Cup sugar
3/4 Cup oil or softened butter
1 tsp salt
16 Cups white flour, more as needed
1/4 C wheat gluten, optional

3 T. dry yeast

Instructions:
~Fit attachment for dough making onto your mixer.
~Layer ingredients in the mixing bowl in the order listed, starting with water or milk, ending with yeast.
~Put top on the bowl and pulse the ingredients to start to gently incorporate them without making flour fly everywhere.
~Once combined, set the machine on the setting that kneads well without bogging down. (For my Bosch, that's the "2" setting.)
~Knead for 8 minutes, then let rest until doubled in size.
Note: The Bosch mixer is very efficient, and does not require a second rising. If you are using a different mixer, or working by hand, let your dough rise a second time.
~Pulse again to knock down the dough, then remove from bowl and divide up for use.
~Shape into loaves (or whatever else you are making) and let rise until doubled in size.
~Bake at 350 for 20 min, then remove from pan and place on wire racks to cool completely before packaging.

Blessings from my family bakery to yours,
Leni


Saturday, January 25, 2014

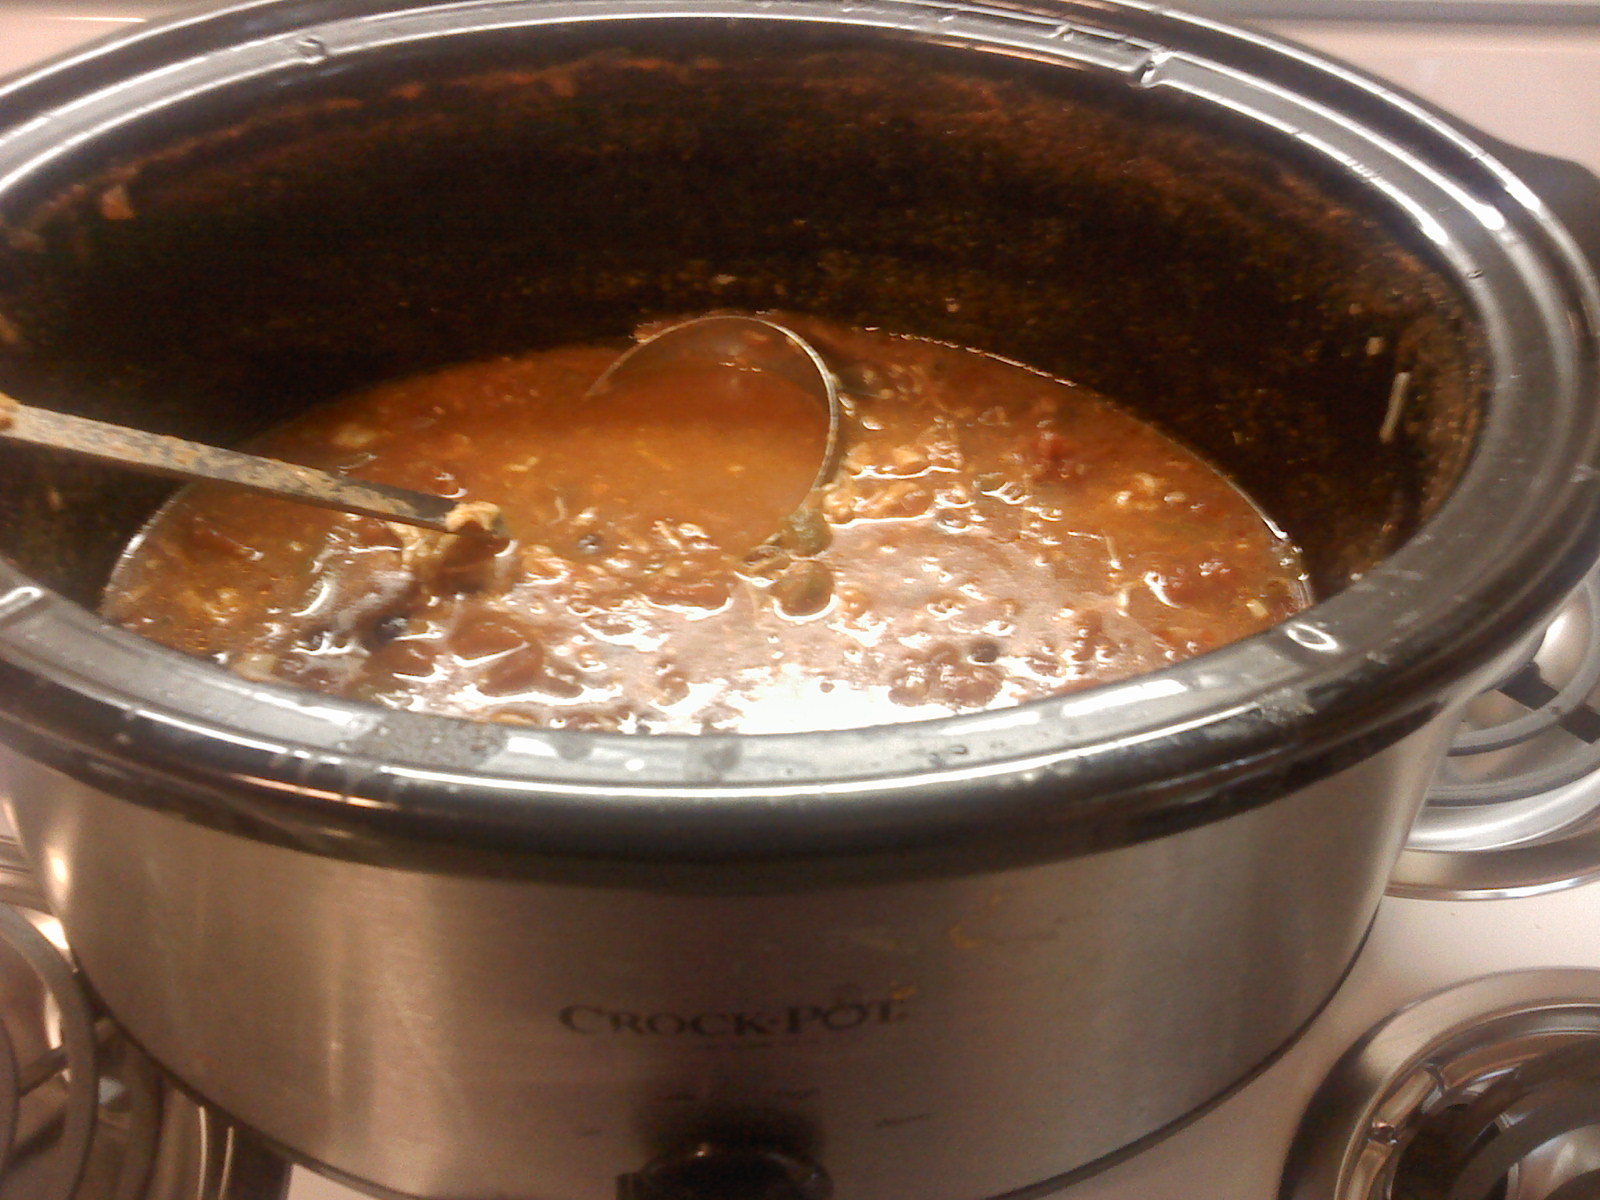
The Long-Awaited Chili Recipe


Yes, indeed, the long-awaited recipe. Not that you've been waiting for it, but I sure have! Over the years, I have tried so many recipes I've lost count of them all. But none of them were just right. They were ok, the family said they enjoyed it, but it just wasn't "it."

Let's face it, if you ask 100 people for their chili recipe, you'll get 100 different recipes. I tried to mimic my favorites, but they were always off on the consistency or taste. I also have to take dietary needs into account. Do you know how hard it is to make chili with no seeds? 

I started a little research project. I polled a group of long-standing online friends, friends I work with on the social committee, favorite cooks, the spice seller guy (who shall from now on be referred to affectionately as "Old Spice", but I'm getting ahead of myself) and anyone else who would listen. I wanted to know if they had a specific recipe, a secret ingredient, something that made their chili stand out in a crowd. Everyone had a different answer, and none of them went together. When I told Old Spice that my chili needed some serious help, he asked, "Well, what kind of chili do you make?" And that's when I realized I missed the most important question. "How do you define chili?" 

After talking with Old Spice for a couple of minutes, we refined my definition, and he recommended a spice blend. I was a little leery, because I'm not fond of mixes and I really hate a recipe that reads, "Open a can of soup, add it to a box of XYZ mix and bake for 7 hours." However, this blend is just right, and he adds NO fillers, no MSG, no nasties. Just pure spices. So I had narrowed down my search.

I took all of the suggestions, and played with recipes until I got the taste I wanted, but the texture was still wrong. My husband likes a good brothy chili, and I just could not find a way to get that without crushed tomatoes, which are full of seeds. But I found a way, and it turned out exactly like we wanted. My husband hid the leftovers so he could have them himself. That's a good sign. 


Leni's Chili with sour cream and slices of sharp cheddar, because I was to tired to shred it.

Leni's Notes:
~The spice blend I'm using is Cool Chili Seasoning from Stuart's Spices in Rochester, NY. It's got a tiny bit of kick, but I can tell you I don't enjoy hot food, and this is not spicy. It is a blend of ground chili peppers, cumin, garlic, oregano and salt. If you don't have the pleasure of living locally, you can order from them, just click on the Contact Us button. Or, mix up your own blend!
~Adjust the meat and bean ratio to your own liking. We like a good amount of protein in ours.
~Turn up the heat accordingly, or leave spices on the table for folks to adjust the taste themselves.
~This can certainly be done on the stove, but it is nice to throw in the crock pot and forget about.
~The amount of masa listed will thicken it slightly, but still leave a very soupy texture. Adjust amount to your liking.
~Serve with some rolls or corn bread.

Ingredients:
32 oz Vegetable Juice (like V8)
2 lbs. ground beef
2 cloves garlic, minced
1 can black beans, drained and rinsed
1 can pinto beans, drained and rinsed
1 small onion, diced
6 large mushrooms, diced
1/4 C Cool Chili Seasoning
2 Tbls masa (corn flour)
salt and pepper

Instructions:
~Brown the ground beef with the minced garlic, then drain.
~Add everything except masa, salt and pepper to the crock.
~Let cook on low 5-6 hours or high for 3-4 hours.
~Half an hour before serving, taste the broth and add salt and pepper to your liking.
~Sprinkle masa over the chili, and stir in.
~Cover and let cook until you are ready to eat.

Blessings to you from my kitchen in the frozen tundra of Western New York,
Leni

Monday, November 11, 2013

Twice Baked Potatoes for the Freezer

Here I am, alive and well! I've been working on revamping my techniques for cooking ahead. Somethings, like lasagna, are really good when you freeze and then thaw and bake. But for the most part, I prefer to have things fresh-made. That does not quite fit with my current lifestyle. ;) 

So I have been filling my fridge and freezer with foods that are prepped for fresh cooking. It's a great time saver during the week. My veggies are prepped, my meat is butchered and brined, broth is frozen...you get the idea. 

Today I worked on a side dish. What you see below is one of the trays of twice baked potatoes that I made today. (I made 2 1/2 trays.) It was a lot of work, but I made enough for 6-8 meals, depending on how many are here for dinner. 


Leni's Notes:
~As I was making these, my family came along and put sloppy joes on top of them. Big hit! I'll have to remember that for later.
~I flash freeze them on these trays, then move them to ziplocs for long-term storage.
~The filling is very versatile. Make them with whatever flavors you like. But I recommend always using the cream cheese and sour cream, otherwise the potatoes tend to get kind of gritty when they thaw.
 ~I mashed mine down because I wanted mine level, so we can add toppings  You could mound it up if you want to. (If you make them level, you'll have extra mashed potatoes to enjoy!)


Ingredients:
10# Russet baking potatoes
1 8oz. block cream cheese, softened
1 lg container sour cream 
1 stick butter
2 tsp black pepper
2 tsp sea salt
2 tsp garlic salt
2 C shredded sharp cheddar
2 -4 Tbls dried chives

Instructions:
~Preheat oven to 350 degrees.(If you're eating them that day.)
~Wash the potatoes, and pat dry.
~Prick the skins, and rub skins with oil. 
~Place potatoes on a foil-lined pan. (I fit all of them on two large cookie sheets.)
~Bake until tender, 1 to 1 1/2 hours, depending on size.
~Let cool until you can handle them, then scoop the middles out, leaving a small layer of potato in the skin.
~Put the scooped out middled in a large bowl, and put the potato skins back on the trays.
~To the bowl, add cream cheese, sour cream, butter, pepper and salts.
~Mash or blend until desired consistency. 
~Mix in cheese and chives.
~Use an ice cream scoop to put filling back into the skins, and mash down. 
~Cover with plastic wrap, and freeze.
~When ready to serve, place desired amount of potatoes in baking dish. (Temp is variable, put them in with whatever you are already making.)
~If putting them in the oven frozen, cover with foil. If thawed, you can leave them open. 
~Bake until heated through and slightly browned. 

Tuesday, July 16, 2013

Meatballs in Bulk

Despite today's scorching heat, I had to do some cooking. By the time we get home from work, no one cares about cooking. Time to restock the freezer so we have some wholesome meals to enjoy again!

This has become my favorite way to do meatballs. I do not have the time or energy to pan fry them, and I don't really care for the texture when they are oven baked. So I cook them in the sauce. I normally use regular sized crock pots, but today I was doing a very large batch, so I used my 18 Qt. Nesco Roaster. My dad got that for me years ago, and I love it! Perfect for bulk cooking (and Thanksgiving turkeys!)


Leni's Notes:
~You can cut this recipe down if you don't want to make such a large batch. As written, this recipe makes 8 - 9 dozen meatballs, with a lot of extra sauce for serving with pasta.
~Next time I do this, I might throw a couple links of Italian Sausage in, just for a little bit different flavor.
~24 meat balls will fit nicely into a gallon sized freezer bag, and lay flat for storage. I throw a couple cups of sauce in, also.
~The original recipe for the meatballs came from this cookbook. I used to have a link for the recipe online, but the page seems to be missing.
~Great with pasta, but my family's favorite is meatball subs. ;o)

Ingredients:

Meatball Mixture:
2 C panko
2 C milk
4 eggs
3 C parmesan
1/4 C dry chopped onion
1/2 C dry parsley
2 tsp jarred minced garlic
2 tsp salt
2 tsp pepper
6 1/2 - 7  lbs lean ground beef

Sauce:
3 jars marinara sauce (I use Wegmans Smooth Marinara)
3 (28 oz.) cans tomato puree
2 C water
2 T oregano
2 T raw sugar
1 T basil
1 tsp garlic salt

Instructions:
~Mix meatball ingredients in a large bowl until evenly combined.
~Mix sauce ingredients in a large bowl, place a quarter of the mixture in the bottom of the roaster.
~Use a standard cookie scoop (about 1/4 cup? Maybe a little less?) to make meatballs uniform.
~Gently drop them into the sauce, so they kind of make craters in the sauce. 
~When you have one layer, cover those with another quarter of the sauce mix evenly over the meatballs, enough to cover them completely.
~Start your next layer of meatballs, and continue on until all meat mixture is used.
~Make sure all meatballs are completely covered in sauce. 
~Cover, set to 250 (or low, if you're using a crock pot) and let cook for 5-6 hours.
~When done, gently stir them to loosen any that have stuck to the sides or cooked together.
~Let cool a bit before packaging.

Blessings from my wonderful-smelling kitchen to yours!
Leni

Monday, July 15, 2013

Filling the Freezer

I admit it, I HATE cooking when it gets hot. I don't even want to eat! Alas, my family insists on eating every single day.

This week I'm working on stocking up the freezer with pre-made meals. That way all I have to do is throw it in a crock pot or the oven and be done.

Here's the lineup:
Meatballs
Twice-baked potatoes
Enchilada Casserole

Today I made 8 1/2 dozen meatballs that are cooking away in my roaster pan. I'll post the recipe later tonight. With only three of us at home this summer (and an occasional drop-in from the newly-weds) these should last us a while.

I also have the VBS closing picnic to put together on Friday. It will be fun to serve everyone. I'm not able to help with VBS during the week this year, so at least I'll get to enjoy the closing program and see what they did all week. My contribution for the week was to make pinatas of their bug mascots. Forgot to take pictures. Whoops. My apologies to those who asked for final results. I'll see if my daughter can get pics before they are destroyed. ;o)

Stay safe in the heat, everyone. This stuff is dangerous.

Wednesday, May 15, 2013

Glory Be, A Day At Home!

Today I had a very rare day at home. I mean completely at home. The kind of day where you only get dressed in case someone comes to the door.

I had a good kitchen day.

Crock pot:
2 pork tenderloins with baked potatoes
8 qts of bean dip (started from dry beans)

Oven/Stovetop:
Double Blueberry Rhubarb Crisp
4 pans of taco casserole for the freezer

I intended to make granola, also, but I ran out of steam!

I'm trying to grab pictures here and there to post later, but it's one of those seasons in life where I'm too busy living to take time to write about it. I'm ok with that. ;o)

Monday, March 11, 2013

Freezer Cooking - Lasagna

My youngest daughter is on Spring Break, so I don't have to drive her to the college this week! I decided to take this opportunity to restock my freezer meals as we are completely out.

There is just nothing like being able to pull a healthy, home-cooked meal from your freezer, pop it in the oven and walk away. I'd like to think this would let me relax for a couple of minutes, but really, it frees me up to go work on something else. I'll take what I can get, though. My schedule is maxed out right now, so any break I can get is worth it.

In case I haven't mentioned it before, I have become a huge fan of disposable steamer trays. These half trays are just the right size for when the whole family is visiting, or when it's our smaller group (with a couple of lunch servings left over.) The foil lids let them stack beautifully in the freezer. When dinner's over, throw them out. ;o) I get mine in bulk at Sam's Club.


Leni's Notes:
~Adjust the recipe to include your family's favorite ingredients.
~Cooking has to be flexible with this one, as there are a lot of determining factors. Was it completely thawed before baking? Partially frozen? Did you have other things in the oven? When did you uncover it? Always check with a thermometer or by poking a metal butter knife in the middle and feeling the temp on the end of the knife. (Very scientific, don't you know!)
~Always put a cookie sheet under these pans. Not only will this save your oven should there be any boil-over, but these pans can be very flexible, and you do not want hot cheese and sauce spilling down your legs. Safety first!
~I know you can buy no-boil lasagna noodles. I personally don't like the result. It leaves all that starch in the finished product and everything tastes gummy. Not a fan.
~When I cook the lasagna noodles, I only partially cook them. (about 3/4 of the amount of time instructed.) When they come out of the water, I rinse them and then layer them between sheets of aluminum foil until I'm ready to use them. This works really well!
~I'm using some convenience items here, but I have found that if you do small things like buy block cheese and shred it yourself, you can make lasagna pretty economically. Everything costs time or money, so it depends on what you have available to spend!
~I am not a fan of chunks in my sauce, so I tend to buy smooth marinara. Feel free to buy your favorite sauce, or to throw in some crushed tomatoes with your marinara.

Ingredients:
2 packages whole wheat lasagna noodles, cooked, layered on foil
3 lbs browned ground beef (give or take) cooked with onions, salt and pepper
6 Italian sausages, cooked, cooled and chopped (optional)
1 (3 lb) container ricotta cheese
3 cups shredded mozzarella cheese
3 eggs
1 cup parmesan cheese
1 Tablespoon each: oregano, basil, parsley
2 ( 24 oz) jars of your favorite marinara
1 (24 oz) jar of water
1 (20 oz) can of tomato puree
2 cloves of garlic
Extra mozzarella for topping


Instructions:
~Combine beef and sausage in one bowl.
~Combine ricotta, mozzarella, eggs, parmesan, oregano, basil and parsley in another bowl.
~Combine marinara, water, tomato puree and garlic in a third bowl.
~Prepare three 13x9 pans with cooking spray or a little olive oil and a pastry brush.
~Start with a thin layer of sauce.
~Follow with layers of: noodles (3 will fit perfectly,) cheese, sauce, noodles, meat, sauce.
~Repeat until all ingredients have been used up.
~Top with extra mozzarella.
~Top each pan with it's lid, seal tightly.
~Label with item name and cooking instructions (including thawing times.)
~Stack neatly in the freezer. (Don't let them tip at all until they are solid frozen or you will have a MESS!)

~When ready to cook, my suggestion is to thaw completely first, then bake at 375 for 1 to 1 1/2 hours.
~I usually bake for one hour with the lid on, then take it off, check for doneness and decide if it needs more actual cooking time, or just a little time to brown the top a smidge.
~Remove from oven when done, and let it cool for 15-20 min. This gives the fluids time to settle a bit before serving.

Blessings from my busy kitchen to yours,
Leni


Monday, March 04, 2013

Crock Pot Best Beef Stew

Be honest. Nothing beats a good beef stew. Especially when it's cooking all day while you're at work, and you come home to that wonderful aroma. It just speaks comfort. Add in some fresh-baked rolls or dumplings and you've got a combo that can't be beat.

The first time I made the stew for a crowd, it was for a VBS closing dinner. Everyone thought I was nuts, making hot beef stew for 150 people in the heat of August. But when you're doing a old-style cowboy themed program, how can you not serve up chuck wagon stew? There were skeptics who said kids wouldn't eat something so grown up. I'm here to tell you, those who came late for dinner were left out, because adults and kids alike chowed down that stew like they hadn't eaten in a week. You just can't beat good home cooking!

Here's the great thing about stew. You make it early, and then you leave it alone. You have to let it cook long and low to get the meat tender and the flavors blended. So when you have a big group to feed, or you just don't want to be fussing in the kitchen while you have company, this is a terrific choice. Start it in the morning and leave it alone until you're ready to serve.

This stew has morphed over the years as I've changed my methods trying to find the easiest way to get the best taste. I *think* have found my final version. Gone are the days of browning the meat and deglazing the pan, which defeated the purpose of the crock pot, which was to make everything easy! Also, no taking time to thicken the gravy at the end, everything is done up front.

Leni's Notes
~This recipe translates well when multiplied for a large roaster pan. However, potatoes do not freeze well, so only make enough to eat up in a couple of days.
~This recipe can be adjusted for budget. If you have less money to work with, cut way back on the meat and load it up with more veggies. Just be careful with carrots (too many makes it sweet) and celery (too many, and all you'll taste is celery.)
~Feel free to buy a roast and cut it up, or even to use browned ground beef if that's what you've got. Because of my work schedule, I don't have time to mess with cutting up meat, so I spring for well-trimmed stew beef.
~A loaf of Italian bread or fresh rolls is a terrific accompaniment for this. Dumplings are even better, but not for a crowd. Save those for the intimate family dinners.
~If you're really in a hurry, and don't have time to make a roux in the morning, just put the ingredients in with the broth, and make the roux later. I like to do it ahead of time, because when I get home, I'm too tired to care. ;o)
~This recipe fits well in an 8 quart crock pot, with enough room to not boil over. Beef stew is the only thing I make that consistently boils over! What a mess. Leave an inch of space in the top of the crock to avoid this.


Ingredients
1 1/2 sticks of salted butter
1 1/2 cups white flour
2 quarts beef broth (Pacific Organic)
1/4 cup dry chopped onions
1 T dry basil
1 T dry oregano
2 tsp garlic powder
2-4 tsp sea salt, according to preference
1 1/2 tsp black pepper
1-2 lbs well trimmed stew beef
4-6 white potatoes, cleaned and cubed
4 carrots, chopped
2 celery stalks, chopped

Instructions
~In dutch oven, melt butter, then whisk in flour, allowing it to cook a little as you mix.
~Slowly add in broth, whisking until all is smooth. (Immersion blender is great for this step.)
~Allow to cook and thicken a bit, stirring to keep from scorching.
~When roux has reached desired thickness, pour into the crock pot.
~Place all remaining ingredients in crock pot and stir.
~Cook on low for 5-6 hours.
~Stir well before serving.
~Enjoy with fresh bread and butter.

Blessings from my cozy home to yours,
Leni

Tuesday, January 29, 2013

Sloppy Joes for the Freezer

Currently Mondays are turning out to be the worst possible day for me to post recipes. Or to cook. To be fair, I don't really have a good day to cook, unless I get to it on the weekends. So I've gone back to my old practice for stocking the freezer. Once a week, I pick one meal to make in bulk and I put 3 of them in the freezer. Right now, my deep freeze has a nice stock of lasagna, enchilada casserole, chicken in gravy and sloppy joes.

Thankfully, my family is willing and able to help out. This goes really well, right up until I get distracted while writing down a recipe. My husband got a huge kick out of today's recipe calling for a good measure of black powder. You know, to give it some kick! lol. It would be fair to say my brain is a bit muddled. 

Today's recipe is a crock pot recipe that freezes well. Two of my favorite things. Not a lot of notes on this one, it's simple, yummy, and makes the masses happy. 


Leni's Notes:
~This recipe serves 3 meals for my family, with leftovers for lunches.
~Tater tots are the traditional side dish in our household. 
~Freeze the leftovers quickly, or your family will eat more than you intended and it won't stretch as far!
~This is also a great meal for kid's parties.


Ingredients
6 lbs ground beef, browned and drained
1 large onion, finely chopped
1 T. paprika
1 1/2 T chili powder
3/4 C brown sugar or raw sugar
6 tsp cumin
6 tsp salt
6 tsp corn starch
3 tsp garlic powder
1 1/2 tsp dry mustard
1 1/2 tsp pepper (not black powder!)
29 oz can plain tomato sauce

Instructions
~Dump everything in a large crock pot (I used my 8 quart.)
~Cook on low for 5-6 hours or high for 3-4 hours.
~Serve over split rolls, with slices of cheddar or colby jack cheese.
~Freeze extras in gallon ziplocs. 

Monday, December 10, 2012

Sweet and Sour Meatballs for a Crowd

Today's recipe is one I used for my daughter's wedding, and a number of times for our Labor Day party when we were using the Luau theme. You can't go wrong with Sweet and Sour Meatballs. Unless of course, there's an abundance of bees, because those little stinkers LOVE pineapple! Our 1st Annual Davis Labor Day Party was almost a disaster because of the invasion of bees. What's worse is that the next day, we pulled leftovers out of the fridge, and discovered bees had burrowed down into them, and were coming out to investigate! I have an admittedly unreasonable fear of bees, so it was kind of a nightmare come true.

I don't have a picture currently, because I took the last of the meatballs to the Christmas Cookie Exchange. ;o) So here's a picture of the wedding party, who is obviously thrilled, because they are finally going to get to eat meatballs! 


This recipe is insanely easy. You can make it difficult if you want to, by making your own meatballs. If you want to do that, I suggest the Meatball Evolution recipe.  That said, I find meatballs to be a pain in the tuckus to make! They just don't last long enough for the amount of work they take. I only make them if I need them for someone who can't do all the fillers in store-bought meatballs. So, unless you need a specific menu, buy the frozen ones, and throw this sauce over them in the crock pot. 

Leni's Notes:
~This more than filled our 18 quart roaster. This will do the roaster REALLY full, pluse a crock pot or two. Or better yet, get two roasters, and fill them both about half way so you have room to stir.
~If you're not having a wedding reception for 200 people, maybe cut the recipe down a bit. ;o)
~If you want to make a meal of this rather than appetizers, serve with rice or egg noodles. Wonderful. 
~If you have extras, they freeze really well, which makes for a quick dinner on busy nights.
~Not that it effects the flavor, but if you have a variety of bell peppers, the red, orange and green look beautiful on the plate.
~When I originally made this, it had soy sauce in it. (I used Bragg's Liquid Amino Acids.) It adds a nice fullness and cuts the sweetness, but as so many have trouble with MSG and soy, I just decided to leave it out.

Ingredients:
2 cups cornstarch
8 cups brown sugar
16 (15 ounce) can pineapple chunks, juice reserved
5 & 1/3 cup vinegar
6 chunked and seeded bell peppers
(Optional - 1 Cup soy sauce)

Instructions:
~Place meatballs, drained pineapple and chunks of green pepper into the roaster pan.
~Stir the cornstarch and brown sugar together in a saucepan and place over low heat.
~Add the reserved pineapple juice and vinegar; stir until smooth.
~Bring the mixture to a boil; pour over the meatballs in the slow cooker. 
~Cook the mixture in the slow cooker on low until the flavors are thoroughly combined, 3 to 4 hours. (If you do the big roaster, you might need more time, especially if the meatballs are crowded together.)

Blessings from my kitchen to yours,
Leni


Monday, October 22, 2012

Shredded Chicken for the Freezer

My life has been hectic lately. Crazy, even. As much as I love to cook, I am rarely home to do so, and it makes me long for my stay-at-home-mom days. Honestly, I love having a day to spend in the kitchen. Probably why I love Thanksgiving so much. One day of the year set aside for  cooking more food than a house full of people could consume in one day! Bliss!

With my free time so very limited I've been challenged to find ways to still put home-cooked meals on the table with about 30 minutes to prep. The real challenge has been to find a way to pre-prep the food without losing any of the quality. Some veggies lend themselves well to pre-slicing, some side dishes can be made ahead and warmed, but the real stinker is meat.

I'll admit, I am picky about meat. I like a good cut of meat to begin with, and I can't stand meat that has that 'old' taste to it. Whether it's from sitting in the fridge or from freezer burn...I just can't stomach it. So what's a girl to do when she does not have the time to stop by the market every day to get fresh meat?

I have finally found my answer when it comes to chicken! It's been a lot of trial and error, but I found the method that produces a good post-freezer result.

I started off by getting four good roasting chickens. In the picture below, you'll see all four in one pan, but for roasting, I split them into two pans, so they weren't crowded.


We cooled them completely, and then I set Noelle to work on getting every bit of meat off of them that she could. (She has requested that next time we do two chickens at a time. ;o)

Once she had all the meat off the bone, I started making gravy. Now you could just do chicken broth, and if you're going to use the chicken in something non-gravy based, that's a good option. But for quality purposes, I really prefer the gravy method. Broth freezing was ok, but the meat texture was better with the gravy. (Gravy recipe below.) 

I made enough gravy to just cover the chicken, mixed it up and let it cool down a bit. Then we packaged it up in gallon size freezer bags. (Be sure to label and date your freezer food...no one wants to play the "How Long Has This Been In Here?" guessing game!)

Here's what we use this chicken for, usually in the crock pot.
Chicken and biscuits
Chicken Pot Pie
Chicken Noodle Soup (add more broth) 
Chicken/broccoli/stuffing casserole
Chicken and Mashed potatoes
Chicken Stew (with dumplings, yum!)

Gravy Recipe (May take more than one batch, depending on how much chicken you have)

1/2 C Butter
3 Tbsp bouillon concentrate (Better than Bouillon is my favorite)
1/2 C Flour
2 Quarts water

Melt butter and bouillon, slowly incorporate flour until smooth.
Cook, stirring constantly for about one minute.
While whisking, begin to drizzle in water, pouring slowly until all water is added. 
Continue to whisk til smooth, stir until it starts to thicken.
Remove from heat, and it's ready to use.

Hope this is useful for you. I have been delighted many times to open the freezer and find that my dinner issues were solved because I'd already done the work!

Blessings from my kitchen to yours, 
Leni

Tuesday, October 16, 2012

Chicken Salsa Soup

Cold weather is upon us! Fall is here, but that air has a decidedly Winter bite to it. I was inspired by some soup recipes I found on Pinterest this week, and decided to stock up my freezer with some lunches for my husband. As you can see from the half-empty crock, I had to work fast on getting it into the freezer, because everyone was eating it!

I started out following someone else's recipe, but by the time I finished, it in no way resembled the original, so I'm giving it it's own name. The soup doesn't actually call for salsa, but it gets kind of a salsa vibe since you're using a lot of the same ingredients.


Leni Notes:
~This recipe filled an 8 qt. crock pot, we got 12 good-sized servings out of this.
~A nice crusty bread or grilled garlic bread would be a nice accompaniment. 

Ingredients:
6 Cups water
4 raw chicken breasts
2 (30 oz) can diced tomatoes
1 (30 oz) can black beans
1 Cup tomato paste
1 (4 oz) can diced jalapeños 
1 green bell pepper, diced
1 large onion, diced
6 tsp Chicken Better than Bouillon base or 6 chicken bouillon cubes
4 tsp chopped garlic (equivalent of 8 cloves) 
4 tsp cumin
4 tsp chili powder
1/2 tsp cayenne powder
8 oz. Pepper Jack cheese, shredded

~Place all ingredients in crock, except for the cheese.
~Cook on low for 8 hours.
~Pull chicken out, and place on plate. 
~The chicken will shred very easily, shred and place back into crock.
~Sprinkle cheese over the top and mix in.


Wednesday, October 10, 2012

Cocoa Cones for a Crowd (Wedding Favors)

What's this? A recipe post on a Wednesday? What can I say, I thought I'd throw caution to the wind. Plus with holidays, and soccer games, most of the time I have no idea what day of the week it is. Speaking of soccer, last night I about froze to death at my daughter's soccer game. Which made me think of how badly I wished we'd brought hot cocoa. And then I remembered the left over cocoa cones I had at home. 

For our daughter's autumn wedding, we decided to make Cocoa Cones. These were fun to make, and I love how they came out. 
The finished product on the table. A lovely family from our church added the final touches to our cones.


First we had a bunch of Moriah's childhood friends over to make the cones. Great fun!


Cocoa cones can be made for any event, as they are so easy to personalize. They can also be made in a variety of flavors and would be great for kids to make for gift giving at Christmas. We made ours into a fall theme by adding fall leaf sprinkles. My daughter then gathered a bunch of her favorite quotes on love and marriage to add to them. One side has the quote, the other has the cocoa directions and the couple's names and wedding date.

 I scaled the recipe back a little bit, as we made these for 200 people. Also, even if you're making them for 200 people, good luck with finding a container big enough to mix it all in at one time. And I have really large containers!! I saw a suggestion with one of the 1,000's of recipes I read, to mix it all in a garbage bag. I really didn't want the plastic taste added to it, but I suppose it's worth a shot if you wanted to do it all at once.

Leni's Notes:
~If you're making these in bulk, like we did, it will save you a lot of money to order the container supplies online. We bought our supplies for this and the cheesecakes at the WEBstaurant Store. Shop around, you might find better prices yet!
~Each of these cones makes 2 servings, or one really big serving!
~The cocoa portions stores really well, but if you're making them way ahead of time, hold off on the marshmallows until closer to the date. They can get a little stale.
~For flavor variety, try different flavored coffee creamers or add some instant coffee to the mix.
~ Also, to the powder mix, you can add cinnamon or ground red pepper, depending on your tastes. ;o)
~I highly recommend trying a cup of the cocoa before packaging to be sure you like the flavor. You might decide to adjust the cocoa or sugar content.
~If you are looking for decorating ideas, do a Google Image Search for Cocoa Cones.

Supply list:
Plastic cake decorator bags (2 bags for each cocoa cone.)
Closures for the bags (2 for each cone) - we used small zip ties. You could use twist ties, rubber bands, etc.
Sprinkles (optional, but really cute!)
Decorations (we did printed tags with colored ribbon. Whatever fits your theme.)

Ingredient List for 45 Servings:

3 Cups cocoa powder
6 Cups granulated sugar
10 Cups instant dry milk
2 Cups dry coffee creamer (plain or flavored)
Mini Marshmallows (1/3 Cup per cone)
Optional: flavored chips to add to the marshmallows. (Chocolate, peanut butter, butterscotch, etc.) or crushed hard candy, like candy canes.

In a large bowl, mix the cocoa powder, sugar, milk and creamer together.
Take half of your decorator bags and fill each with 2/3 C of dry mix.
Twist the top to push down the mix and close it off.
Seal very tightly with a zip tie. (We cut the extra off.)
Trim the plastic to about a half inch.
Place each filled decorator bag inside another bag.
Top with marshmallows, sprinkles (1-2 tsps) and chocolate chips.
Twist closed without smashing the marshmallows, seal with another zip tie.

Add your decorations and instructions (1/3 Cup mix with 3/4 Cup boiling water.)

Blessings from my kitchen to yours,
Leni


Monday, September 24, 2012

Mini Pumpkin Cheesecakes for a Crowd

Finally, I get to share some wedding recipes with you!

I made a lot of these. 200 pumpkin cheesecakes...I was swimming in cheesecakes! lol

This was what we put on our cupcake tower for the wedding. They really were not terribly hard to make, and once you get the process going, it goes quickly. These would be great for Thanksgiving or Christmas, also. They freeze wonderfully, and my older kids have discovered they like them straight out of the freezer like a pudding pop. (Remember those?)

Because I was making so many of them, I bought 3 oz paper cups to bake them in. These are the type that stand straight up, and don't spread out when you fill them. I had to order online to find them, but they were worth it.

I played with this recipe for a while before I found just the right dimensions. I hope you enjoy!

Fresh out of the oven.

On the cupcake tower at the wedding.
Leni's Notes:
~Baking times will vary, but lean toward undercooked rather than over cooked. If they over cook, they get really dried out.
~Remember that when it comes to cheesecake, less is more with the mixing. You want to just combine your ingredients, without incorporating a bunch of air into it. Over beating will also give you a tough texture.
~These can be dressed up with whipped cream and a sprinkle of cinnamon or a drizzle of caramel sauce.
~They freeze well, but if they get thawed and refrozen, the cookies will go to mush.
~You can make these gluten free by leaving out the gingersnap, however without it, you will not get a nice level surface. Without the cookie, they tend to sink in a bit.

Mini Pumpkin Cheesecakes for a Crowd
This recipe makes 3 dozen servings.

4 (8 oz.) packages of cream cheese, softened (Full or low fat, don NOT use fat free)
1 1/2 cups sugar
4 eggs
32 Gingersnap cookies (one box is usually enough)
32 paper baking cups
1 cup pumpkin puree (not pumpkin pie filling)
1 tsp cinnamon
1/4 tsp freshly ground nutmeg

Beat cream cheese and sugar together.
Add eggs one at a time, beat just until smooth.
Add pumpkin and spices, beat just until combined.
Line cupcake pan with liners. Place a gingersnap flat side down in each liner.
Fill with cream cheese mixture, leaving about a centimeter clearance at the top.
Bake at 375 degrees for 15-20 minutes.
Allow cheesecakes to cool and store in the fridge or freezer.
To serve: Remove from freezer, but keep chilled until ready to serve.

Tuesday, August 14, 2012

Crockpot Enchilada Casserole

First, an apology for the delay with this week's post. I fear as the wedding gets closer there may be more instances of this happening. 24 days to go!

Now I know that the picture below might cause confusion. I admit, I am recycling my photos! Today I'm sharing the recipe for the casserole that uses the sauce I posted last week. 

Who doesn't love an enchilada? Who loves taking the time to roll each enchilada? Always looking for a way to speed the process, we developed this crock pot casserole. It's cheap, it's filling, and if you've got a household full of teenagers, they will leave the table satisfied and not be back in 10 minutes claiming hunger again.

When we go camping (in a cabin, I do not do tents any more!) I make these either in the crock or in individual servings in foil cake pans. They can be popped in an oven or over coals to cook. I make them ahead and freeze, just thaw before cooking. 


Leni's Notes:
~Very versatile, feel free to change up the ingredients. Pick and choose from the lists below. Go wild and throw in whatever floats your boat!
~This can be done in the oven also, it's very much a "cook until done" recipe. When the cheese is melty and starting to brown, it's done.
~This is a terrific meal to keep in the freezer for those occasions when you want to send a meal to a friend who is laid up or for those nights when you just didn't have time to pull dinner together.

Ingredients
(for an 8 qt crock pot)

1/2 recipe of enchilada sauce (link above)
1 package whole wheat tortillas
1 large can fat free refried beans
2# browned ground beef
Shredded cheddar
Sour Cream and Salsa for serving

Instructions

~Grease your cooking container of choice
~Spoon some sauce into the bottom of the container
~Combine the refried beans with some enchilada sauce to make it easier to spread
~Combine the meat with some enchilada sauce to make it easier to spread
~Layers:
Tortilla
Meat mixture
Cheese
Tortilla
Bean Mixture
Cheese
~Repeat until your cooking container is full, ending with tortillas
~Top with a good healthy dose of sauce, so it runs down in and saturates the casserole.
~Sprinkle some cheese on top, cook until done. (It can handle high for 4-5 hours, if it's going to be on longer than that, cook on low.)

Serve with sour cream and salsa.

It's not pretty to look at on the plate. My kids say that just scares off the people who don't know any better, leaving more for them. ;o)

Alternate Ingredients
Whole canned beans (black, pinto, navy...)
Rice (makes a great filler for stretching a budget!)
Grilled chicken (or leave the meat out altogether)

From my home to yours, enjoy!


Monday, August 06, 2012

Enchilada Sauce

The inspiration for today's recipe comes from my favorite California resident, Jeanette. She shared her recipe for enchilada sauce after I complained about how much it cost to buy it in those little cans. Her recipe tasted so much better than the store bought! 

Jeanette is a homeschooling friend from across the country. After years of sharing parenting advice and recipes with me, I finally got to meet her when hubby's company sent us to CA for a week. I can't tell you what a treat it was to meet some of her family and go explore Santa Monica Pier and the Promenade with them. Definitely the highlight of my trip. Now I can't call her an imaginary friend any more. ;o)

Pictured below is the finished product of our Crock Pot Enchiladas. I'll be posting that recipe next.
I made minor changes to Jeanette's recipe suit our family's tastes and to make it into a bulk recipe. Notes below. 


Leni's Notes:
~When we make enchiladas, they go fast, so we always make a huge batch. Hence, this sauce recipe is a quadruple batch.
~The resulting sauce will freeze well in casseroles, but I wasn't crazy about the texture if we just froze the sauce.
~This works great with gluten free flour and regular flour, so adjust to fit your needs.
~As written, this will give a mild heat to your dish. If you like things spicier, add in more chili powder at the end to reach your desired taste.
~Makes 12 cups

Ingredients:
1/2 C oil
1/2 C flour (white, rice, GF blend - they all work)
1/2 C chili powder
32 oz tomato puree
8 C water
1/2 C dry, minced onions
4 tsp salt
2 tsp cumin 
1 tsp garlic powder


Instructions:
Heat oil in dutch oven. When oil is hot, add in flour and chili powder, whisking to combine.
Continue to heat mixture, whisking regularly, for about one minute.
Add the rest of the ingredients, bring to a boil and simmer for 10 min., stirring occasionally.
You can start making enchiladas at this point or cool and store in the fridge until ready to use.

Enchilada Casserole recipe to come next week!