Showing posts with label Party Food. Show all posts

Tuesday, July 16, 2013

Meatballs in Bulk

Despite today's scorching heat, I had to do some cooking. By the time we get home from work, no one cares about cooking. Time to restock the freezer so we have some wholesome meals to enjoy again!

This has become my favorite way to do meatballs. I do not have the time or energy to pan fry them, and I don't really care for the texture when they are oven baked. So I cook them in the sauce. I normally use regular sized crock pots, but today I was doing a very large batch, so I used my 18 Qt. Nesco Roaster. My dad got that for me years ago, and I love it! Perfect for bulk cooking (and Thanksgiving turkeys!)


Leni's Notes:
~You can cut this recipe down if you don't want to make such a large batch. As written, this recipe makes 8 - 9 dozen meatballs, with a lot of extra sauce for serving with pasta.
~Next time I do this, I might throw a couple links of Italian Sausage in, just for a little bit different flavor.
~24 meat balls will fit nicely into a gallon sized freezer bag, and lay flat for storage. I throw a couple cups of sauce in, also.
~The original recipe for the meatballs came from this cookbook. I used to have a link for the recipe online, but the page seems to be missing.
~Great with pasta, but my family's favorite is meatball subs. ;o)

Ingredients:

Meatball Mixture:
2 C panko
2 C milk
4 eggs
3 C parmesan
1/4 C dry chopped onion
1/2 C dry parsley
2 tsp jarred minced garlic
2 tsp salt
2 tsp pepper
6 1/2 - 7  lbs lean ground beef

Sauce:
3 jars marinara sauce (I use Wegmans Smooth Marinara)
3 (28 oz.) cans tomato puree
2 C water
2 T oregano
2 T raw sugar
1 T basil
1 tsp garlic salt

Instructions:
~Mix meatball ingredients in a large bowl until evenly combined.
~Mix sauce ingredients in a large bowl, place a quarter of the mixture in the bottom of the roaster.
~Use a standard cookie scoop (about 1/4 cup? Maybe a little less?) to make meatballs uniform.
~Gently drop them into the sauce, so they kind of make craters in the sauce. 
~When you have one layer, cover those with another quarter of the sauce mix evenly over the meatballs, enough to cover them completely.
~Start your next layer of meatballs, and continue on until all meat mixture is used.
~Make sure all meatballs are completely covered in sauce. 
~Cover, set to 250 (or low, if you're using a crock pot) and let cook for 5-6 hours.
~When done, gently stir them to loosen any that have stuck to the sides or cooked together.
~Let cool a bit before packaging.

Blessings from my wonderful-smelling kitchen to yours!
Leni

Monday, April 01, 2013

Peanut Butter "Tandy" Cake

I have had this recipe for Tandy Cake floating around my cookbook shelves for many, many years. I had no idea where it came from, but assumed that it came from my girlfriend who's last name is Tandy. Makes sense, right? So I let her know that I had made some changes to it, and asked if it would be ok to share it on my blog. Her response? "That's not my recipe, I'm allergic to peanut butter!" What?!

So she quickly did some investigating and we discovered that the recipe is a knock of recipe for a store bought snack cake. Who knew? Seems that everybody and their brother has their own version of a Tandy Cake recipe. Hmph.


Well maybe they do, but do they have a model as adorable as mine? The little missie pictured above is enjoying a piece of my Tandy Cake. She prefers to first bathe in her cake, and then when it's well seasoned, eat it up. My husband took this picture. He kind of adores this little lady and the glint that's always in her eye. I think they are kindred spirits. Apparently during this process, someone tried to wash some of the chocolate off of her face. One observer said that she got kind of an insulted look on her face, and carefully filled in the clean spots with chocolate (by rubbing the cake on her face) until she was in 'full makeup' again. I think she should model all my food from now on!

This recipe is really fast to whip up, and makes a huge batch. Wonderful for a houseful of company or a back yard full of kids. I made it for a dessert fellowship at church.


Leni's Notes:
~Traditional Tandy Cake knock offs have a layer of peanut butter and then melted chocolate is poured on top, making a hard chocolate layer. We really didn't like it that way. This version gives it more of a soft almost peanut butter fudge layer on top.
~I also made a version with dulce la leche and hot fudge. ;o)
~I am now dying to make a version with coffee in the cake batter and/or maybe a salted caramel topping. I see myself headed back to the kitchen very soon.
~Travels well, doesn't get stale quickly, so I also making it as a snack of the week type item. 

Ingredients:
4 eggs
2 cups sugar
2 cups flour
1 cup milk
2 tsp. baking powder
2 tsp melted butter
2 tsp vanilla
2 cups creamy peanut butter
2 bags (4 cups) chocolate chips

~Combine everything except peanut butter and chocolate and mix well.
~Pour into a greased jelly roll pan and bake at 350 degrees for 30-35 minutes.
~Take out of oven and put dollops of peanut butter all over the surface.
~Let the peanut butter warm for a couple of minutes, then spread evenly over surface.
~Immediately sprinkle top of cake with the chocolate chips.
~Let sit until the chips are all melting (you'll notice a subtle change in color.)
~If time has elapsed for some reason and the cake has cooled too much to melt the chips, pop it back into the hot oven for a minute or so.
~Spread the melted chips over the peanut butter, and let the two ingredients swirl together.
~Let cool at room temperature.
~Cut into squares and serve with a glass of milk. ;o)

Blessings from my peanut butter-covered kitchen to yours,
Leni

Monday, February 04, 2013

Peppermint Ice Cream Cake

Ice Cream cake? In February? In Upstate NY? No, I haven't lost my mind, it was a special request from my daughter.


Yes indeed, this weekend we celebrated my baby girl's sixteenth birthday! 


Isn't she beautiful? More importantly, she's got a beautiful spirit.  My baby is growing up. *sniff, sniff*  To mark the special occasion, I made her a cake I first made over 20 years ago for her big sister's first birthday. Come to think of it, that might have been the last time I made it!

We had planned a day of shopping with the Thrift Store Teen Queen, but the snowy weather kept us from leaving town.  So instead, we stayed home and ate ice cream cake, of course. ;o)

Leni's Notes:
~While my family loved the way I made the peppermint layer, I think if I make it again, I will cut down on the amount of peppermint patties. Only because it makes it kind of chewy when it's frozen. I seemed to be the only one who noticed.
~This will fit into 2 13x9 pans or one larger pan.

Ingredients:
2 containers chocolate sandwich cookies (Oreo type)
1 half gallon chocolate or vanilla ice cream
1 regular sized bag of York Peppermint Patties
1/2 - 1 Cup cream
2 T coconut oil (You could use shortening if you need to)
4 C whipped cream

Instructions:
~Crush cookies in a plastic bag, and place into the bottom of the pan, reserving a cup of crumbs.
~Slice or scoop ice cream and put on top of the cookies.
~Let the ice cream melt over the cookies while you make the chocolate sauce. (Not completely to liquid, just til it's soft enough to push down over the crust.)
~In a double boiler, place the candies and oil, and turn on the burner to medium. (I break the candies up a bit.)
~As they start to melt, add in the cream, and stir occasionally.
~When the sauce is smooth, dump the hot water out of the double boiler and set the sauce aside to cool a bit.
~While the ice cream is melting, press it down over the cookies.
~Drizzle peppermint sauce over the ice cream, reserving about half a cup.
~Cover with whipped cream.
~Lightly drizzle with remaining sauce, then sprinkle cookie crumbs over the top.
~Cover with plastic wrap, and place on an even surface in the freezer.

~When ready to serve, remove from the freezer half an hour before cutting.

Blessings from my kitchen to yours,
Leni

Sunday, January 06, 2013

Sausage Stuffed Mushrooms

New Year's Eve has come and gone, and somehow I never managed to get here to post my recipe. My apologies. Had the family home all week with no work (for them, anyways) or school and we tried to just enjoy. 

So, this was my first attempt at Stuffed Mushrooms. I think it could use some tweaking, but my family said to leave it alone. Hmmm. I shall post it as it was prepared. ;o)


Leni's Notes:
~These were great to make ahead and then refrigerate just before the baking step. Nice for a party, so you can get the work done a day or so ahead of time.
~This version did not have a lot of extra fluid (which I happen to think it could have used, but I digress.) They weren't sloppy to eat. Again, good for a party.
~I used mild sausage, feel free to kick it up with hot sausage.
~Ingredients I would consider adding next time: reconstituted dry onion, 1/2 tsp garlic powder, 6 minced mushroom stems.

Ingredients:
4 links of Italian sausage, cooked and refrigerated until completely cooled.
32 oz package of baby bella mushrooms (I used Wegmans Food You Feel Good About)
10 oz (give or take) chopped spinach, thawed and drained
1 Cup panko bread crumbs
1/2 - 3/4 Cup shredded parmesan
1-2 Tablespoons lemon juice
Salt & Pepper to taste

Instructions:
~Place cooled sausage in food processor and mince until it has an even crumbly texture.
~Pour into a larger bowl, and add spinach, panko, parmesan, lemon juice, salt and pepper.
~Thoroughly mix ingredients.
~Wipe off mushrooms, and remove stems.  (save the stems to add to another recipe.;o)
~Grease baking dish.
~Place a mushroom cap in the palm of your hand, and pack the filling in until it resembles a golfball.


~Bake at 450 degrees for 20-25 minutes, until browned.

Leftovers warm up well. ;o)

Blessings from my kitchen to yours, and Happy New Year!
Leni


Saturday, December 22, 2012

A Day in the Kitchen Preparing for Christmas

The day has arrived. My self-imposed deadline for all Christmas cooking. The next three days are going to be back-to-back Christmas celebrations, and I don't want to be having to leave parties early to go home and get ready for the next party!

So, I made huge mountains of Pioneer Woman's Cinnamon Rolls on Thursday, and have already begun distributing them to teachers, pastors and other folks on our list.

Yesterday I made two super-secret gift desserts for my kids. (I'll fill you in later on those!)

Today's list:

5 Layer Mexican Dip for teen party tonight

Another couple dozen cinnamon rolls to take to my family's big Christmas bash Sunday afternoon.

Applesauce and Pumpkin Pies for Chirstmas Eve Brunch with the inlaws.

Zuppa Toscana for family gathering here at home after church on Christmas Eve.

Veggie Gratin and Scalloped Pineapple for Christmas Day at my mom's.

Orange cookies if I still feel up to it. So probably not. ;o)

It's going to be a long day, but when all is done I can just relax. Ooh, or I could wrap Christmas presents! oy. I used to do them Christmas Eve until the year I spent tilt he wee hours of Christmas morning in the ER checking for broken ribs. (An enthusiastic toddler and wrestling can end very badly sometimes.) When we finally got home with a diagnosis of badly bruised ribs and orders for me to rest and not lift anything for the next 48 hours, we still had all the presents to wrap! My poor husband. lol.

Off and running! Hope your holiday planning is coming along swimmingly, and that you enjoy this season with your family. When the chaos overtakes you, remember that we're celebrating the Savior's birth, and try to relax and love on your family!

Blessings from my chaotic kitchen to yours!
Leni

Monday, December 17, 2012

Tiramisu Inspired Dessert


Let me tell you a story about my attempt at Tiramisu.  

I wanted to do something special for my hubby for our 21st anniversary. As it would happen, my dearest friend in the world was also coming into town, and bringing her Prince Charming with her. So now the celebration morphed into an Anniversary/Woohoo-Karen-got-the-job/Happy-Birthday-to-Matt type of thing. This calls for something big! Something I've never done before. Something everyone loves. Tiramisu. 

Have you ever looked at recipes for this lovely dessert? If you look at one, you might be doing ok. If you look at more than one, you can be sure that none of the recipes will agree with each other and your head will start to swim with all of the ingredients and instructions that each person insists you MUST DO to be authentic! Eggs, no eggs. Raw eggs, or cooked eggs? Rum, Amaretto, Marsala? No alcohol at all! Lady Fingers? No, pound cake! Marscapone or cream cheese? Both? Only use Espresso! Just use coffee!

I gave up on authentic before I even began. In fact, I gave up on recipes. I decided to ditch it all and just wing it, making my own recipe. I hesitate to call this Tiramisu, because I'm sure purists would stone me or something. It might be well deserved. So we're going with Tiramisu-inspired.

I nervously gathered my ingredients and immediately ran into problems. Not just any problems, Baptist Girl problems. (BGP) The original recipe called for alcohol of some sort. I am not strictly opposed to alcohol, and actually like to use it for cooking. I happen to have an inherited bottle of amaretto, and was excited that I could use it for this. My BGP was not a conflict over using alcohol, it was a struggle over opening it. I couldn't get the top off! It's been a couple of years since I baked anything with it, but I'm reasonably sure I didn't have this kind of trouble before. I called my daughter to help me. The first thing she said was, "WHAT are you doing with that bottle, missy?!" She's a funny girl. Alas, even my muscle-bound teenager couldn't get the top off, so I dismissed that idea and moved on. So much for Plan A.

Rum extract! Not ideal, but it would help the flavoring. Do you think we could find even a drop of rum extract?? I know for a fact that I have at least 2 bottles floating around somewhere. But it was definitely not on the shelf full of extracts where it belonged. Good-bye to Plan B.

Plan C involved a total reworking of the recipe I had in mind, but I think it worked. I would not serve it to someone who was an expert on Tiramisu, as it would likely be a huge disappointment to them. But I don't think anyone will spit it out in disgust. (There were moments I thought that might be a possibility...)

So, below you will see the recipe for my final attempt. Should you try it, I'd love your feedback. Especially if you have tasted the real deal. I'd like to know how close I got. ;o)


Leni's Notes
~This made a 13x9 pan, there was enough filling that I probably could have made another smaller dish, but I just layered up extra filling. 
~Other than making coffee, there's no cooking involved in my version.
~I feel like this would freeze really well. I might save a piece and try it, it would make a terrific dish to make ahead for the holidays, and then just pull out to thaw the day of.
~Don't yell at me for doing it wrong. Remember, Tiramisu Inspired.
~Budget played a roll in my choice of ingredients. If you've got money to spend and want to go for marscapone instead of cream cheese, go for it! 
~Having now served the tiramisu, I can say that next time I would definitely use at least half marscapone, if not all.
~This one took a bit more time than I usually spend on a recipe. I think it would go faster with experience, but for a no-bake recipe, it took me a while. Probably all the decision making I was doing along the way.
~This plates beautifully! I served it with coffee. A lovely night was had by all.

Ingredients
2 Cups of Decaf Espresso or strongly brewed coffee, cooled
2 Tablespoons of raw sugar
3 packages of Lady Fingers. (Each package had about 40 small lady fingers)
4 (8 oz) blocks of cream cheese, softened
3/4 Cup raw sugar
2 Cups Heavy Whipping Cream 
2 tsp vanilla extract
Cocoa Powder

Instructions
~Brew the coffee, and mix in the 2 T of sugar. 
~Place in the fridge to cool.
~Cream together cream cheese and sugar until smooth
~Whip the heavy cream and vanilla extract until you have soft peaks, but not runny.
~Fold the cream mixture into the cream cheese mixture.
~Separate the lady fingers.
~Dip the lady fingers into the coffee and place in pan.
IMPORTANT NOTE! This is a very quick process, 2 seconds or less. Any more than that will have them falling apart in your hand.
~Put a layer of dipped lady fingers in the pan, making sure you've covered in all with the fingers laying flat.
~Gently spread half of the cream mixture over the lady fingers.
~Layer a dusting of cocoa powder over the cream mixture.
~Repeat layers.
~Cover tightly with plastic or foil and place in fridge for a minimum of 2 hours.

If all goes well, you should be able to cut a square of this dessert to plate for your guests.

Blessings from my kitchen to yours,
Leni

Monday, December 10, 2012

Sweet and Sour Meatballs for a Crowd

Today's recipe is one I used for my daughter's wedding, and a number of times for our Labor Day party when we were using the Luau theme. You can't go wrong with Sweet and Sour Meatballs. Unless of course, there's an abundance of bees, because those little stinkers LOVE pineapple! Our 1st Annual Davis Labor Day Party was almost a disaster because of the invasion of bees. What's worse is that the next day, we pulled leftovers out of the fridge, and discovered bees had burrowed down into them, and were coming out to investigate! I have an admittedly unreasonable fear of bees, so it was kind of a nightmare come true.

I don't have a picture currently, because I took the last of the meatballs to the Christmas Cookie Exchange. ;o) So here's a picture of the wedding party, who is obviously thrilled, because they are finally going to get to eat meatballs! 


This recipe is insanely easy. You can make it difficult if you want to, by making your own meatballs. If you want to do that, I suggest the Meatball Evolution recipe.  That said, I find meatballs to be a pain in the tuckus to make! They just don't last long enough for the amount of work they take. I only make them if I need them for someone who can't do all the fillers in store-bought meatballs. So, unless you need a specific menu, buy the frozen ones, and throw this sauce over them in the crock pot. 

Leni's Notes:
~This more than filled our 18 quart roaster. This will do the roaster REALLY full, pluse a crock pot or two. Or better yet, get two roasters, and fill them both about half way so you have room to stir.
~If you're not having a wedding reception for 200 people, maybe cut the recipe down a bit. ;o)
~If you want to make a meal of this rather than appetizers, serve with rice or egg noodles. Wonderful. 
~If you have extras, they freeze really well, which makes for a quick dinner on busy nights.
~Not that it effects the flavor, but if you have a variety of bell peppers, the red, orange and green look beautiful on the plate.
~When I originally made this, it had soy sauce in it. (I used Bragg's Liquid Amino Acids.) It adds a nice fullness and cuts the sweetness, but as so many have trouble with MSG and soy, I just decided to leave it out.

Ingredients:
2 cups cornstarch
8 cups brown sugar
16 (15 ounce) can pineapple chunks, juice reserved
5 & 1/3 cup vinegar
6 chunked and seeded bell peppers
(Optional - 1 Cup soy sauce)

Instructions:
~Place meatballs, drained pineapple and chunks of green pepper into the roaster pan.
~Stir the cornstarch and brown sugar together in a saucepan and place over low heat.
~Add the reserved pineapple juice and vinegar; stir until smooth.
~Bring the mixture to a boil; pour over the meatballs in the slow cooker. 
~Cook the mixture in the slow cooker on low until the flavors are thoroughly combined, 3 to 4 hours. (If you do the big roaster, you might need more time, especially if the meatballs are crowded together.)

Blessings from my kitchen to yours,
Leni


Tuesday, November 13, 2012

Thanksgiving

As a food blogger, it feels somehow criminal that I have not even mentioned Thanksgiving. I mean, I hate to follow the crowd, but still, it's like National Food Day, so I've got to at least chime in, right?

I always host Thanksgiving, as we have a house big enough to fit our family. Well, not really, but we fit better than we'd fit anywhere else, so it works. Family holidays are supposed to be loud and crowded. Did I mention it's also a Birthday Extravaganza? My mother's birthday is the day before Thanksgiving, and my mother-in-law and husband are the day of! So we just mash it all together and have one big celebration.

I am blessed that everyone offers to help and bring stuff for the meal. That takes a lot of pressure off. With my daughter recently married, that adds another kitchen to the mix for prep. They are both great cooks, so whatever they bring will be great.

We'll start the day with the parade and the dog show while we're cooking and setting up the extra table. Some time during the dog show, people will start arriving with food. I'll share this year's menu with you, and confess that I am going to make the turkey the day before. I've been thinking about this for a couple of years, and I'm giving it a shot. Later this week, I'll share some Thanksgiving disaster stories just to make you feel better about how bad your day might be going. ;o)

Thanksgiving 2012

Appetizers
Cheese & Crackers
Hot Artichoke Spinach Dip

Meat
Dry Brine Turkey with gravy

Veggies
Possibly Roasted Chili Lime Corn
Sweet Potatoes
Squash
Cauliflower Gratin

Sides
Homemade Stuffing
Homemade Rolls
Refrigerator Mashed Potatoes
Cranberry Salad
Broccoli Salad

Dessert
Cherry Pie
Pumpkin Pie
Apple Pie
Cheesecake Cinnamon Roll concoction

Drinks
Sparkling Apple Punch
Iced Tea
Coffee

Wednesday, October 10, 2012

Cocoa Cones for a Crowd (Wedding Favors)

What's this? A recipe post on a Wednesday? What can I say, I thought I'd throw caution to the wind. Plus with holidays, and soccer games, most of the time I have no idea what day of the week it is. Speaking of soccer, last night I about froze to death at my daughter's soccer game. Which made me think of how badly I wished we'd brought hot cocoa. And then I remembered the left over cocoa cones I had at home. 

For our daughter's autumn wedding, we decided to make Cocoa Cones. These were fun to make, and I love how they came out. 
The finished product on the table. A lovely family from our church added the final touches to our cones.


First we had a bunch of Moriah's childhood friends over to make the cones. Great fun!


Cocoa cones can be made for any event, as they are so easy to personalize. They can also be made in a variety of flavors and would be great for kids to make for gift giving at Christmas. We made ours into a fall theme by adding fall leaf sprinkles. My daughter then gathered a bunch of her favorite quotes on love and marriage to add to them. One side has the quote, the other has the cocoa directions and the couple's names and wedding date.

 I scaled the recipe back a little bit, as we made these for 200 people. Also, even if you're making them for 200 people, good luck with finding a container big enough to mix it all in at one time. And I have really large containers!! I saw a suggestion with one of the 1,000's of recipes I read, to mix it all in a garbage bag. I really didn't want the plastic taste added to it, but I suppose it's worth a shot if you wanted to do it all at once.

Leni's Notes:
~If you're making these in bulk, like we did, it will save you a lot of money to order the container supplies online. We bought our supplies for this and the cheesecakes at the WEBstaurant Store. Shop around, you might find better prices yet!
~Each of these cones makes 2 servings, or one really big serving!
~The cocoa portions stores really well, but if you're making them way ahead of time, hold off on the marshmallows until closer to the date. They can get a little stale.
~For flavor variety, try different flavored coffee creamers or add some instant coffee to the mix.
~ Also, to the powder mix, you can add cinnamon or ground red pepper, depending on your tastes. ;o)
~I highly recommend trying a cup of the cocoa before packaging to be sure you like the flavor. You might decide to adjust the cocoa or sugar content.
~If you are looking for decorating ideas, do a Google Image Search for Cocoa Cones.

Supply list:
Plastic cake decorator bags (2 bags for each cocoa cone.)
Closures for the bags (2 for each cone) - we used small zip ties. You could use twist ties, rubber bands, etc.
Sprinkles (optional, but really cute!)
Decorations (we did printed tags with colored ribbon. Whatever fits your theme.)

Ingredient List for 45 Servings:

3 Cups cocoa powder
6 Cups granulated sugar
10 Cups instant dry milk
2 Cups dry coffee creamer (plain or flavored)
Mini Marshmallows (1/3 Cup per cone)
Optional: flavored chips to add to the marshmallows. (Chocolate, peanut butter, butterscotch, etc.) or crushed hard candy, like candy canes.

In a large bowl, mix the cocoa powder, sugar, milk and creamer together.
Take half of your decorator bags and fill each with 2/3 C of dry mix.
Twist the top to push down the mix and close it off.
Seal very tightly with a zip tie. (We cut the extra off.)
Trim the plastic to about a half inch.
Place each filled decorator bag inside another bag.
Top with marshmallows, sprinkles (1-2 tsps) and chocolate chips.
Twist closed without smashing the marshmallows, seal with another zip tie.

Add your decorations and instructions (1/3 Cup mix with 3/4 Cup boiling water.)

Blessings from my kitchen to yours,
Leni


Monday, October 01, 2012

Pumpkin Chocolate Trifle

This is a recipe that does not fit into my plan of quick and easy, but it was worth the extra effort.

Seth turned 18 this past week. He wanted something pumpkiny, creamy and chocolately. Noelle piped up and said, "You should make a trifle!" So trifle it was. We are big trifle fans around here. It started years ago when friends from Ireland taught us how to make it. In those days, we were using cake and jello and fruit. Since then, we've expanded into many different flavors.

My favorite was the one  I made for my father-in-law many years ago. He loves lime, so I decided to make him a lime bundt cake for his birthday. I don't make those often, and soon remembered why. I can never get the things to come out of the pan without breaking! Sure enough, it broke, and I was left with lime bundt chunks. Appetizing.

So I did the only reasonable thing, and decided to turn it into a trifle! (I'm sure this is how trifle was born. Fixing cooking screw-ups.) I whipped up some vanilla pudding and whipped cream, and made a big bowl of trifle, with about an hour to spare before everyone arrived for the birthday dinner. As I was placing it in the fridge, breathing a sigh of relief, I knocked a can of biscuits into the top of it! Grrr! Took it out, patched it up again, and told my kids, "If anyone asks, this was the plan all along! And nothing fell into it!"

For today's recipe, I didn't have quite so many adventures, but it was a two-day process. I was creating this one from scratch, and getting all of the elements the way I wanted took a while. The results were just what I had hoped for, and everyone gave it a thumbs up. If I make it again, I would try it with a milk chocolate ganache, just to see if we like that flavor better.

The birthday boy was pleased with it, so I'm happy! (Said birthday boy just walked in and asked me if I'd make it again for Christmas. ;o)


Leni's Notes:
~If you don't have a trifle bowl, any clear dish will do. I've even used a large punch bowl when I was making trifle for a crowd. Part of the fun is seeing the layers.
~Most of my trifles are not so elaborate, and really do lend themselves to a quick throw-together. 
~Really is best to make this a two day process so you can let your cake cubes dry out a bit. Then they absorb the flavors better.
~I made the whole thing from scratch. You can shorten up the process a LOT with pudding mix, cake mix and jarred syrup. I don't guarantee it will be as good, but you can do it. ;o)

Simple Ingredient List:
Pumpkin Cake
Vanilla Pudding
Chocolate Ganache

Detailed Ingredient and Instruction List:
Cake
3 C flour
1 C whole wheat flour
2 C raw sugar
2 Tablespoons baking powder
2 tsp cinnamon
1/2 tsp each of salt, baking soda and fresh ground nutmeg
2 C pumpkin puree
1 C milk
4 eggs
2/3 C coconut or vegetable oil

Sift dry ingredients together in a large bowl.
Add wet ingredients, combine, then mix on high for a couple of minutes. 

Pour batter into a greased 13 x 9 pan. (or larger, but cook for less time if it's a larger pan.)
Bake for 1 hour at 350, test to be sure it's baked through. 
Set aside to cool.
When cool, cut into squares and spread out on a cookie sheet to dry out a bit. 
(You'll have extras, so feel free to let the kids snack a bit!)

While cake is baking, you can get started on the pudding.

Pudding
1 C raw sugar
2/3 C flour
6 C whole milk
4 beaten eggs
2 Tablespoons butter
1 Tablespoon vanilla extract

Whisk together sugar and flour in a large pan.
Slowly whisk in milk until well combined, no lumps of flour left.
Turn pan on to medium, and stir until mixture begins to bubble and thicken.
I must admit, I am ridiculously impatient at this point, and always end up bumping up the heat to move things along. Unless you are right there watching every minute, DON'T DO IT! You will scorch your pudding and have a mess to clean up.
Remove the pudding from the heat, and ladle a cup or so into the beaten eggs, mixing continuously to temper the eggs. 
If you add the eggs directly to the mixture, you'll be sifting scrambled eggs out of your runny pudding. DON'T DO IT!
Take the egg/pudding mixture, and incorporate back into the pudding pan.
Place back on medium heat, and stir constantly just until it begins to bubble.
Turn the heat down a bit and cook for a couple minutes more, but do not let it boil. 
What happens if I let it boil? See note above about scrambled eggs.
Remove from heat, add butter and extract. 
When everything is melted in and stirred together, place saran wrap directly on the surface of the hot pudding and let cool without stirring. 
Refrigerate until ready to use.

Ganache (Make when you are ready to assemble the trifle)
13 oz. Semi-sweet chocolate (Spring for baker's chocolate and resist the urge to buy chocolate chips)
1 1/2 C heavy whipping cream (again, no substitutes)

Place the cream in a pan with a good heavy bottom. 
Turn burner on to low, stir occasionally. 
Chop up the chocolate and place in a glass bowl. (I feel that glass holds the heat better. Use what you have, but if you have glass, that's what I prefer.)
When cream is hot, pour over the chocolate and stir until everything is melted and evenly mixed. 

Trifle Assembly
This is where you can get artsy, or you can just throw the whole thing together and not worry about being fancy. Once it's on the plate, it's not too pretty anyways! ;o) I like to layer the sides so that you see all the ingredients in a beautiful pattern.

I did three layers, each starting with cake, then pudding, then ganache. You will end with ganache, and you can spread it right up to the rim of the dish, which seals it and eliminates the need for saran wrap, unless you're traveling with it. 

If you want to decorate the top for an occasion, it's best to wait until you get where you're going so it doesn't get smooshed. 

Blessings from my kitchen to yours,
Leni

Monday, September 24, 2012

Mini Pumpkin Cheesecakes for a Crowd

Finally, I get to share some wedding recipes with you!

I made a lot of these. 200 pumpkin cheesecakes...I was swimming in cheesecakes! lol

This was what we put on our cupcake tower for the wedding. They really were not terribly hard to make, and once you get the process going, it goes quickly. These would be great for Thanksgiving or Christmas, also. They freeze wonderfully, and my older kids have discovered they like them straight out of the freezer like a pudding pop. (Remember those?)

Because I was making so many of them, I bought 3 oz paper cups to bake them in. These are the type that stand straight up, and don't spread out when you fill them. I had to order online to find them, but they were worth it.

I played with this recipe for a while before I found just the right dimensions. I hope you enjoy!

Fresh out of the oven.

On the cupcake tower at the wedding.
Leni's Notes:
~Baking times will vary, but lean toward undercooked rather than over cooked. If they over cook, they get really dried out.
~Remember that when it comes to cheesecake, less is more with the mixing. You want to just combine your ingredients, without incorporating a bunch of air into it. Over beating will also give you a tough texture.
~These can be dressed up with whipped cream and a sprinkle of cinnamon or a drizzle of caramel sauce.
~They freeze well, but if they get thawed and refrozen, the cookies will go to mush.
~You can make these gluten free by leaving out the gingersnap, however without it, you will not get a nice level surface. Without the cookie, they tend to sink in a bit.

Mini Pumpkin Cheesecakes for a Crowd
This recipe makes 3 dozen servings.

4 (8 oz.) packages of cream cheese, softened (Full or low fat, don NOT use fat free)
1 1/2 cups sugar
4 eggs
32 Gingersnap cookies (one box is usually enough)
32 paper baking cups
1 cup pumpkin puree (not pumpkin pie filling)
1 tsp cinnamon
1/4 tsp freshly ground nutmeg

Beat cream cheese and sugar together.
Add eggs one at a time, beat just until smooth.
Add pumpkin and spices, beat just until combined.
Line cupcake pan with liners. Place a gingersnap flat side down in each liner.
Fill with cream cheese mixture, leaving about a centimeter clearance at the top.
Bake at 375 degrees for 15-20 minutes.
Allow cheesecakes to cool and store in the fridge or freezer.
To serve: Remove from freezer, but keep chilled until ready to serve.

Friday, September 14, 2012

Wedding Update

Well, we survived! The wedding was amazing. The weather was not. Damaging winds. Tornadoes (thankfully in Buffalo, but enough to panic everyone who was watching the weather.) We were not watching the weather, we were too busy transforming our venue.

It started as this.

After many hours, and a lot of hard work from some of the best friends in the whole world, we morphed it into my daughter's dream wedding location. They were supposed to get married outside at this spot.


It had rained ALL day. Pouring, blowing winds, cold, nasty...but the weatherman assured us it would all be over at 2pm, 4 at the latest. The clouds cleared, the sun came out, and the guys set up the above location. At about 5:40 pm, this beautiful shot was taken. At 5:45 pm, it started pouring again! We gave up all hope and moved to plan C.

We had our guests sit down at their spots for the reception and had the wedding there. Daddy walked her down the isle (he's kind of blocked by the bride here.) Pastor Dave Akers was the officiating pastor.


Pastor Zatkiewicz gave a wonderful message.

They did manage to get outside for some pics after the wedding. They all had a great time.

You'd be amazed how hard it was to get the six of us together for ONE shot! My happy family.

 The deliriously happy couple in front of the cake table. We had individual pumpkin cheesecakes and an apple strudel cheesecake on top for them to cut and feed each other.

It was a gorgeous day that wore me out more than I could have imagined. I'd do it all over again though, it was all worth it!

By the way, don't look for a recipe from me on Monday. I still have a house full of wedding stuff to sort!!

Wednesday, August 08, 2012

Wish Me Luck!

Today I am doing a test-run of the mini cheesecakes I am making for the wedding. Trying a couple of variations, and seeing how they hold up to being frozen and thawed.

I shall report back with my results, no matter how bad they are! Meanwhile, the whole family is looking forward to eating the evidence when they get home. ;o)

If you have any tried and true mini-cheesecake recipes, do share!

Sunday, July 22, 2012

Bridal Shower Time

My oldest baby is getting married! The bridesmaids and I hosted a bridal shower for her this weekend, so I thought I'd share what we served and how we decorated.

Since the bride and groom are big fans of the movies, we put together a movie theme. I was able to find a great book called Kisses that was full of photos and quotes from black and white movies. We used those for decorations and place mats. I was thrilled that the first thing guests did was walk around the table trying to identify all of the actors and movies! ;o)

I set up an Amazon wish list on my account with a large selection of movies that they love but do not own. (Cary Grant, anyone?) 

Here are some pictures, and the menu is down below.

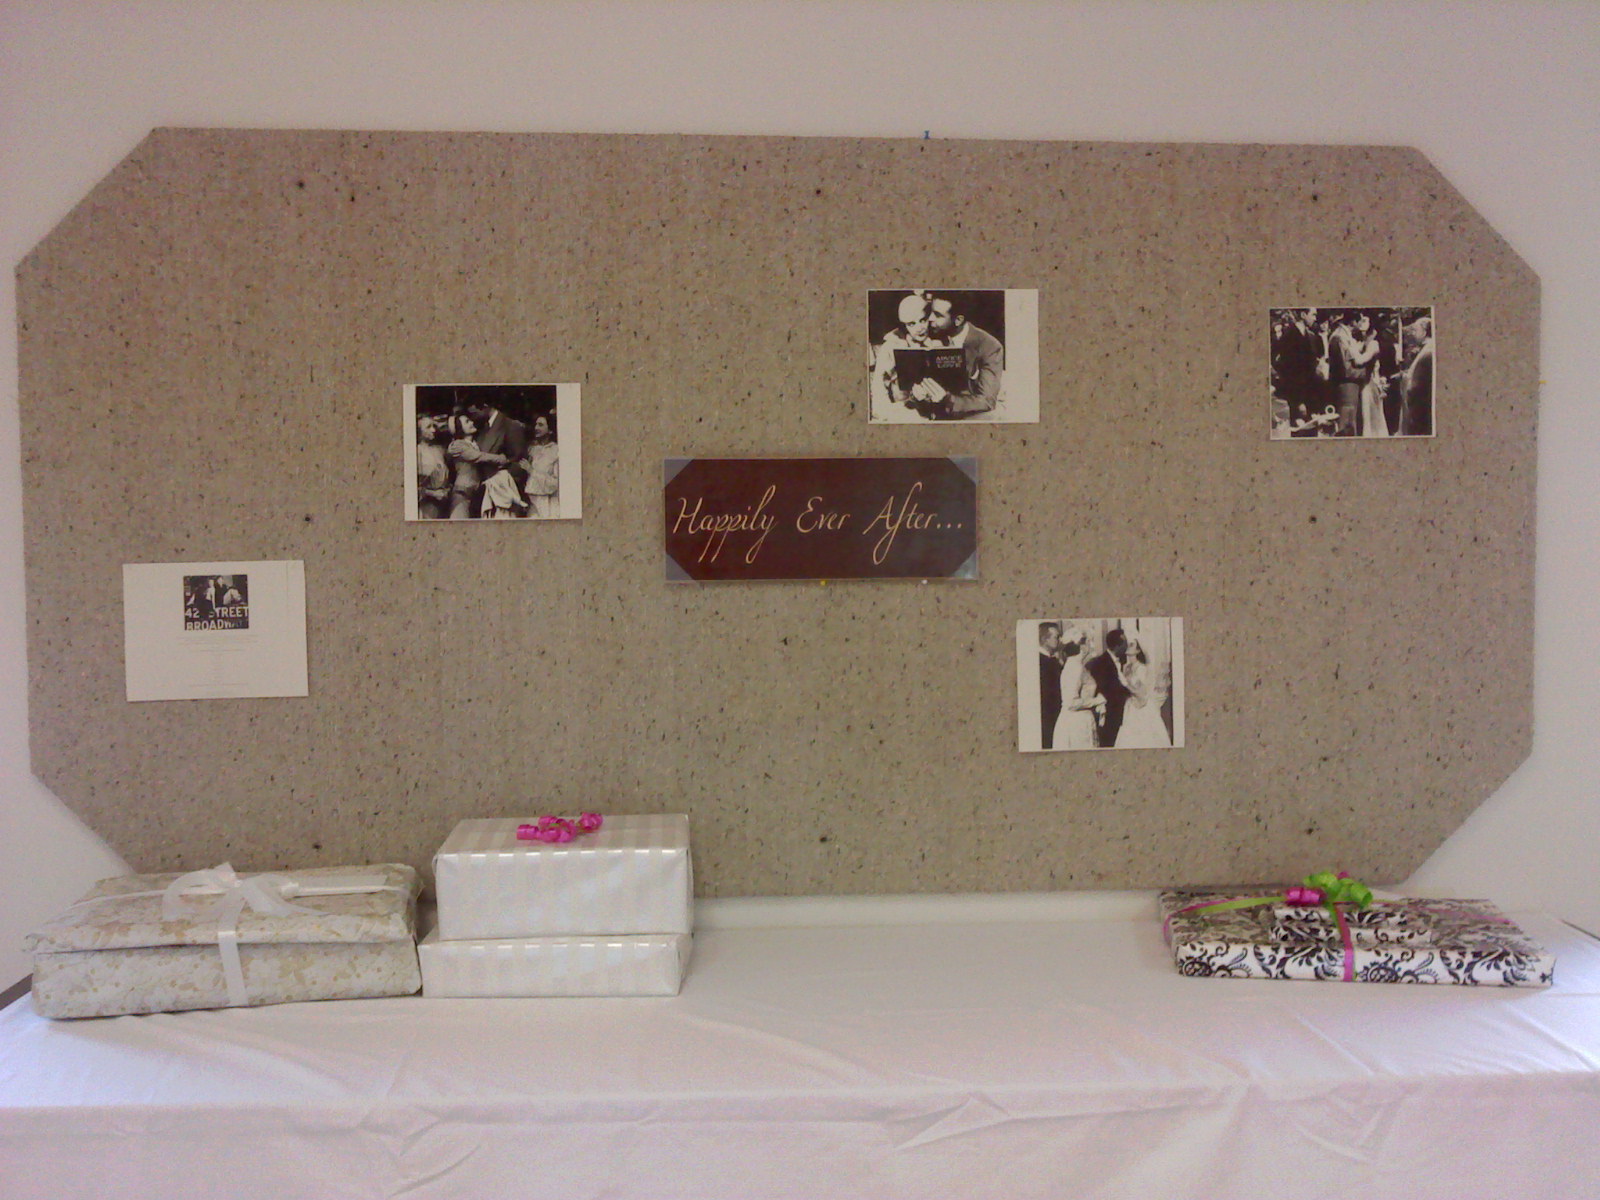
The wall behind the gift table was covered with photos from movies and a "Happily Ever After" plaque.


Place settings included a unique black and white movie photo and a mini packet of microwave popcorn.
The popcorn buckets were full of movie candy and dvd movies that we used as prizes for games.


The bridal party at the food table. Bride Moriah on the right, Maid of Honor Noelle on the left and Bridesmaid Julie in the middle. The other Julie wasn't able to attend, due to being in another state. ;o)

We tried to keep the menu simple but yummy.

Meatballs with barbeque sauce
Maple Dip with Honey Wheat Pretzels
Pumpkin Dip with Ginger Snaps
Black Raspberry Dip with Chocolate Pretzels
Veggie Pizza Appetizers (Recipe to come)
Insanely Moist and Decadent Chocolate Cupcakes (Recipe to come)
Pina Colada Punch (Recipe to come)
Iced Water Bottles

We did a quiz that consisted of movie quotes, requiring players to name the movie, and for bonus points, the movie couple. 

We also did the toilet paper bridal gown game. That was great fun. ;o)


Saturday, July 21, 2012

Crockpot Spinach Artichoke Dip

I have a special weekend edition for you! We hosted a bridal shower today, and this was one of the new recipes I tried. It was a huge hit. My daughter Noelle insisted that I send it to our family recipe email account immediately. ;o) One guest said that it was comparable to Applebee's version. Good news, since that was the bride's favorite!


Leni's Notes:
~I mixed this up and refrigerated it a couple of days ahead of time. Being that it was completely chilled, I didn't think it would warm through in 2 hours, so I popped it in the microwave for a couple of minutes first. (Yeah, I used a microwave...lol.)
~This was just enough to fit into our itty bitty 1 quart crock.
~Quartered artichoke hearts are found in the canned vegetable isle. I thought I'd save you the trouble, since I sure couldn't find them!
~We served these with Tostitos Scoops.
~We had a 16 oz container of spinach, and I ended up just throwing it all in. Didn't seem over spinach-y to any of us.

You can find the original recipe at Get Crocked. Looking forward to trying more of her recipes.

  • 2 - 8 oz. packages of cream cheese, (softened)
  • 3/4 c. half and half
  • 1 tsp. onion, finely chopped
  • 1 clove garlic, minced
  • 1/2 c. Parmesan cheese, grated
  • 10 oz. bag frozen cut spinach, thawed and well drained
  • 13 oz. can quartered artichoke hearts, rinsed, drained and chopped
  • 2/3 c. Monterey Jack cheese, shredded
1. Combine the cream cheese and half and half in a bowl until well blended. 2. Add the remaining ingredients and stir well.
3. Pour the mixture into the crock pot.
4. Cover. Cook for 2 hours or until thoroughly melted.

Wednesday, June 27, 2012

Where's the Beef?!

I am sure that is the cry of my husband and children in recent days. They are coming home to a lot of what we call "at home fast food." Basically, I bought it in a grocery store, but that doesn't mean there's anything particularly healthy or inviting about it.

We've hit one of those seasons, which should be over rather quickly, but in the mean time must be endured. It's the end of the year, and for a homeschool family, that means a lot of things. For this homeschool family, we had a whole lot of time-sensitive things fall into this week.

School Stuff:
~Final Report and Evaluations needed to be written and sent in with test results.
~Letter of Intent and Lesson Plans written and turned in for next year.
(I do it all at once so I'm done for the summer.)
~Noelle's transcripts updated
~Finish planning Seth's graduation party
~Finish prep/host Seth's graduation party

Non-School Stuff
~Moriah's wedding invitations finished, weighed, stamped and mailed
~Shower invitations and registry lists made, addressed, mailed
~Extra work hours since boss is out of town
~Summer Reading program kick off
~Kids are out of school so the library has been inundated with people
(Yes, this is a good thing, but it puts me on overload!)
~Friends visiting from CA (highlight of the week!)
~Orthodontist and Chiropractic appointments
~Baby shower at church

All that to say that sometimes, no matter how badly you might want to feed your family a gourmet organic dinner, they're getting corn dogs!

More importantly, it's ok. No one is going to die from one week of less-than-stellar meals. But you might die from stress if you try to keep up a schedule like I have this week and try to put a four-course meal on the table. Sometimes you just have to let it go and move on. Make the best choices you can, and call it good.

God willing, I'll be back next week with something wholesome and yummy!

Monday, June 11, 2012

Marinated Pasta Salad

Today in Western New York, it's decided to be summer again. 90 degrees and humid, which means no one will have much of an appetite, and when they do get hungry, they won't want anything hot. This calls for a pasta salad. 

There are so many different recipes for pasta salad, most of which contain mayonnaise. I'm not a big fan of mayo, so I prefer a salad that is marinated in a nice vinaigrette. My current favorite is Brianna's French Vinaigrette. Good stuff, no nasties! (Local friends, you can find it at Wegmans.)

Over the years I have changed up my salad recipe to make it a bit more wholesome, so I can say from experience that this salad tastes good with the cheaper ingredients and the more expensive healthy ingredients. Do whatever works for your pocketbook! When I'm cooking for a large crowd, I tone down the price without sacrificing good taste.


Leni's Notes:
~Nice side dish for grilled meats.
~Holds up well for parties and picnics.
~When you are done mixing, let it sit for a couple of hours in the fridge and then test it again to see if it needs more dressing.
~This makes a nice light lunch, also.

Ingredients:
2 lbs whole wheat pasta of choice (Rotini for us this time)
1 large head of fresh broccoli, cut into small  spears
1 lb block cheese, cut into cubes (Colby-Jack is our favorite)
1 quart grape tomatoes, cut in half
1 (6 oz) package turkey pepperoni, sliced into quarters
1 bottle vinaigrette dressing
1/4 C grated parmesan cheese
Optional: Sliced black olives, chopped raw bell pepper, shredded raw onion

Directions:
~Boil pasta according to directions. During the last minute of cooking, throw the broccoli in. Drain and rinse, and set aside to dry out a bit.
~When pasta is well drained, add in everything except dressing and parmesan.
~Mix well, and add about half the bottle of dressing, making sure to coat all of the pasta well. The dressing amount will vary according to taste, but it's better to go light at first.
~Add parmesan, cover and refrigerate.
~Before serving, taste to gauge the need for more dressing.

Be blessed!
Leni