Monday, November 26, 2012

ChanceLee Chicken

This recipe has a bit of history. I first posted it back in 2006, when I was apparently taking it to a friend who's family had been sick. Well here I am again, looking for some good comfort food for a sick family, and this recipe came to mind!

Better known as Garlic Brown Sugar Chicken, we affectionately renamed it for a small guest in our home. While everyone else was begging for dessert, little ChanceLee, baby cheeks glowing, begged her mama to get the chicken back out of the fridge so she could have more. Who could resist a request like that? ChanceLee is no longer a little girl, but a beautiful young woman. My, how the time flies!


Leni's Notes:
~This can work in the crock, but is better in the oven. Both directions below. (Honestly, I don't like it in the crock, but maybe you'll love it.)
~Terrific over egg noodles, but also good with rice or quinoa.
~Using Cayenne will give it a Szchewan flavor. If everyone likes a little kick, give it a shot. Very good that way!
~I've overhauled the recipe a bit from the one I've found around the internet. No major changes, just cleaner ingredients (like homemade lemonade instead of lemon-lime soda.)
~I like to use chicken drumsticks, but use what you've got. Thighs, leg quarters, boneless breast...just be sure to adjust your cooking time. Leg quarters are especially tough in the crock pot. They tend to be overcooked by the time you get them thoroughly done.
~You can thicken the juices after cooking with a little cornstarch. It's a nice touch.
~I suggest serving this with something kind of light. Green beans, cauliflower, carrots...something that offsets the sweetness in the chicken.

Ingredients:
Chicken legs (enough to feed your family, the sauces stretches.)
1 cup brown sugar
2/3 cup vinegar
1/4 cup lemonade
2-3 Tbls. minced garlic
2 Tbls. soy sauce (Bragg's Liquid Aminos)
1 tsp. pepper (regular black or cayenne)


Instructions:

Crock Pot
~Place chicken in crockpot.
~Mix all remaining ingredients and pour over chicken.
~Cook on low for 6-8 hours.

Oven
~Preheat oven to 375 degrees.

~Place chicken on greased sheet with sides
~Mix all remaining ingredients and pour over chicken.
~Bake for 1 to 1 1/2 hours, until fully cooked.
~Halfway through cooking, spoon sauce over the chicken again.

Blessings from my kitchen to yours!

Wednesday, November 21, 2012

It's Not About the Food!

I have news for you about Thanksgiving that you might find shocking.

It's not all about the food.

Trust me, I wouldn't lie to you! On one level, it is, of course, all about the food. But really, it's about giving thanks and being grateful for all that we have. Bringing our family and friends together to remind us to be thankful for them, also.

I tell you this because things are bound to go wrong. Sometimes horribly wrong. Irreparably wrong. Please, don't let it ruin your holiday! For example, no matter how many times you have successfully roasted a turkey, there will be that one time that the bugger just won't cook, and you end up carving the meat 3 hours later than planned. Or your potatoes scorch and you've got to throw out the whole pot. Rolls hard as rocks, lumpy gravy, broken dishes, the list goes on and on. You've gotta laugh it off and make the best of it. It will make a great family story down the line. (Wait til you hear about the exploding cupboard!)

When I was a teenager, I used to watch a soap opera where every Thanksgiving (or was it Christmas?) the rich family's meal would be completely ruined and they'd have to order a stack of pizzas. What else are you going to do? Mope and throw a tantrum? Psh. Move on.

So here's hoping that you don't have the Davis curse, and there are no catastrophes on your big day. But if there are, take another page from the Davis play book and laugh it off. And then tell me about it. I'd hate to think I'm all alone out here in my disaster land!

Tuesday, November 20, 2012

Newest Thanksgiving Catastrophe '12?

It's not even Thanksgiving day yet, but I'm thinking maybe I've already had my catastrophe of the year. Last night, as the kids were working on their recipes for Thursday, I opened up my laptop to find details and heard a horrible cracking sound. And with that, my screen flopped over backward! Yup, the hinges broke.

So my computer is still working, but is now rigged up on my husband's desk so that I can put a book holder behind it to prop the screen up. A little red-neckish, but it will work until we can get it repaired. This is a good thing, as all of my recipes are stored online! Years ago, I set up a gmail account just for recipes. Gmail has so much storage, and a terrific search feature. Makes it so easy to find what I'm looking for and share recipes easily. I also set up a family gmail account that all of my kids have access to. Whenever we try a recipe that we all love, we send it to that account so they will be able to access 'Mom's Recipes' no matter where they live or how badly my memory fails. ;o)

Last night, Seth whipped up the Spinach Artichoke Dip, and Noelle did the Refrigerator Mashed Potatoes. Today's work list includes a pie or two (cherry and blueberry cream) and working up a recipe for a Cauliflower Gratin. Never made it before, so I think I'll do a test run to make sure it's edible before I feed our company. I'd like to think I'll have enough energy to do the stuffing also, but I'm not sure I'll even get through the preliminary list! We'll see how it goes.

I hope all of your Thanksgiving plans are coming along nicely, and whatever you do on Thursday, you take a moment to count the many blessings in your life.

Leni

Monday, November 19, 2012

Apple-Honey Oatmeal Muffins

We interrupt the Thanksgiving onslaught to bring you this yummy treat that will keep the masses away from your holiday preparations. This is the most wonderful, healthy muffin recipe! I got the original recipe  from the Rodale Whole Foods Cookbook, page 575. Really terrific cookbook. I found it at the library, at a time when I was trying to convert a bunch of my recipes to use honey and fruit instead of cane sugar. Rodale had already done that! I borrowed the book from the library so many times that my husband finally bought me my own copy. I got the original Rodale's Basic Natural Foods Cookbook. It's the holy grail of natural cooking!

Back to the muffins...my family loves these with chocolate chips, but you could add fresh or dry fruit also. Play with the recipe. They mix up easily, bake quickly and disappear faster than you can imagine. I made two dozen last night, and this morning had to snag the dozen that were left so I could get a picture.

This recipe has passed a lot of tests. My family loves them. I took them to a church breakfast, they loved them. Most critical, I sent them to a Search and Rescue weekend for a horde of teenagers. Loved them. Thank you, Rodale!


Leni's Notes:
~I use a silicone pan, so no liners, but if you're not using silicone or liners, do grease the pan very well.
~My kids love these with cream cheese.
~Don't over bake. My new oven seems to be running a bit high on the temperature, and it made for a dry batch of muffins. They are normally very moist.
~Yes, I used my own homemade applesauce. It means nothing to the recipe, but I thought it was very homestead-ish of me, and wanted credit. 
~Rodale Cookbook is worth the price, and it doubles as a work out plan. It's HUGE.
~Unless you live alone, double the recipe. ;o)

Ingredients:

1 C whole wheat flour
1 C old fashioned oats
2 tsp baking powder
1/2 tsp baking soda
1/2 tsp salt
1/2 tsp cinnamon
1/8 tsp freshly grated nutmeg
1 large egg
1 C unsweetened applesauce
1/2 C milk
1/4 C honey
2 T butter, melted
1/2 C Chocolate Chips

Instructions:
~Preheat oven to 375.
~Generously butter muffin tins. (Silicone was fine w/o greasing)
~Whisk together dry ingredients.
 ~In a small bowl, combine wet ingredients.
~Make a well in dry ingredients, pour in wet.
~Mix with a fork just til moistened.
~Stir in Chocolate Chips.
~Fill 12 muffin cups 2/3 full.
~Bake 20-25 minutes.
~Serve warm with butter or cream cheese.

Blessings from my kitchen to yours,
Leni

Sunday, November 18, 2012

Sunday Before Thanksgiving

The turkey is brining!

My friend Briggie reminded me to take my turkey out of the freezer days ago. I was so glad, because I never take it out soon enough! Well, today is brining day and that 27 pound gobbler is still frozen solid! This is where I get creative in ways that Butterball would never approve of. But I digress.

I went ahead and started the process while it's still frozen. I've done it before, it works just fine. We're hoping to roast it on Wednesday and save ourselves some work on Thanksgiving!

I think this is the biggest bird I have ever roasted!


The Great Thanksgiving Catastrophe of '07

As promised, here is one of my Thanksgiving Catastrophe stories. I offer this to you as something to reflect on during the holiday. Should things start to go wrong, you can comfort yourself that at least you're not in my house! Also, it can be a point of reference. How bad was your holiday? "About two step above Leni '07." ;o)

I do hope that your holiday planning is going well, and that you will all have a catastrophe free Thanksgiving!

Here's how a holiday goes in Leni Land. To give yourself the proper setting, pretend you're reading a new edition of the "If You Give a Moose a Muffin" series."

Thanksgiving Day (which also happens to be my husband's birthday, just so you have proper sympathy for him.)

Despite the fact that I am not a morning person, I am up at 6:30 to have turkey in roaster at 7am. *Yawn*
I ask Steve later in the morning if he will hang up my shadow box. We've been waiting for a free moment to do so, and our holiday planning is going so well, we actually have leisure time before dinner!

Wanting to do the job right, Steve gathers the children around and explains that he will need certain tools. Not only is he going to do the job, but we're going to get a homeschool lesson out of it!

So, he goes out to the shed to get the level. Of course, the key is nowhere to be found, so he goes to buy a new lock at the pharmacy, intending to break the old one off.  He comes out of the store, van won't start. Extra amusing, as we have not yet made the first payment on said van. Awesome. So, he walks home in very cold rain. I see him coming, and I can tell by the stomping through puddles that he is not a happy camper. He takes his frustration out on the lock since it was going to come off anyways. Ironically will not come off. It's a very sturdy lock! So sturdy that instead of the lock giving way, the hasp starts to break.

He gives up and comes in, calls the dealer, who of course will only honor the warranty if HE does the work. That means towing it 85 miles. Thank God for AAA, because the dealer was not going to pay for the towing...grrr... Steve makes the arrangements, and decides to still try to make something of the day. He'll  figure out why the vacuum is so loud. Takes the whole thing apart, can find nothing wrong with it! But while it's still spread all over the livning room, my mom arrives an hour early which we expected. No big deal that she's here, but the dogs get all excited because there's company, and they start prancing all over the place while Steve is trying to put the cleaner back together.

At this point, my oldest daughter reluctantly tells us that she just found water dripping into the laundry room from the bathroom that is right above it. Seriously?! Hubby quickly figures out that it is coming from the tub, so he goes to investigate. Upon pulling up the tiles by the corner of the tub, we find that the sub-flooring is totally rotted away, and there is apparently a leak inside the wall! Why not? Steve says (are you ready for this?) "I'm surprised the wall isn't rotting also." With that he gently pushes on the wall above the area, which totally gives under the pressure. ARGH! At that point I decided that we should just go back to bed and forget this day completely.

All this by noon, folks! We did, however, go on to have a lovely day. The birthday girls arrived (both grandmas) and the rest of our company. Dinner went off without a hitch, and then we played board games and watched movies til bed time. All in all, a nice day. That weekend we dealt with all the problems, and my kids got a lesson in patching drywall!

This is just so typical for us, it's almost laughable!

Blessings from my kitchen to yours,
Leni

Tuesday, November 13, 2012

Thanksgiving

As a food blogger, it feels somehow criminal that I have not even mentioned Thanksgiving. I mean, I hate to follow the crowd, but still, it's like National Food Day, so I've got to at least chime in, right?

I always host Thanksgiving, as we have a house big enough to fit our family. Well, not really, but we fit better than we'd fit anywhere else, so it works. Family holidays are supposed to be loud and crowded. Did I mention it's also a Birthday Extravaganza? My mother's birthday is the day before Thanksgiving, and my mother-in-law and husband are the day of! So we just mash it all together and have one big celebration.

I am blessed that everyone offers to help and bring stuff for the meal. That takes a lot of pressure off. With my daughter recently married, that adds another kitchen to the mix for prep. They are both great cooks, so whatever they bring will be great.

We'll start the day with the parade and the dog show while we're cooking and setting up the extra table. Some time during the dog show, people will start arriving with food. I'll share this year's menu with you, and confess that I am going to make the turkey the day before. I've been thinking about this for a couple of years, and I'm giving it a shot. Later this week, I'll share some Thanksgiving disaster stories just to make you feel better about how bad your day might be going. ;o)

Thanksgiving 2012

Appetizers
Cheese & Crackers
Hot Artichoke Spinach Dip

Meat
Dry Brine Turkey with gravy

Veggies
Possibly Roasted Chili Lime Corn
Sweet Potatoes
Squash
Cauliflower Gratin

Sides
Homemade Stuffing
Homemade Rolls
Refrigerator Mashed Potatoes
Cranberry Salad
Broccoli Salad

Dessert
Cherry Pie
Pumpkin Pie
Apple Pie
Cheesecake Cinnamon Roll concoction

Drinks
Sparkling Apple Punch
Iced Tea
Coffee

Monday, November 12, 2012

Revolutionary Mac & Cheese

My search for the perfect macaroni and cheese is legendary. Well, amongst my family, anyways. They joke about how many "perfect mac & cheese recipes" I have found over the years. So now I have started to categorize them so that when I find them later I remember why this one was perfect for that moment. ;o) 

It is my pleasure to introduce you to one of those recipes today. This was a Pinterest find for me, I have the link to the original blog down by the recipe. For me, this one is perfect, because it's not time-consuming. You can arrive home after work, decide you really want mac & cheese, and within half an hour, have home-style comfort on your plate that didn't come with neon cheese powder. Also, it takes real ingredients that you are likely to already have in your fridge and pantry already. (No canned soup or evaporated milk...)

The beauty of it is, it's all one pot. You do not boil the pasta ahead of time. That's what caught my attention the first time around.

The picture below is what it looks like when it's done on the stove. Kinda bland looking, as we used white cheese this time. I decided to dress it up a bit  (details on that below) but it involved a broiler and an unnamed member of my family who has a love-hate relationship with said broiler. The end result was less than picture worthy, but still edible! ;o)


Leni's Notes
~We use whole wheat pasta, works just fine, takes a tad longer to absorb the milk.
~This last time, I used whole wheat rotini pasta. I do not recommend it. I ended up having to add another cup of milk, and it took a LONG time for the spirals to cook properly. I recommend shells or elbows. Bowtie works, but it's got a similar issue as the spirals. That thick middle section doesn't like to cook as well.
~The original recipe uses 2% milk. Whatever floats your boat. I use whole milk most of the time, and add other creamy ingredients.
~I have yet to try it, but I wonder if I could turn this into a frozen dish that could later be popped in the oven. I think it would work. (Thinking ahead to taking meals to other families.)
~Lots of good stir-in ideas. Cooked chicken or turkey for more of a main-dish casserole. I also have made it with half pasta, half broccoli and that worked really well.
~I always double this recipe, as I have 4 adult-sized people living here, and double recipe leaves me lunches for them to take to work. Single recipe leaves nothing left over.

Original recipe was found on this blog. As you can see, I've changed it up a bit, as I tend to do. Do what works for you, and enjoy!

Ingredients:
2 cups dried pasta
2 cups milk
1 cup loosely packed shredded cheddar cheese
1 tsp salt
1/2 tsp dry mustard
1/4 tsp pepper
2-3 ounces of cream cheese or flavored Laughing Cow (Sundried Tomato and Spice is lovely.)

Instructions:


~In a pan, add pasta, milk and cream cheese.
~Bring to simmer, then reduce heat to low and cook for 20 minutes, until pasta is soft, stirring frequently and ensuring milk does not boil.
~Turn heat off, add cheese, salt, pepper and dry mustard.
~Stir until combined.
~Serve as is, or put in greased baking dish, and top with a mixture of bread crumbs and cheese.
~Bake or broil until topping is browned (not burned.)

I don't list a temp, because I usually have something else in the oven, so I put it in with whatever is in there.

Blessings from my kitchen to yours,
Leni

Wednesday, November 07, 2012

The Things I Learn From My Dogs

My dogs have a very specific way of sitting and staring intently at something that they want, waiting for us to notice and give it to them. (Usually staring at the door, willing it to open so they can go out.)

Yesterday I was in Walmart, and passed an old man in the candy isle who was in a wheel chair. He was holding two bags of candy, and staring intently at the top shelf. At first I went past him, thinking that he already had the candy he wanted, but after a couple seconds, I realized that I recognized that stare. "Is there something I can reach for you?"

The man's shoulders slumped with relief, as he said, "Well, I'd really like that giant bag of Jolly Ranchers up there. I need them to keep my mouth moist, and that's a much better deal than these small bags." I could relate to that, I've been living on Jolly Ranchers lately. Yes, I know that Jolly Ranchers completely do not fit my food philosophy. Shhhhh.....

I grabbed it for him, and put the other bags back on the shelf. I went back to my cart, and turned to see if he needed anything else, but he was already gone. Makes me wonder just how long he'd been sitting there waiting for help.

So thanks to my doggies for training me well. I'll get you that extra doggie treat later. Just remind me by staring at the treat bin.


Monday, November 05, 2012

Chipotle Chicken Chili

Happy Monday everyone! Before I get started today, I wanted to extend a hearty welcome to all of our new readers. Hope you're enjoying the recipes, and that you'll introduce yourselves at some point. 

These past couple of weeks, I have been working on some soup recipes. I must confess, I am not a big fan of soup. My mom loved making soups, and I was always suspicious of what she was hiding in there. (Probably zucchini and stewed tomatoes.) I also was not a fan of gravy, salad dressing, sauces, condiments...I wanted to see my food. Obviously, I got over that, but my aversion to soup remained. 

You know of course, that I married a man who loves soup! We've been married almost 21 years, and I figure it's about time I make peace with the fact that my man is over the moon when he comes home to a pot of yummy soup and some rolls to go with it. 

I had the best intentions of sharing an original recipe, but my attempt at Minestrone went horribly wrong. They ate it, after we fixed it up a bit, but it's definitely not blog-worthy yet. So for today, I am sharing a Pinterest find that was a huge hit with my family. I tried a bite. It was good! Not enough for me to want a big bowl of it, but definitely a keeper. 


The original link to the recipe can be found here. I made a couple of changes, so the recipe below is the version I made. They used items that were lower sodium and fat-free. I can do lower sodium if I have to, but I do not do fat-free. Seriously, what IS fat free half-and-half?! Cream is milk fat, if it's fat free, it is NOT half-and-half. Blech. Use real ingredients! But I digress.

Leni's Notes:
~I doubled the amount of chicken, thinking my hubby would want more protein. His only complaint was there was too much chicken. Huh.
~I've heard it freezes well. It didn't last long enough for me to find out.
~I used my pressure cooker pot to make this. (Without the pressure feature.) Those pots make terrific stock pots! Nothing scorched.
~I somehow found myself without any frozen or fresh onions! It a fit of desperation, I reconstituted 3/4 C of dry onions (1/4 cup for each onion called for.) Amazingly, it worked.
~This cooked up very quickly. I came home from work at 5, and had dinner on the table by 6 with time to spare. If you pre-cut your chicken and onions ahead of time, it's practically an instant dinner.
~Original recipe says it serves 8. Eight children, maybe. With grown ups in the house, more like 4.
~ If you want to prepare your own cooked white beans for this recipe, you'll need 4 1/2 cups (from 2 1/4 cups dried).

Ingredients

2 tablespoons extra-virgin olive oil
3 medium onions, chopped (I buy frozen chopped onions.)
4 large garlic cloves, minced (Jarred in water or olive oil, 2 tsp)
2 boneless, skinless chicken breasts, cut into 1-inch chunks
1 tablespoon chipotle chile powder or chili seasoning
4 teaspoons ground cumin
salt
3 cans (19 ounces each) cannellini beans, drained and rinsed
3 cups Better than Bouillon chicken broth, or your favorite stock
1/2 cup half-and-half
1/2 cup shredded Cheddar cheese (2 ounces)
1/4 cup chopped fresh cilantro

Instructions


~In a large Dutch oven, heat the oil over medium-low heat.
~Add the onions and cook, stirring occasionally, until beginning to soften, 4 to 5 minutes.
~Push the onions to one side of the pan, add the chicken, and sprinkle with the chipotle chile powder, cumin, and salt to taste.
~Cook, stirring, until most of the chicken is opaque on the outside, 5 to 6 minutes.
~Stir in 3 cups of the beans and 2 cups of the broth.
~Increase the heat to medium-high and bring to a simmer.
~Partially cover and cook until the chicken is cooked through, about 8 minutes.
~Meanwhile, in a food processor, combine the remaining beans and remaining 1 cup broth.
~Process to a smooth puree.
~Stir the bean puree and half-and-half into the soup.
~Dish up soup, and top with cheese and cilantro. 


Blessings from my kitchen to yours,
Leni

Tuesday, October 30, 2012

Slow Cooker Plan C Lasagna

Today's meal plan got changed a number of times as I tried to plan around the Hurricane Sandy possibilities.
Plan A was to make soup, but as I prepped lasagna for later in the week, I realized that if we lose power, my slow cooker wasn't going to be a lot of use. Soup can be made out on the grill. So, Plan B, we would have the lasagna tonight. Except I couldn't find the lasagna noodles! My daughter tore the pantry apart, but they were no where to be found. Plan C involved some whole wheat elbow macaroni. It all worked out.


My apologies for the dark picture. I usually take my food outside to be photographed in natural light, but Hurricane Sandy decided that we would have nothing but dark skies today. So all you get is this pitiful picture from my kitchen of what was left over after everyone dug in. It turned out pretty well, so who needs lasagna noodles?!


Leni's Notes:
~Change up the seasonings and ingredients to fit your tastes. I don't think I have ever made it exactly the same way twice.
~This recipe fed 4 adults for dinner, with enough for a couple lunch servings left over. If the whole family was home, I'd double it.

Ingredients:
1/2 lb. ground beef, browned
2 links Italian sausage, grilled and sliced into thin chunks
1 jar of your favorite spaghetti sauce
1 1/2 C water
1/2 lb. mozzerella cheese, shredded
2 C cottage cheese or ricotta
1/4 C parmesan cheese, grated
1 beaten egg
1/2 T dry parsley
1/2 T dry oregano
1 box whole wheat elbow noodles

Instructions:
~Mix the meat, sauce and water together.
~In another bowl, mix the cheeses, egg and dry herbs
~ In a greased crock, place the following layers:
1/4 Sauce
1/3 Noodles
1/3 Pasta
1/4 Sauce
1/3 Noodles
1/3 Pasta
1/4 Sauce
1/3 Noodles
1/3 Pasta
1/4 Sauce

~Cover and cook on low 4-5 hours.

Blessings from my kitchen to yours,
Leni

Monday, October 22, 2012

Shredded Chicken for the Freezer

My life has been hectic lately. Crazy, even. As much as I love to cook, I am rarely home to do so, and it makes me long for my stay-at-home-mom days. Honestly, I love having a day to spend in the kitchen. Probably why I love Thanksgiving so much. One day of the year set aside for  cooking more food than a house full of people could consume in one day! Bliss!

With my free time so very limited I've been challenged to find ways to still put home-cooked meals on the table with about 30 minutes to prep. The real challenge has been to find a way to pre-prep the food without losing any of the quality. Some veggies lend themselves well to pre-slicing, some side dishes can be made ahead and warmed, but the real stinker is meat.

I'll admit, I am picky about meat. I like a good cut of meat to begin with, and I can't stand meat that has that 'old' taste to it. Whether it's from sitting in the fridge or from freezer burn...I just can't stomach it. So what's a girl to do when she does not have the time to stop by the market every day to get fresh meat?

I have finally found my answer when it comes to chicken! It's been a lot of trial and error, but I found the method that produces a good post-freezer result.

I started off by getting four good roasting chickens. In the picture below, you'll see all four in one pan, but for roasting, I split them into two pans, so they weren't crowded.


We cooled them completely, and then I set Noelle to work on getting every bit of meat off of them that she could. (She has requested that next time we do two chickens at a time. ;o)

Once she had all the meat off the bone, I started making gravy. Now you could just do chicken broth, and if you're going to use the chicken in something non-gravy based, that's a good option. But for quality purposes, I really prefer the gravy method. Broth freezing was ok, but the meat texture was better with the gravy. (Gravy recipe below.) 

I made enough gravy to just cover the chicken, mixed it up and let it cool down a bit. Then we packaged it up in gallon size freezer bags. (Be sure to label and date your freezer food...no one wants to play the "How Long Has This Been In Here?" guessing game!)

Here's what we use this chicken for, usually in the crock pot.
Chicken and biscuits
Chicken Pot Pie
Chicken Noodle Soup (add more broth) 
Chicken/broccoli/stuffing casserole
Chicken and Mashed potatoes
Chicken Stew (with dumplings, yum!)

Gravy Recipe (May take more than one batch, depending on how much chicken you have)

1/2 C Butter
3 Tbsp bouillon concentrate (Better than Bouillon is my favorite)
1/2 C Flour
2 Quarts water

Melt butter and bouillon, slowly incorporate flour until smooth.
Cook, stirring constantly for about one minute.
While whisking, begin to drizzle in water, pouring slowly until all water is added. 
Continue to whisk til smooth, stir until it starts to thicken.
Remove from heat, and it's ready to use.

Hope this is useful for you. I have been delighted many times to open the freezer and find that my dinner issues were solved because I'd already done the work!

Blessings from my kitchen to yours, 
Leni

Wednesday, October 17, 2012

MidWeek Check In

Wednesday is my day off of work, so it's the day I catch everything up. I tend to do meal prep, shopping, laundry, cleaning...you get the idea.

So today I have pork tenderloin roasting, and a super-secret dessert that I'm not naming since my hubby reads my blog. ;o)

Tomorrow we will have the Ham and Potatoes Augratin that I put in the crock pot over the weekend. From there, who knows?

What's on your menu for the week?

Tuesday, October 16, 2012

Chicken Salsa Soup

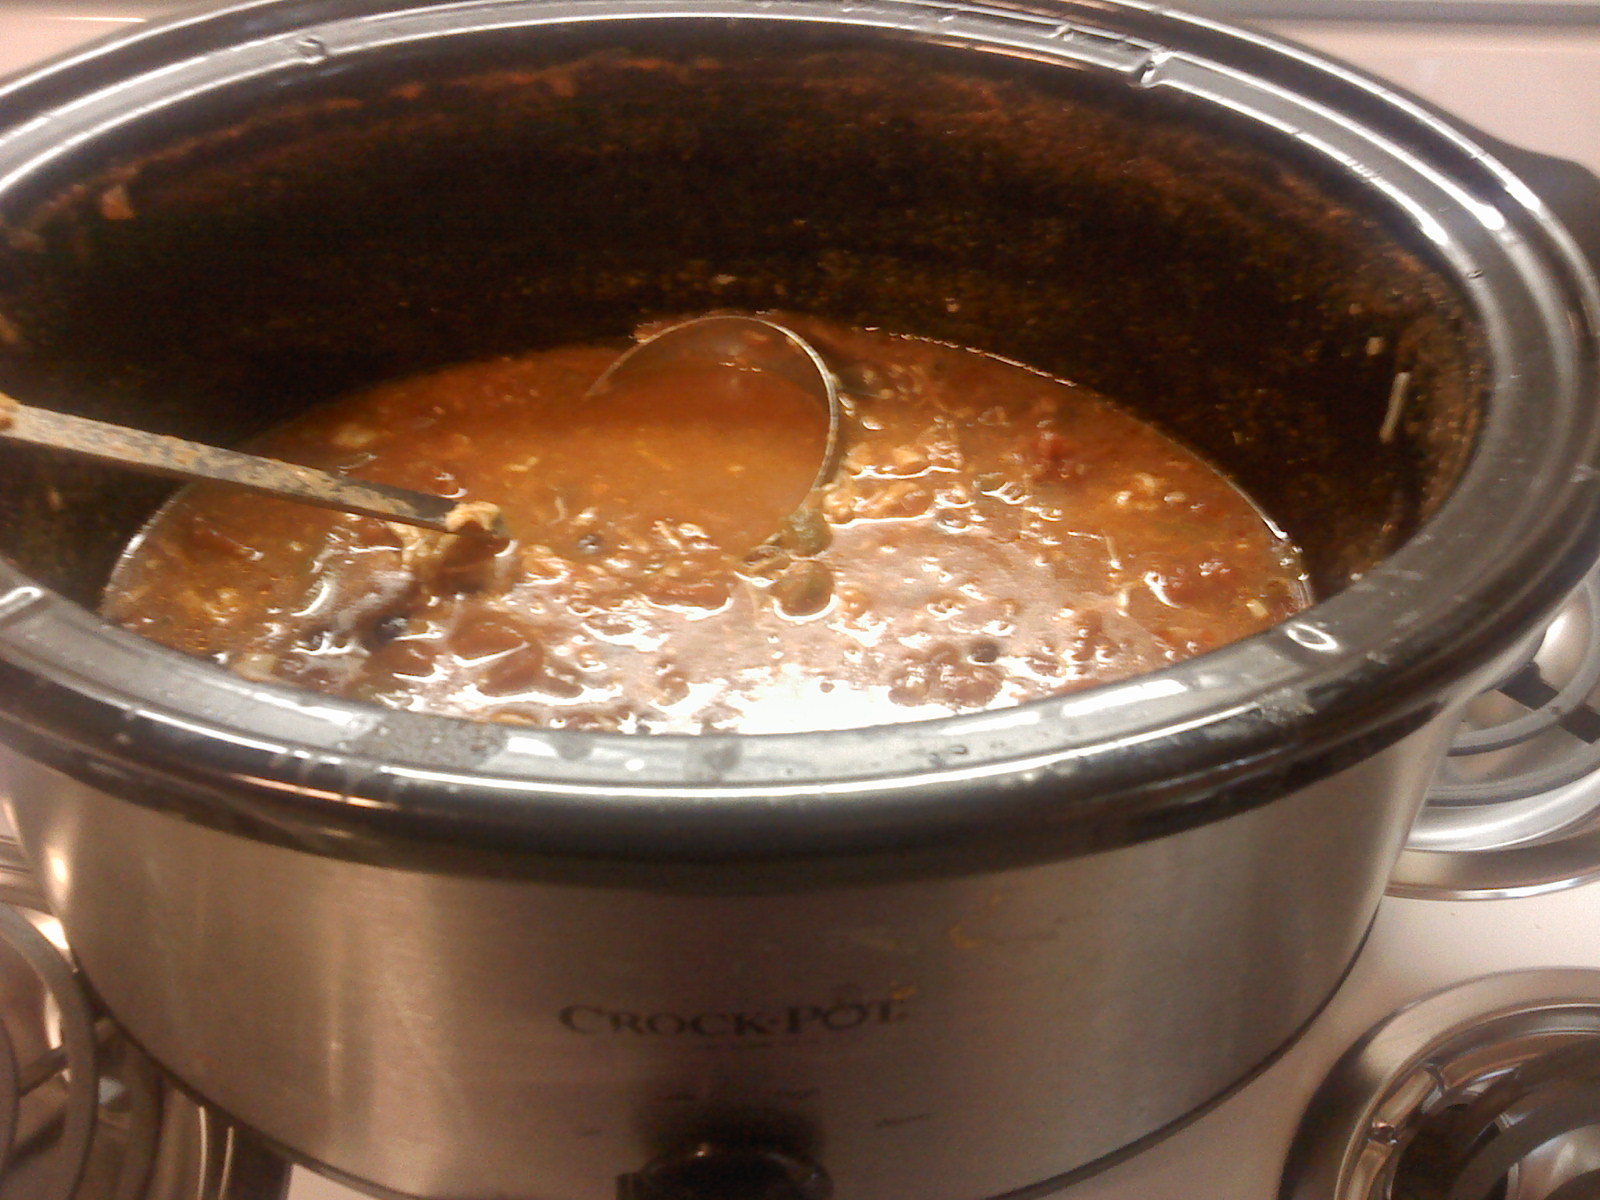
Cold weather is upon us! Fall is here, but that air has a decidedly Winter bite to it. I was inspired by some soup recipes I found on Pinterest this week, and decided to stock up my freezer with some lunches for my husband. As you can see from the half-empty crock, I had to work fast on getting it into the freezer, because everyone was eating it!

I started out following someone else's recipe, but by the time I finished, it in no way resembled the original, so I'm giving it it's own name. The soup doesn't actually call for salsa, but it gets kind of a salsa vibe since you're using a lot of the same ingredients.


Leni Notes:
~This recipe filled an 8 qt. crock pot, we got 12 good-sized servings out of this.
~A nice crusty bread or grilled garlic bread would be a nice accompaniment. 

Ingredients:
6 Cups water
4 raw chicken breasts
2 (30 oz) can diced tomatoes
1 (30 oz) can black beans
1 Cup tomato paste
1 (4 oz) can diced jalapeños 
1 green bell pepper, diced
1 large onion, diced
6 tsp Chicken Better than Bouillon base or 6 chicken bouillon cubes
4 tsp chopped garlic (equivalent of 8 cloves) 
4 tsp cumin
4 tsp chili powder
1/2 tsp cayenne powder
8 oz. Pepper Jack cheese, shredded

~Place all ingredients in crock, except for the cheese.
~Cook on low for 8 hours.
~Pull chicken out, and place on plate. 
~The chicken will shred very easily, shred and place back into crock.
~Sprinkle cheese over the top and mix in.


Wednesday, October 10, 2012

Cocoa Cones for a Crowd (Wedding Favors)

What's this? A recipe post on a Wednesday? What can I say, I thought I'd throw caution to the wind. Plus with holidays, and soccer games, most of the time I have no idea what day of the week it is. Speaking of soccer, last night I about froze to death at my daughter's soccer game. Which made me think of how badly I wished we'd brought hot cocoa. And then I remembered the left over cocoa cones I had at home. 

For our daughter's autumn wedding, we decided to make Cocoa Cones. These were fun to make, and I love how they came out. 
The finished product on the table. A lovely family from our church added the final touches to our cones.


First we had a bunch of Moriah's childhood friends over to make the cones. Great fun!


Cocoa cones can be made for any event, as they are so easy to personalize. They can also be made in a variety of flavors and would be great for kids to make for gift giving at Christmas. We made ours into a fall theme by adding fall leaf sprinkles. My daughter then gathered a bunch of her favorite quotes on love and marriage to add to them. One side has the quote, the other has the cocoa directions and the couple's names and wedding date.

 I scaled the recipe back a little bit, as we made these for 200 people. Also, even if you're making them for 200 people, good luck with finding a container big enough to mix it all in at one time. And I have really large containers!! I saw a suggestion with one of the 1,000's of recipes I read, to mix it all in a garbage bag. I really didn't want the plastic taste added to it, but I suppose it's worth a shot if you wanted to do it all at once.

Leni's Notes:
~If you're making these in bulk, like we did, it will save you a lot of money to order the container supplies online. We bought our supplies for this and the cheesecakes at the WEBstaurant Store. Shop around, you might find better prices yet!
~Each of these cones makes 2 servings, or one really big serving!
~The cocoa portions stores really well, but if you're making them way ahead of time, hold off on the marshmallows until closer to the date. They can get a little stale.
~For flavor variety, try different flavored coffee creamers or add some instant coffee to the mix.
~ Also, to the powder mix, you can add cinnamon or ground red pepper, depending on your tastes. ;o)
~I highly recommend trying a cup of the cocoa before packaging to be sure you like the flavor. You might decide to adjust the cocoa or sugar content.
~If you are looking for decorating ideas, do a Google Image Search for Cocoa Cones.

Supply list:
Plastic cake decorator bags (2 bags for each cocoa cone.)
Closures for the bags (2 for each cone) - we used small zip ties. You could use twist ties, rubber bands, etc.
Sprinkles (optional, but really cute!)
Decorations (we did printed tags with colored ribbon. Whatever fits your theme.)

Ingredient List for 45 Servings:

3 Cups cocoa powder
6 Cups granulated sugar
10 Cups instant dry milk
2 Cups dry coffee creamer (plain or flavored)
Mini Marshmallows (1/3 Cup per cone)
Optional: flavored chips to add to the marshmallows. (Chocolate, peanut butter, butterscotch, etc.) or crushed hard candy, like candy canes.

In a large bowl, mix the cocoa powder, sugar, milk and creamer together.
Take half of your decorator bags and fill each with 2/3 C of dry mix.
Twist the top to push down the mix and close it off.
Seal very tightly with a zip tie. (We cut the extra off.)
Trim the plastic to about a half inch.
Place each filled decorator bag inside another bag.
Top with marshmallows, sprinkles (1-2 tsps) and chocolate chips.
Twist closed without smashing the marshmallows, seal with another zip tie.

Add your decorations and instructions (1/3 Cup mix with 3/4 Cup boiling water.)

Blessings from my kitchen to yours,
Leni


Monday, October 01, 2012

Pumpkin Chocolate Trifle

This is a recipe that does not fit into my plan of quick and easy, but it was worth the extra effort.

Seth turned 18 this past week. He wanted something pumpkiny, creamy and chocolately. Noelle piped up and said, "You should make a trifle!" So trifle it was. We are big trifle fans around here. It started years ago when friends from Ireland taught us how to make it. In those days, we were using cake and jello and fruit. Since then, we've expanded into many different flavors.

My favorite was the one  I made for my father-in-law many years ago. He loves lime, so I decided to make him a lime bundt cake for his birthday. I don't make those often, and soon remembered why. I can never get the things to come out of the pan without breaking! Sure enough, it broke, and I was left with lime bundt chunks. Appetizing.

So I did the only reasonable thing, and decided to turn it into a trifle! (I'm sure this is how trifle was born. Fixing cooking screw-ups.) I whipped up some vanilla pudding and whipped cream, and made a big bowl of trifle, with about an hour to spare before everyone arrived for the birthday dinner. As I was placing it in the fridge, breathing a sigh of relief, I knocked a can of biscuits into the top of it! Grrr! Took it out, patched it up again, and told my kids, "If anyone asks, this was the plan all along! And nothing fell into it!"

For today's recipe, I didn't have quite so many adventures, but it was a two-day process. I was creating this one from scratch, and getting all of the elements the way I wanted took a while. The results were just what I had hoped for, and everyone gave it a thumbs up. If I make it again, I would try it with a milk chocolate ganache, just to see if we like that flavor better.

The birthday boy was pleased with it, so I'm happy! (Said birthday boy just walked in and asked me if I'd make it again for Christmas. ;o)


Leni's Notes:
~If you don't have a trifle bowl, any clear dish will do. I've even used a large punch bowl when I was making trifle for a crowd. Part of the fun is seeing the layers.
~Most of my trifles are not so elaborate, and really do lend themselves to a quick throw-together. 
~Really is best to make this a two day process so you can let your cake cubes dry out a bit. Then they absorb the flavors better.
~I made the whole thing from scratch. You can shorten up the process a LOT with pudding mix, cake mix and jarred syrup. I don't guarantee it will be as good, but you can do it. ;o)

Simple Ingredient List:
Pumpkin Cake
Vanilla Pudding
Chocolate Ganache

Detailed Ingredient and Instruction List:
Cake
3 C flour
1 C whole wheat flour
2 C raw sugar
2 Tablespoons baking powder
2 tsp cinnamon
1/2 tsp each of salt, baking soda and fresh ground nutmeg
2 C pumpkin puree
1 C milk
4 eggs
2/3 C coconut or vegetable oil

Sift dry ingredients together in a large bowl.
Add wet ingredients, combine, then mix on high for a couple of minutes. 

Pour batter into a greased 13 x 9 pan. (or larger, but cook for less time if it's a larger pan.)
Bake for 1 hour at 350, test to be sure it's baked through. 
Set aside to cool.
When cool, cut into squares and spread out on a cookie sheet to dry out a bit. 
(You'll have extras, so feel free to let the kids snack a bit!)

While cake is baking, you can get started on the pudding.

Pudding
1 C raw sugar
2/3 C flour
6 C whole milk
4 beaten eggs
2 Tablespoons butter
1 Tablespoon vanilla extract

Whisk together sugar and flour in a large pan.
Slowly whisk in milk until well combined, no lumps of flour left.
Turn pan on to medium, and stir until mixture begins to bubble and thicken.
I must admit, I am ridiculously impatient at this point, and always end up bumping up the heat to move things along. Unless you are right there watching every minute, DON'T DO IT! You will scorch your pudding and have a mess to clean up.
Remove the pudding from the heat, and ladle a cup or so into the beaten eggs, mixing continuously to temper the eggs. 
If you add the eggs directly to the mixture, you'll be sifting scrambled eggs out of your runny pudding. DON'T DO IT!
Take the egg/pudding mixture, and incorporate back into the pudding pan.
Place back on medium heat, and stir constantly just until it begins to bubble.
Turn the heat down a bit and cook for a couple minutes more, but do not let it boil. 
What happens if I let it boil? See note above about scrambled eggs.
Remove from heat, add butter and extract. 
When everything is melted in and stirred together, place saran wrap directly on the surface of the hot pudding and let cool without stirring. 
Refrigerate until ready to use.

Ganache (Make when you are ready to assemble the trifle)
13 oz. Semi-sweet chocolate (Spring for baker's chocolate and resist the urge to buy chocolate chips)
1 1/2 C heavy whipping cream (again, no substitutes)

Place the cream in a pan with a good heavy bottom. 
Turn burner on to low, stir occasionally. 
Chop up the chocolate and place in a glass bowl. (I feel that glass holds the heat better. Use what you have, but if you have glass, that's what I prefer.)
When cream is hot, pour over the chocolate and stir until everything is melted and evenly mixed. 

Trifle Assembly
This is where you can get artsy, or you can just throw the whole thing together and not worry about being fancy. Once it's on the plate, it's not too pretty anyways! ;o) I like to layer the sides so that you see all the ingredients in a beautiful pattern.

I did three layers, each starting with cake, then pudding, then ganache. You will end with ganache, and you can spread it right up to the rim of the dish, which seals it and eliminates the need for saran wrap, unless you're traveling with it. 

If you want to decorate the top for an occasion, it's best to wait until you get where you're going so it doesn't get smooshed. 

Blessings from my kitchen to yours,
Leni

Monday, September 24, 2012

Mini Pumpkin Cheesecakes for a Crowd

Finally, I get to share some wedding recipes with you!

I made a lot of these. 200 pumpkin cheesecakes...I was swimming in cheesecakes! lol

This was what we put on our cupcake tower for the wedding. They really were not terribly hard to make, and once you get the process going, it goes quickly. These would be great for Thanksgiving or Christmas, also. They freeze wonderfully, and my older kids have discovered they like them straight out of the freezer like a pudding pop. (Remember those?)

Because I was making so many of them, I bought 3 oz paper cups to bake them in. These are the type that stand straight up, and don't spread out when you fill them. I had to order online to find them, but they were worth it.

I played with this recipe for a while before I found just the right dimensions. I hope you enjoy!

Fresh out of the oven.

On the cupcake tower at the wedding.
Leni's Notes:
~Baking times will vary, but lean toward undercooked rather than over cooked. If they over cook, they get really dried out.
~Remember that when it comes to cheesecake, less is more with the mixing. You want to just combine your ingredients, without incorporating a bunch of air into it. Over beating will also give you a tough texture.
~These can be dressed up with whipped cream and a sprinkle of cinnamon or a drizzle of caramel sauce.
~They freeze well, but if they get thawed and refrozen, the cookies will go to mush.
~You can make these gluten free by leaving out the gingersnap, however without it, you will not get a nice level surface. Without the cookie, they tend to sink in a bit.

Mini Pumpkin Cheesecakes for a Crowd
This recipe makes 3 dozen servings.

4 (8 oz.) packages of cream cheese, softened (Full or low fat, don NOT use fat free)
1 1/2 cups sugar
4 eggs
32 Gingersnap cookies (one box is usually enough)
32 paper baking cups
1 cup pumpkin puree (not pumpkin pie filling)
1 tsp cinnamon
1/4 tsp freshly ground nutmeg

Beat cream cheese and sugar together.
Add eggs one at a time, beat just until smooth.
Add pumpkin and spices, beat just until combined.
Line cupcake pan with liners. Place a gingersnap flat side down in each liner.
Fill with cream cheese mixture, leaving about a centimeter clearance at the top.
Bake at 375 degrees for 15-20 minutes.
Allow cheesecakes to cool and store in the fridge or freezer.
To serve: Remove from freezer, but keep chilled until ready to serve.

Friday, September 14, 2012

More Small Wedding Details

For the wedding junkies (like me) out there, here are some more pics that I thought you might like.

The Bride with her Maid of Honor. My girlies.

Favors were Cocoa Cones with favorite quotes from movies, books and real-life friends. 

The groom and one of his sisters, also a bridesmaid. ;o)

Small details. The wedding program, head table, rings, flowers, cakes...
More small details. The bride's dress, the guest book, bridesmaid's lockets, bridal shoes.

The beautiful rings on one of the flowers the bride carried.

Fun item. The girls all waited in the museum next to the park. This used to be an amusement park before it burned to the ground. My hubby and I both spent much of our childhood time there. The bridal party all signed the guest book at the museum. Now they are part of the history too. ;o)

Wedding Update

Well, we survived! The wedding was amazing. The weather was not. Damaging winds. Tornadoes (thankfully in Buffalo, but enough to panic everyone who was watching the weather.) We were not watching the weather, we were too busy transforming our venue.

It started as this.

After many hours, and a lot of hard work from some of the best friends in the whole world, we morphed it into my daughter's dream wedding location. They were supposed to get married outside at this spot.


It had rained ALL day. Pouring, blowing winds, cold, nasty...but the weatherman assured us it would all be over at 2pm, 4 at the latest. The clouds cleared, the sun came out, and the guys set up the above location. At about 5:40 pm, this beautiful shot was taken. At 5:45 pm, it started pouring again! We gave up all hope and moved to plan C.

We had our guests sit down at their spots for the reception and had the wedding there. Daddy walked her down the isle (he's kind of blocked by the bride here.) Pastor Dave Akers was the officiating pastor.


Pastor Zatkiewicz gave a wonderful message.

They did manage to get outside for some pics after the wedding. They all had a great time.

You'd be amazed how hard it was to get the six of us together for ONE shot! My happy family.

 The deliriously happy couple in front of the cake table. We had individual pumpkin cheesecakes and an apple strudel cheesecake on top for them to cut and feed each other.

It was a gorgeous day that wore me out more than I could have imagined. I'd do it all over again though, it was all worth it!

By the way, don't look for a recipe from me on Monday. I still have a house full of wedding stuff to sort!!

Tuesday, September 04, 2012

Greetings From Wedding Central!

Still here, still not cooking!

Actually, lots of cooking, just none of it for daily consumption. Our fridge is full of wedding food, as is our freezer, the church's freezer, future son-in-law's freezer, friend's freezers...you get the idea.

I'll have lots of 'Cooking for a Crowd' recipes for you when I return! I promise to have a proper recipe post for you on the 17th. God willing and the creek don't rise...

Blessings to all!